How to Edit WooCommerce Checkout Shortcode for Better Conversions
Is your WooCommerce checkout page stuck in the default mode? If you’re looking to turn your site visitors into paying customers, implementing a smooth checkout process should be your starting point.
While the WooCommerce checkout shortcode offers some customization, it has its limits. This guide explores four powerful methods to personalize your checkout page, including workarounds for the shortcode’s limitations.
Get ready to watch your sales soar!
What are WooCommerce Shortcodes?
WooCommerce shortcodes are user-friendly snippets that add specific eCommerce features to your WordPress site. These handy tools come in four categories –
- Product: Shortcodes in this category let you display individual product information, descriptions, and even add “Add to Cart” buttons directly on your pages.
- Cart & Checkout: Cart and checkout shortcodes create a frictionless journey by guiding visitors easily from browsing to completing their purchases.
- Product Query: Showcase specific products or groups of products based on criteria like category, tag, or popularity. This allows for targeted product displays and promotions.
- Miscellaneous: Get a variety of helper shortcodes for functionalities like displaying customer accounts, order tracking, and breadcrumbs.
Each category has shortcodes for various functionalities that allow you to display single products, build your cart and checkout pages, highlight specific products, and more.
Ways to Edit WooCommerce Shortcode
There are two ways you can edit your WooCommerce shortcode: using Gutenberg and with a theme editor. Here’s the step-by-step guide both these methods –
Edit WooCommerce Checkout Shortcode in Gutenberg
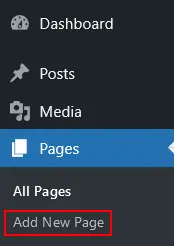
Step 1: Create a New Page
Go to your WooCommerce site dashboard and go to Pages > Add New Page.
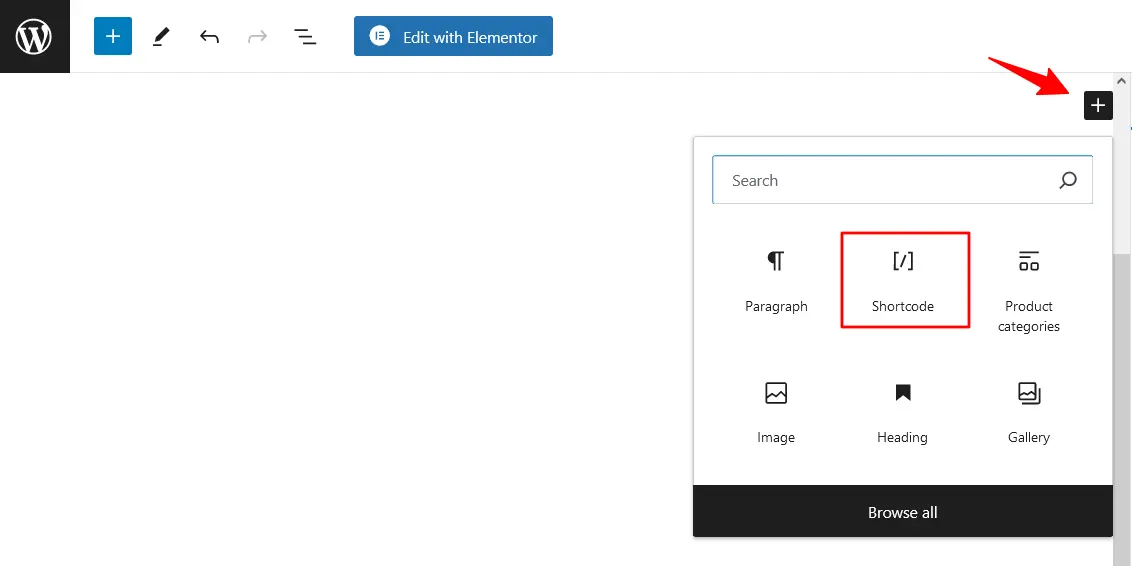
Step 2: Search Shortcode Block in New Checkout
On the WordPress editor, click the (+) sign. Search for Shortcode and click on it to add the Shortcode block.
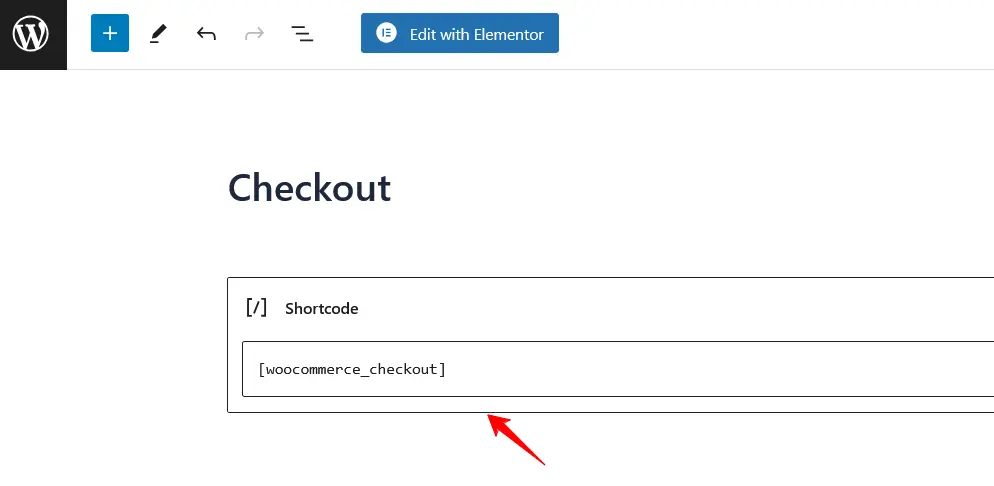
Step 3: Place the Checkout Shortcode in that Block
Now, enter the checkout shortcode on the new block you added.
Step 4: Customize the New Checkout Page
To customize the WooCommerce checkout page with the Gutenberg editor, click on the (+) sign on the left of the page. You’ll find the necessary blocks, design elements, and more from here. Choose your preferred blocks to start customizing.
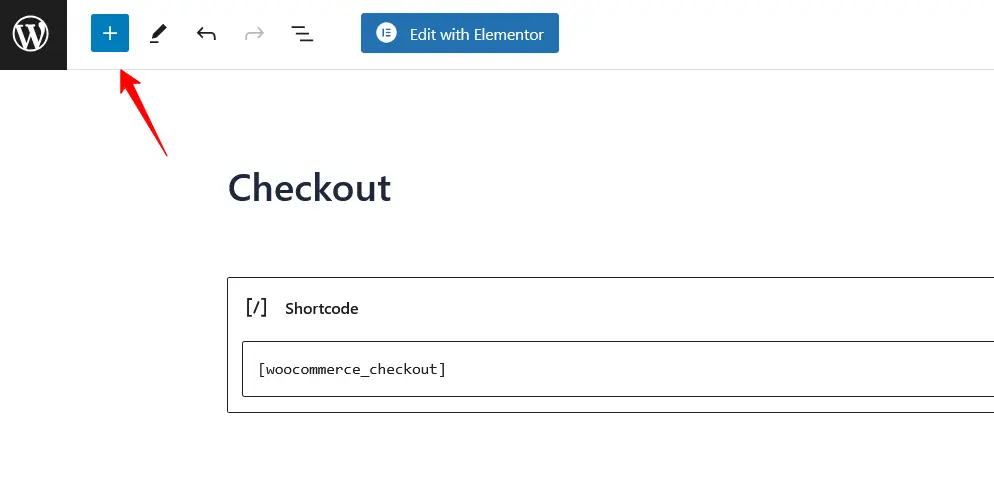
Finally, click Publish to save your changes.
Step 5: Custom CSS for Shortcodes
You can implement responsive CSS to improve the appearance of your checkout shortcode on any device. You can ensure this by using media queries to imply different styles for different-sized screens.
@media (max-width: 768px) {
.woocommerce-products {
font-size: smaller; /* Decreases font size on smaller devices */
}
}
Step 6: Create Custom Checkout Shortcode
To create a custom checkout shortcode, you need to add a new PHP function with your theme’s function.php file. Give it a unique name that resonates with your shortcode purpose.
You can follow this simple structure –
function display_custom_content() {
// Insert your custom code here
return ‘Content that will be displayed by the shortcode.’;
}
add_shortcode(‘custom_shortcode’, ‘display_custom_content’);
Step 7: Publish and Preview the New Checkout Page
After publishing the new checkout page, you can check the custom design on a new tab of your browser.
Edit WooCommerce Checkout Shortcode Using a Theme Editor
Now that you know how to edit WooCommerce checkout shortcode manually. Here’s an easier method to editing WooCommerce checkout shortcode –
Step 1: Create a Child Theme
WooCommerce and theme updates can overwrite your customizations. To prevent this, we’ll need a child theme. Think of it as a separate layer for your edits, keeping them safe from any future updates.
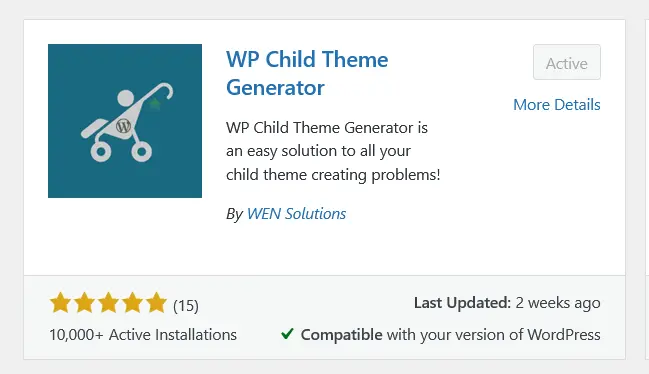
Fortunately, you can easily create a child theme using a reliable WordPress plugin. Once you have that set up, we can jump into customizing the checkout shortcode!
Step 2: Copy the Template
Locate the template for the shortcode you want to customize from the WooCommerce plugin folder. Copy the template file you’ve created to your theme folder.
Step 3: Makes Necessary Customizations
To change the appearance and functionality of the checkout shortcode, open the template file in the editor and make the changes to your user preferences.
Step 4: Save your Changes
Save the customized template in the child theme folder. Preview the template and make sure everything is working as expected.
Limitations of WooCommerce ShortCodes
While WooCommerce shortcodes have their advantages, they also come with several limitations. Here are some of them –
- Ease of Design
While WooCommerce shortcodes offer a convenient way to add core checkout functionality, their reach has some limits. For instance, you can’t use shortcodes alone to add custom fields for checkout information.
- Visual Appeal
The standard WooCommerce checkout can sometimes appear plain, which may lead to customers abandoning their carts before completing their purchases. A lack of visual appeal and engaging design can create a hurdle for customers, making them hesitate before finalizing their orders.
- User Experience
Using shortcodes on your WooCommerce site can significantly slow down your website. A slower website leads to a poor user experience, which can cause visitors to leave without making a purchase.
- Compatibility
With numerous plugins and themes available in the WordPress repository, the default WooCommerce shortcode may not always function properly. This can result in broken pages or critical errors on your WordPress live site.
Alternatives to WooCommerce Checkout Shortcode
Customizing a WooCommerce site can have multiple limitations. To overcome these challenges, we’ll explore various methods that uses premium WooCommerce add-ons –
Step 1: Install and Activate the Required Plugins
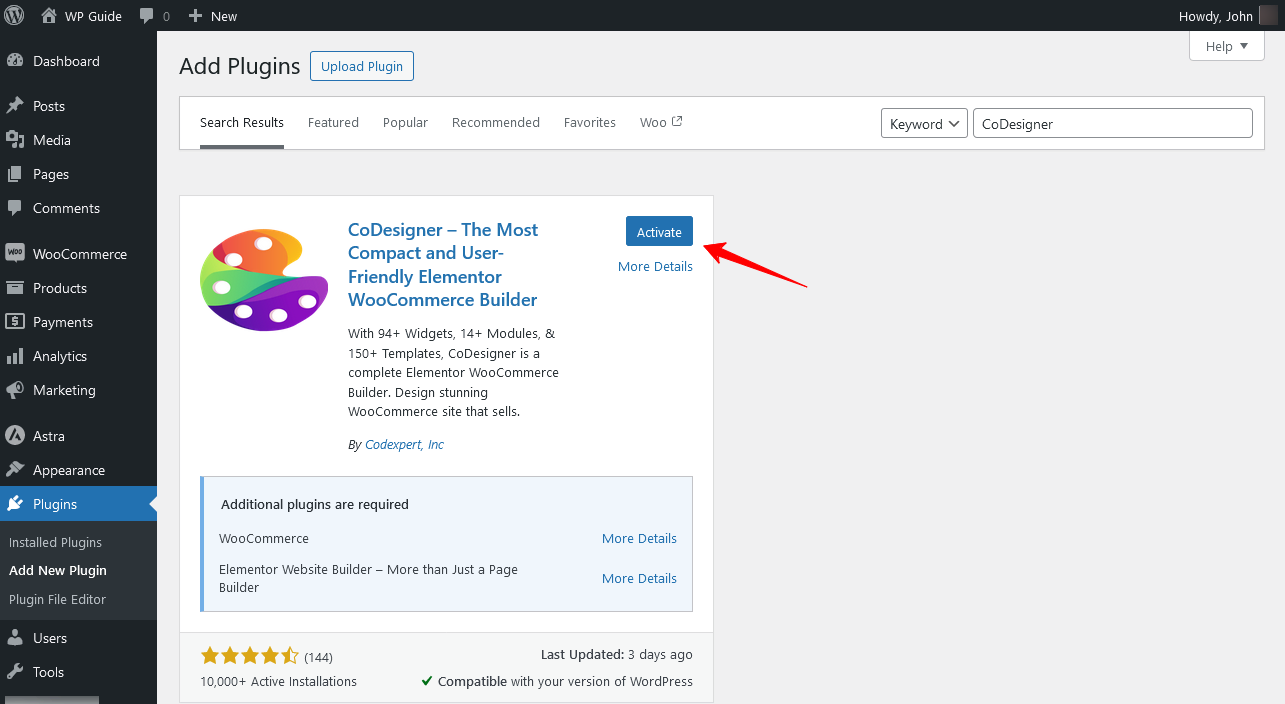
To start without using the WooCommerce checkout shortcode, you need to install and activate CoDesigner and CoDesigner Pro plugins on your WooCommerce store.
However, keep in mind that WooCommerce Advanced Checkout is a premium feature within CoDesigner Pro, so make sure you have a plan purchased before diving in.
Step 2: Enable Necessary Widgets
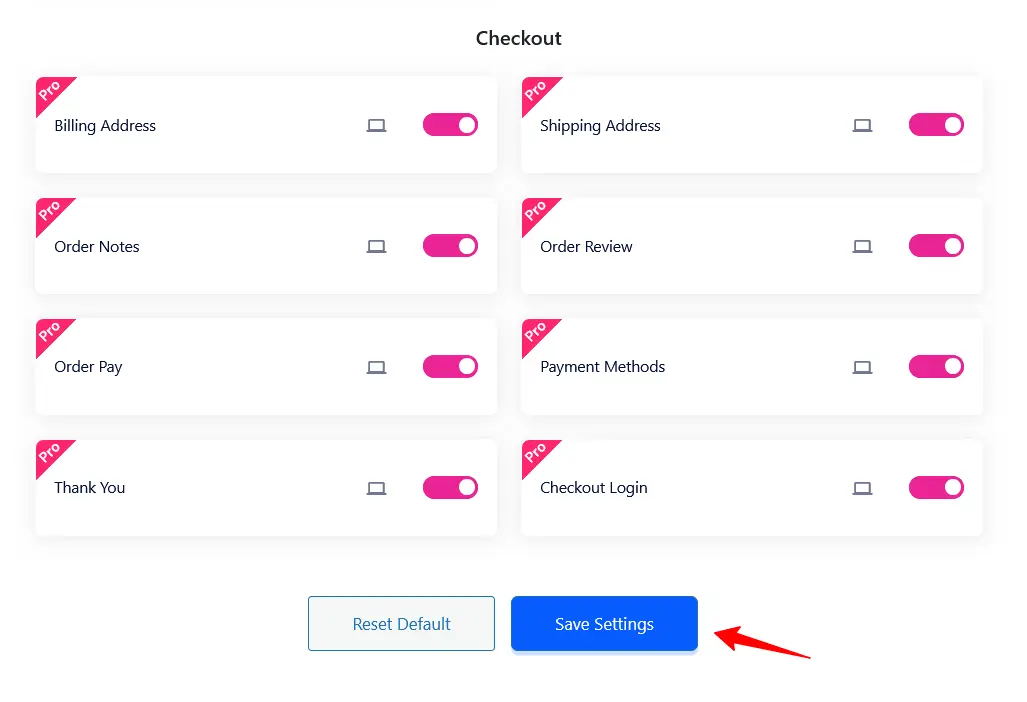
After activating both plugins, you have to enable checkout widgets. For this, go to the site dashboard and navigate to CoDesigner > Widgets.
Step 3: Create and Customize WooCommerce Checkout Shortcode
Create a new checkout page for your WooCommerce store by going to Pages > Add New.
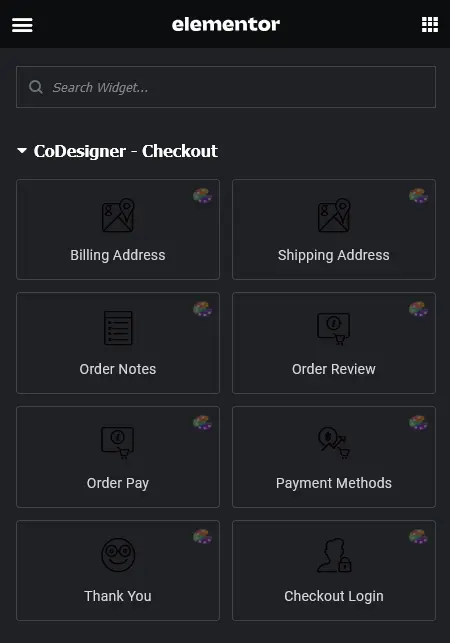
Drag the checkout widgets into the empty sections in Elementor. With CoDesigner checkout widgets, you have complete freedom of customization. You can customize existing widgets or even add additional fields.
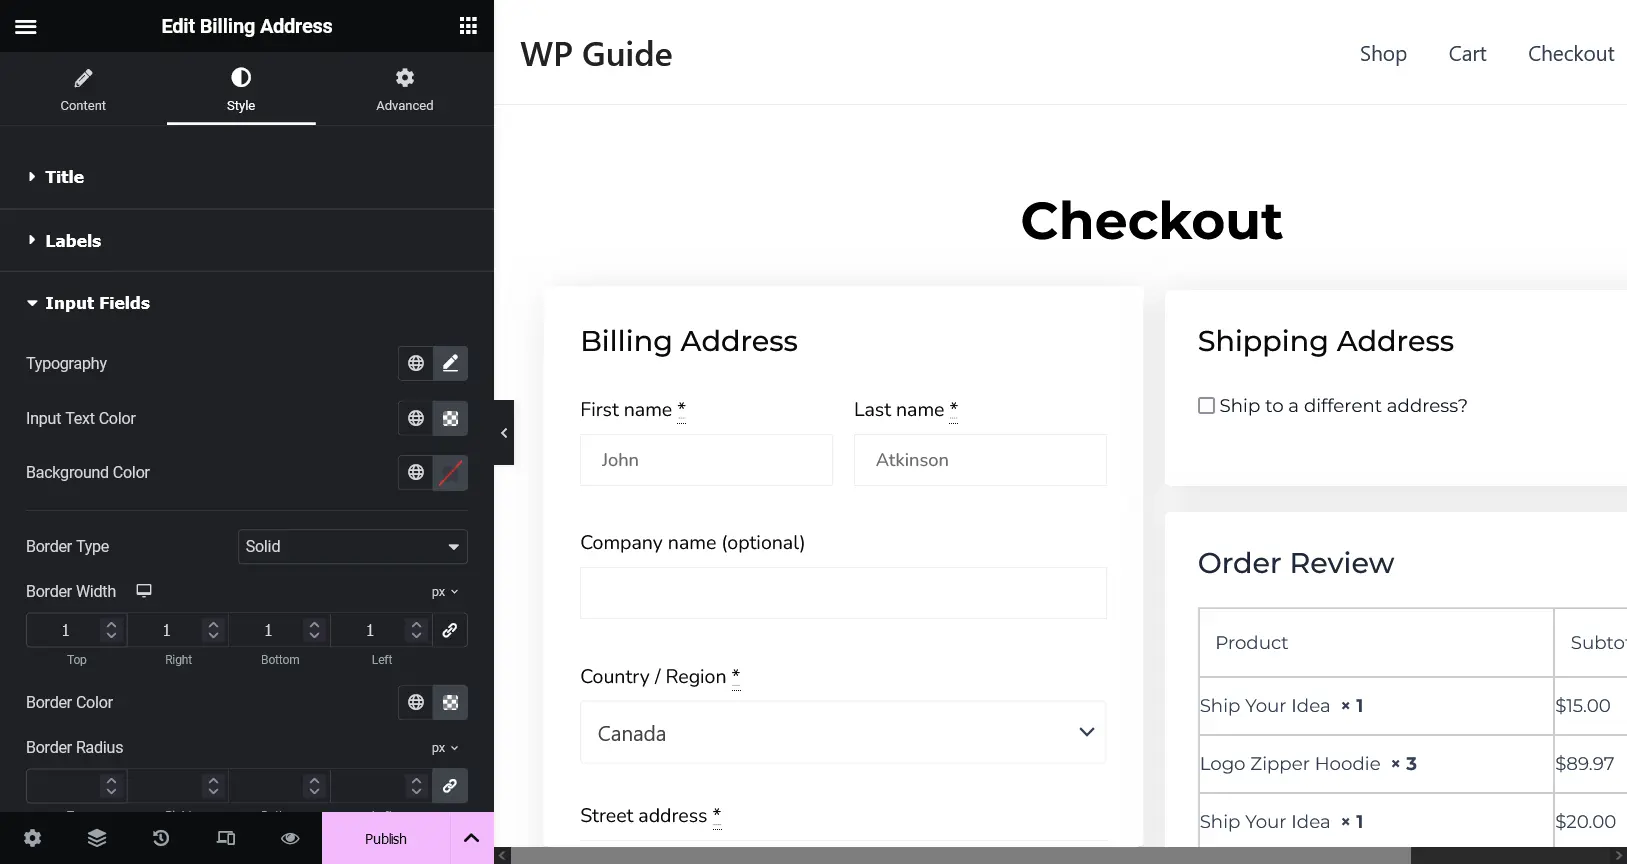
Next, hover over the existing checkout page and click on Edit with Elementor to customize it.
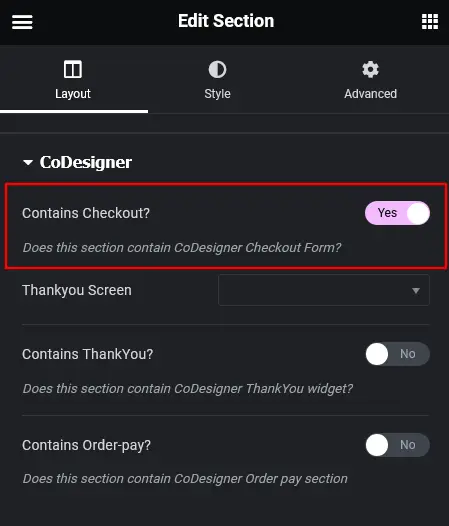
Note: Before publishing the new checkout page, make sure you’ve enabled the Checkout Contains? option from the Elementor
Step 4: Publish and Set WooCommerce Checkout as Default
Once your customization is complete, click the Publish button to make your new WooCommerce checkout page live. Preview the new page in different browsers to ensure further customization is required or not.
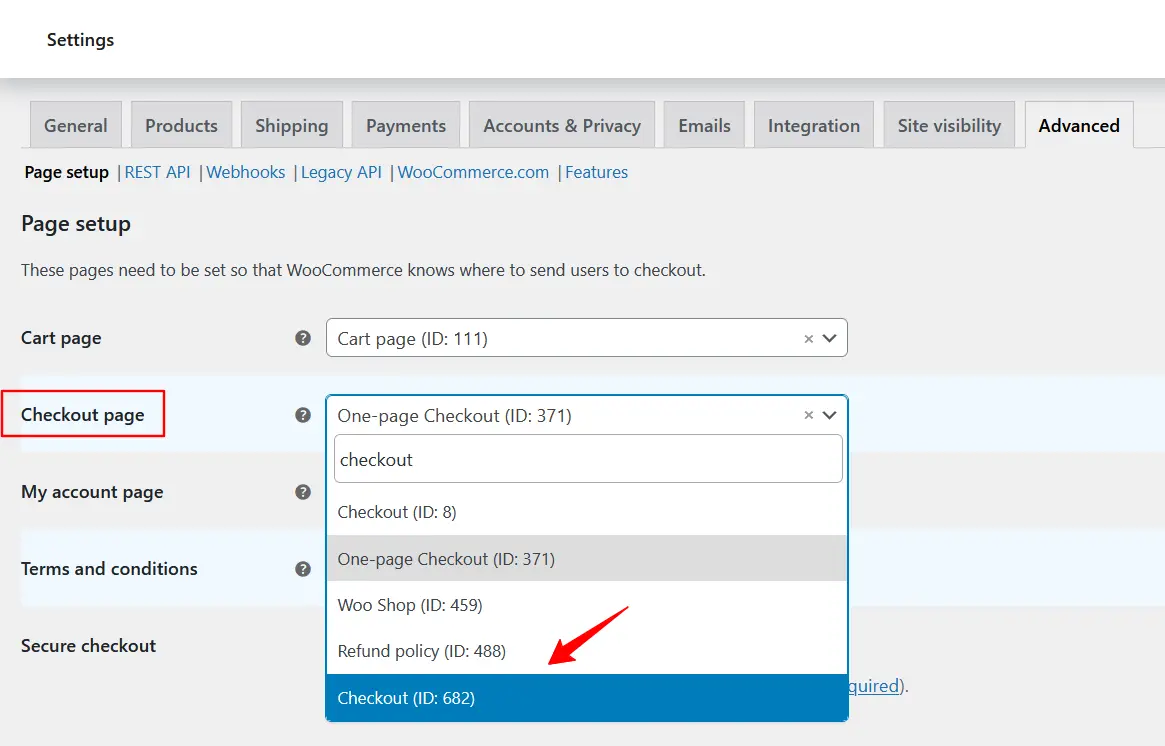
Finally, set the new checkout as default by navigating to WooCommerce > Settings > Advanced > Checkout page.
Create WooCommerce Checkout Page Using Templates
We’ve already covered two methods of editing WooCommerce checkout shortcode. Now let’s look at how to create a WooCommerce checkout page using templates –
Step 1: Edit the Checkout Page with Elementor
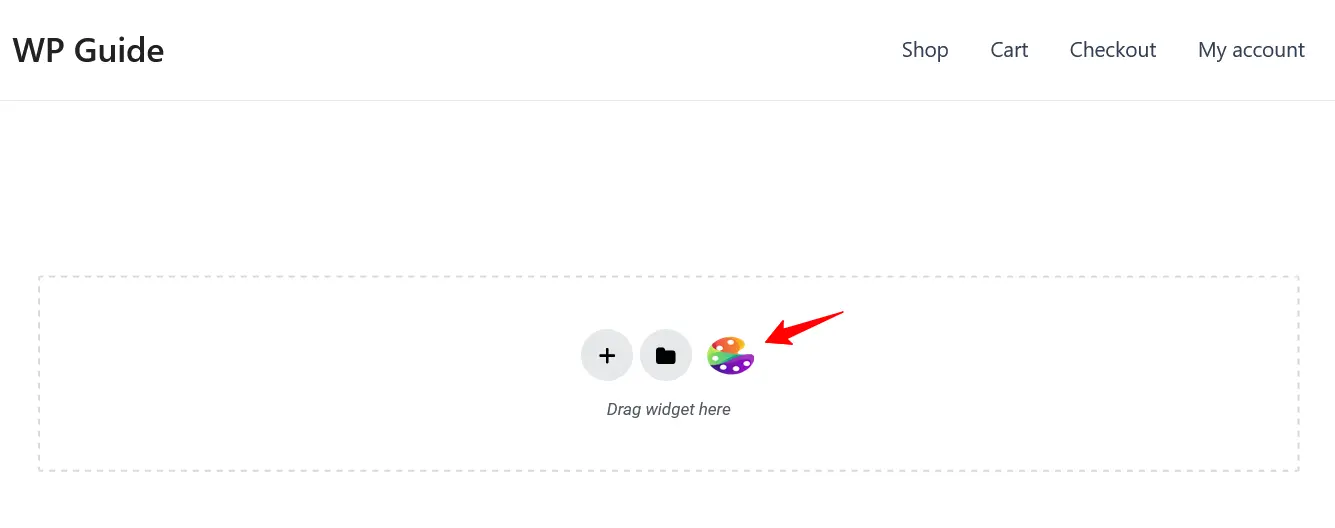
Open the newly created checkout page in Elementor page builder. Click on the CoDesigner icon from the editor section.
Step 2: Insert CoDesigner Checkout Template
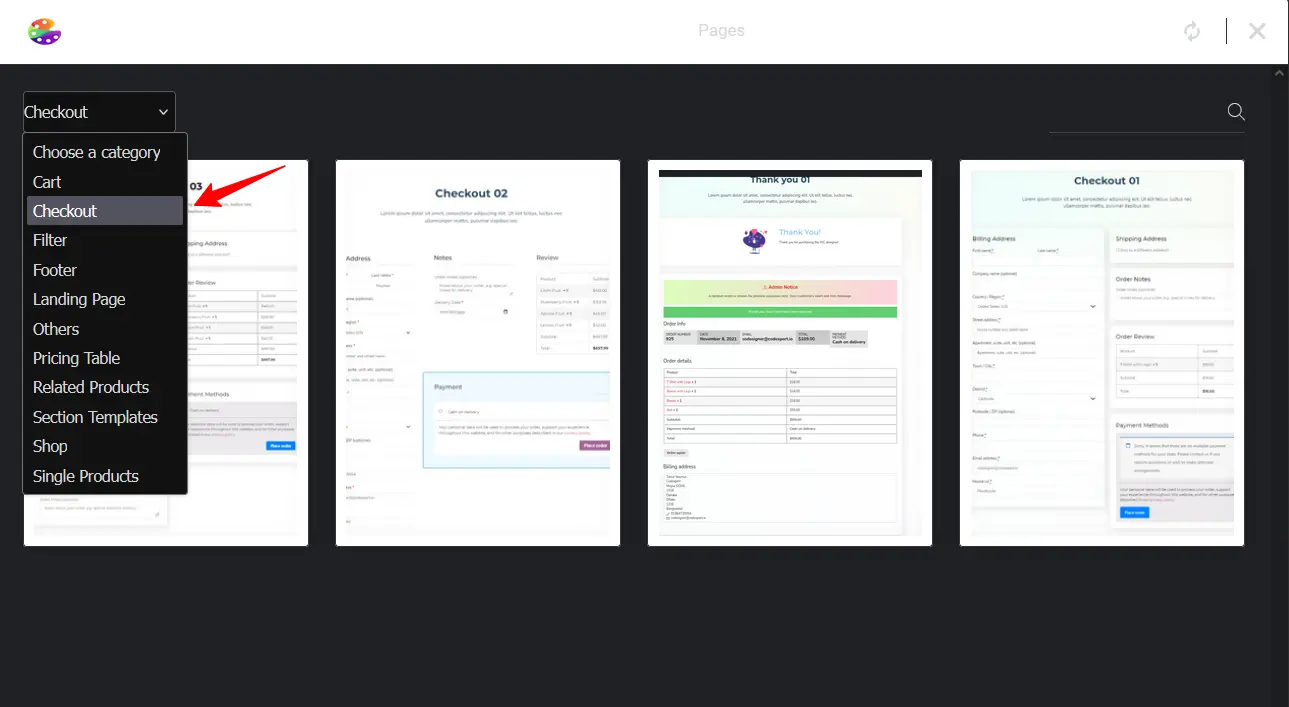
After clicking the icon, a popup will appear. From the popup, select your preferred blocks and choose the checkout category from the dropdown menu.
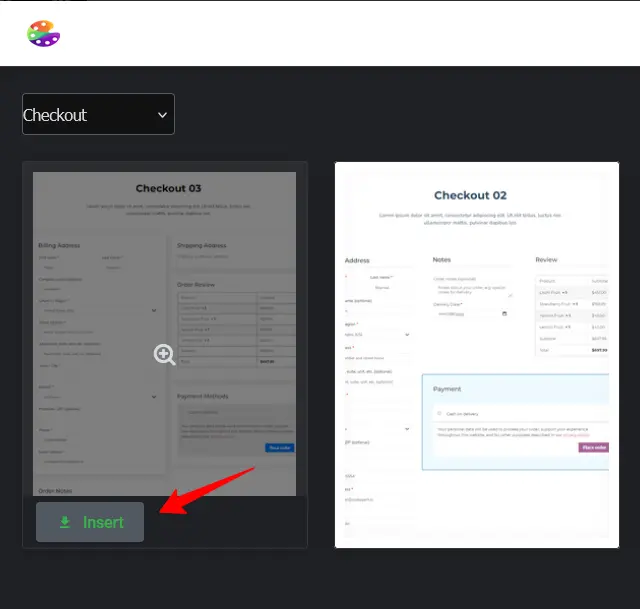
Hover over the available templates for checkout and click the Insert button on your desired template.
When your customizations are complete, click the Update button to save your changes.
Break Free from the Limitations of WooCommerce Shortcodes!
WooCommerce add-ons open up a world of design possibilities, offering pre-made templates and advanced customization options. These tools enable you to craft a beautiful and user-friendly checkout experience that attracts customers and converts them into loyal buyers.
Boost your online store’s conversion rates with shortcodes and watch your sales soar!
Frequently Asked Questions (FAQs)
1. How can I edit the Woocommerce_checkout shortcode?
- Install and activate CoDesigner and CoDesigner Pro on your site.
- Create a new page for your WooCommerce site checkout
- On that page, set your desired sections in Elementor and drag CoDesigner checkout widgets.
- Customize the checkout page.
- Finally, publish and set it as a default WooCommerce checkout page.
2. How do I edit the WooCommerce checkout page with Elementor?
- Install and activate CoDesigner and CoDesigner Pro.
- Enable the checkout widgets from CoDesigner > Widgets.
- Create a new page for your WooCommerce checkout and open it with Elementor.
- Set different sections in Elementor and drag CoDesigner checkout widgets.
- Customize the new checkout and click on the Publish button.
- Finally, set it as a default checkout in WooCommerce > Settings > Advanced.
3. What is the shortcode for WooCommerce checkout?
The shortcode for WooCommerce shortcode is [woocommerce_checkout]
4. Where are WooCommerce checkout settings?
To set your newly designed checkout page:
Go to WooCommerce Settings > Advanced from your site dashboard. On that page, you’ll discover the field to set your WooCommerce checkout page.
Subscribe to Our Newsletter
Get the latest WordPress tutorials, trends, and resources right in your inbox. No Spamming, Unsubscribe Anytime.

Thank you for subscribing to our newsletter!
Table of Content
- What are WooCommerce Shortcodes?
- Ways to Edit WooCommerce Shortcode
- Edit WooCommerce Checkout Shortcode in Gutenberg
- Edit WooCommerce Checkout Shortcode Using a Theme Editor
- Limitations of WooCommerce ShortCodes
- Alternatives to WooCommerce Checkout Shortcode
- Step 1: Install and Activate the Required Plugins
- Step 2: Enable Necessary Widgets
- Step 3: Create and Customize WooCommerce Checkout Shortcode
- Step 4: Publish and Set WooCommerce Checkout as Default
- Create WooCommerce Checkout Page Using Templates
- Step 1: Edit the Checkout Page with Elementor
- Step 2: Insert CoDesigner Checkout Template
- Break Free from the Limitations of WooCommerce Shortcodes!
- Frequently Asked Questions (FAQs)
- 1. How can I edit the Woocommerce_checkout shortcode?
- 2. How do I edit the WooCommerce checkout page with Elementor?
- 3. What is the shortcode for WooCommerce checkout?
- 4. Where are WooCommerce checkout settings?


