How to create nested tabs in WooCommerce 2025
Nested tabs simply mean tabs inside another tab, as in, child tabs inside a mother tab. This method helps you display more information in a structured way where readers can get the key information instantly.
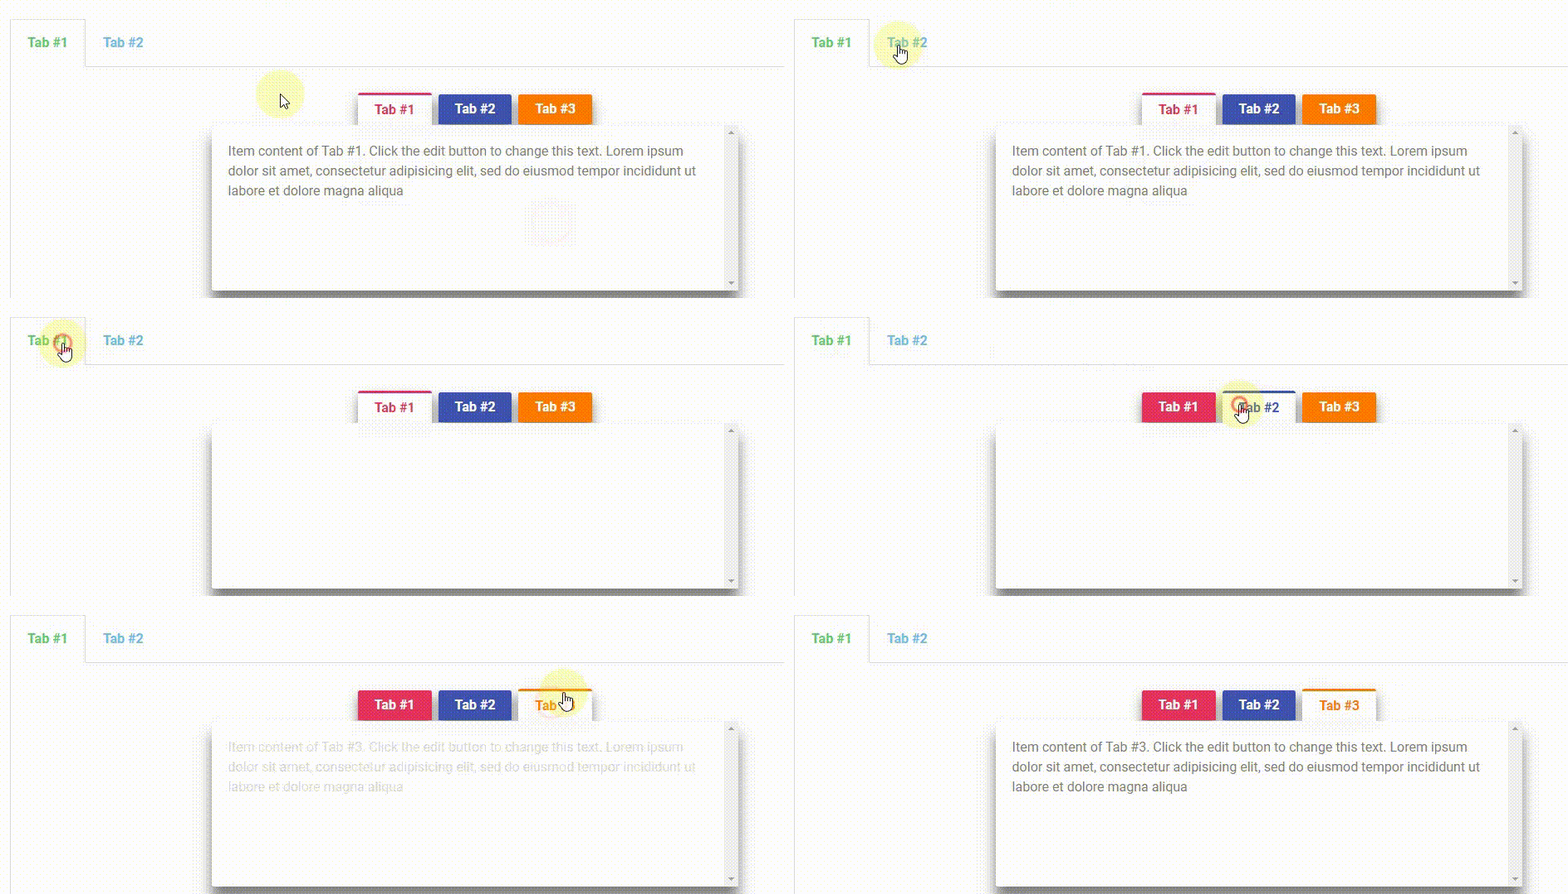
CoDesigner offers 5 tabs widgets to divide contents in order to save up space. Among the 5 tabs widgets of CoDesigner, 4 are completely free and one is a premium widget. With these tabs widgets, you can show off your creativity by constructing amazing nested tabs on your website.
The free widgets include-
On the other hand, Dynamic Tabs is a premium widget offered by CoDesigner.
Today, we will see how to create nested tabs using Dynamic Tabs and one of the most popular free widgets of CoDesigner, Tabs Classic.
Without further ado let’s get started.
Steps to follow for creating nested tabs with Elementor and CoDesigner
1. Activate the widgets
At first, you will need to install and activate both CoDesigner and CoDesigner Pro. Then head over to the CoDesigner dashboard and navigate to the widgets list. There you have to activate any of the free tabs widgets and the premium Dynamic Tabs widget. For now, we will activate the Tabs Classic and continue designing the nested tabs.

2. Creating a child tab template
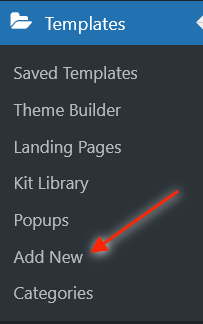
Now, you will need to create child tabs with Tabs Classic. Go to
WordPress Dashboard > Templates > Add New Template
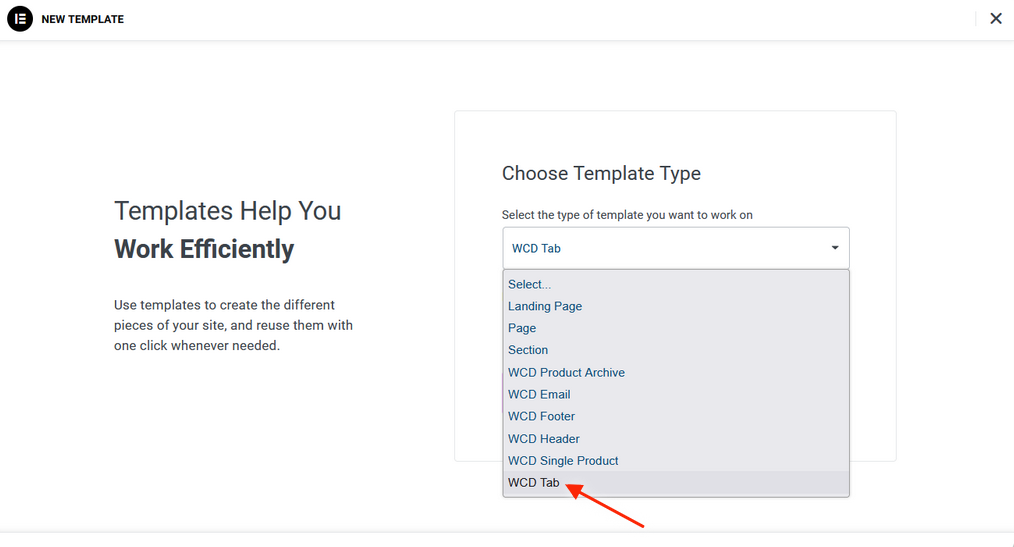
A new template creation pop-up will arrive. From the drop-down menu, select the WL tab and then give a name to the new template, and click on the Create Template button.
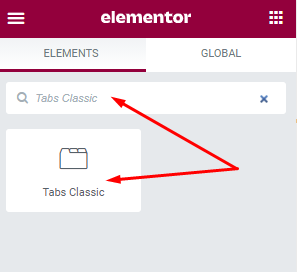
A new Elementor editor page will come up. Search for Tabs Classic on the left widget selection bar and add it to a section.
Add as many tabs as you want with your preferred information and tab name on this section and publish the changes you made.
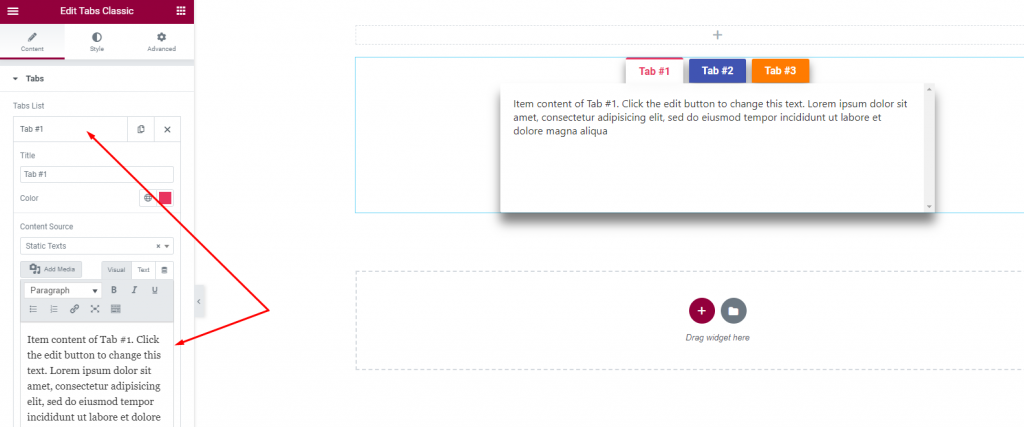
For example, we will create child 3 tabs with demo text.

3. Making Parent Tabs
Select an existing page or create a new page where you wish to make the parent tabs. Then edit the page with Elementor and add a new section. Now, create the parent tab with the Dynamic Tabs widget on the new section the same way you created the child tabs. We will create two parent tabs here.

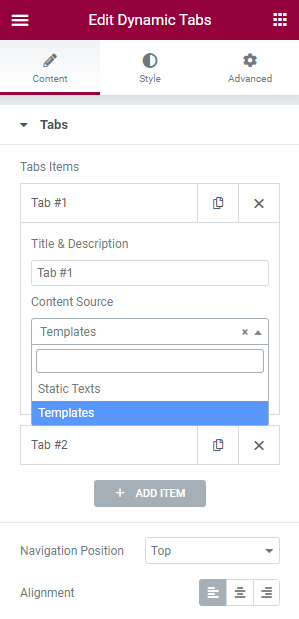
Then we will select the tabs individually and go to the content source. You will see two options – static texts and templates. Choose the templates option and a new selection bar named Tab Templates will appear below. Select the tabs template you have created to insert into the parent tabs.
4. Stying the tabs
You can style all aspects of the free and premium tabs widget. On the premium Dynamic Tabs widget, you will get an extra option to change the navigation position in the content tab. Also, the style tab includes extra options such as changing the title color and active color along with tab and content styling options.
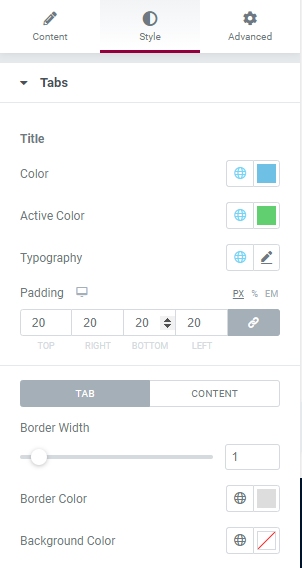
After styling the parent tabs publish the page. That’s it!

This is how you can create nested tabs easily using Elementor and CoDesigner in minutes.
Conclusion
Nested tabs help you to make your site attractive to your users as they can contain important pieces of information in a compact form. It is in fact a ‘need’ when the site has lots of pages/products/information. All this information can be well-structured with the CoDesigner tabs widgets.
CoDesigner is the finest WooCommerce Elementor Addon in the market. To explore other exclusive widgets of CoDesigner you can either download the free version from WordPress Repository or you can check out the demos on the premium version.
Feel free to share your thoughts on this article in the comments section below.
Subscribe to Our Newsletter
Get the latest WordPress tutorials, trends, and resources right in your inbox. No Spamming, Unsubscribe Anytime.

Thank you for subscribing to our newsletter!


Thanks 🙂