How to Add Quick Checkout Button in WooCommerce: An In-Depth Guide
High cart abandonment rates? We can help! Get higher sales by making your checkout process simple and effortless with a WooCommerce quick checkout button.
This blog will provide an easy-to-follow guide for adding a quick checkout button to your WooCommerce shop page. We will also give you a step-by-step on how to create a one-page checkout to replace the default WooCommerce checkout and quickly increase your store’s conversions.
So, let’s get started!
3 Reasons to Add a Quick Checkout Button in WooCommerce
According to research by Baymard, 70% of users abandon their carts due to the complexity of the checkout process.
Compared to traditional checkouts, WooCommerce’s quick checkout button offers several advantages, ultimately creating a smoother experience for your customers. Here are three reasons to consider adding a WooCommerce quick checkout button in your WordPress site –
1. Reduces Cart Abandonment
Customers are likely to leave your store if they have to face a lengthy checkout process, just to make a quick purchase. A quick checkout button helps get rid of unnecessary steps and allows customers to complete their purchases faster. This convenience not only minimizes frustration, but lowers the chances of leaving their cart behind.
2. Increases Conversion Rates
Improving the user experience is important for converting visitors into buyers and a quick checkout button plays a major role in this.
Implementing a quick checkout button in your WooCommerce shop shows that your business values customers’ convenience and are committed to providing an easy shopping experience.
3. Mobile-Friendly Shopping
With the increasing number of consumers shopping on smartphones, having a mobile-friendly checkout is a must. A quick checkout button in WooCommerce is especially beneficial for mobile users.
Smaller screens often means slower load times, so a quick checkout button means customers can complete their purchase with just a few steps and avoid the hassle of navigating through multiple pages.
How to Add Quick Checkout Button in Woocommerce
Now that you know the benefits of adding a quick checkout button, here are some simple steps to integrate this feature to your store using CoDesigner –
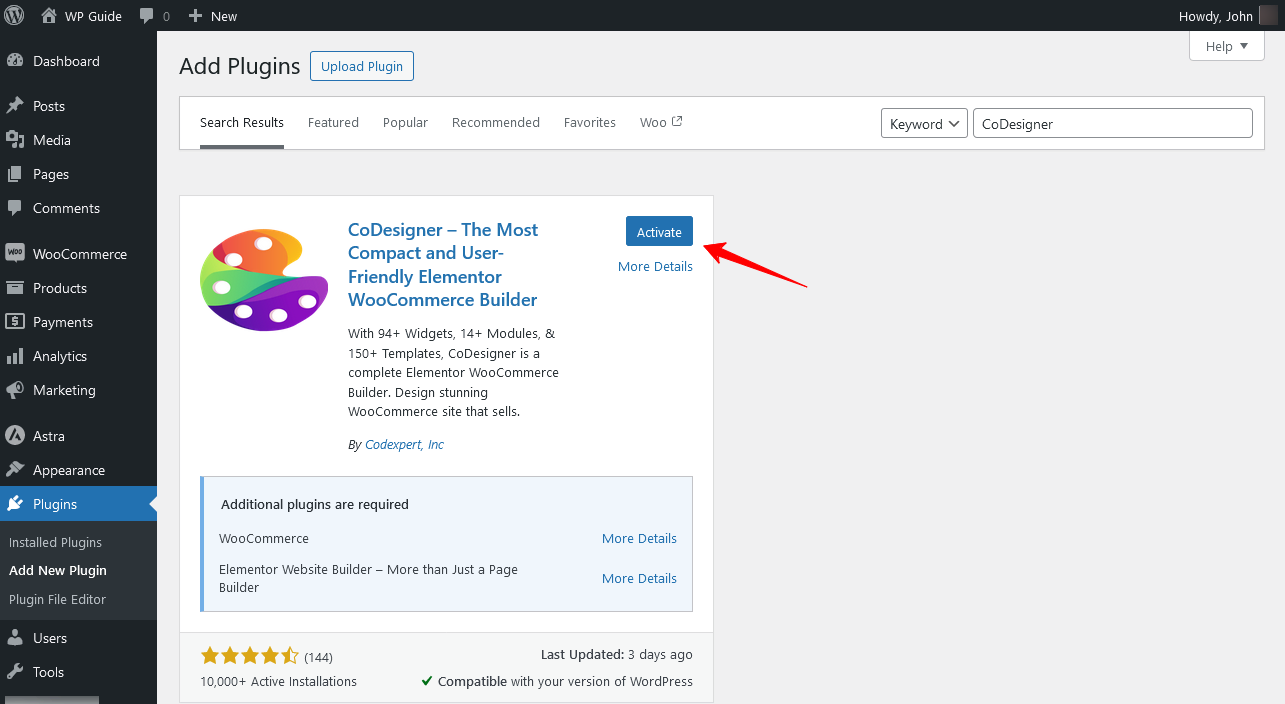
Step 1: Install and Activate CoDesigner
Start by navigating to your WordPress dashboard. Go to Plugins > Add New and look for CoDesigner in the search box to install and activate it.
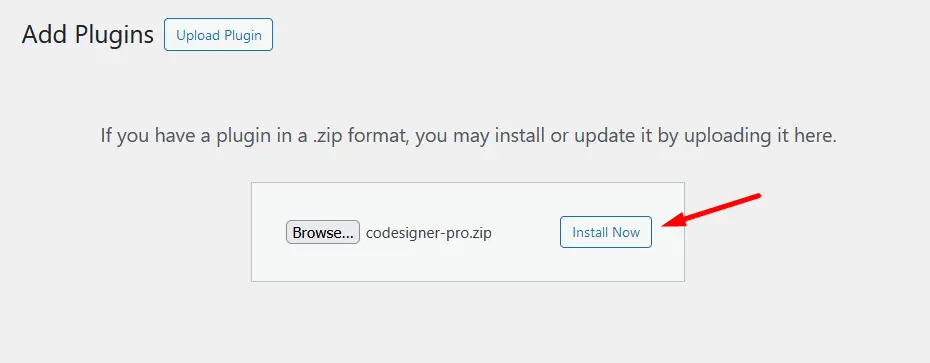
Get CoDesigner Pro from here and upload it to your WordPress site.
Step 2: Enable the Shop Widget
After installing your plugins, you need to enable the Shop Widget from the widgets section of the CoDesigner dashboard. Activate the Shop Widgets you prefer.
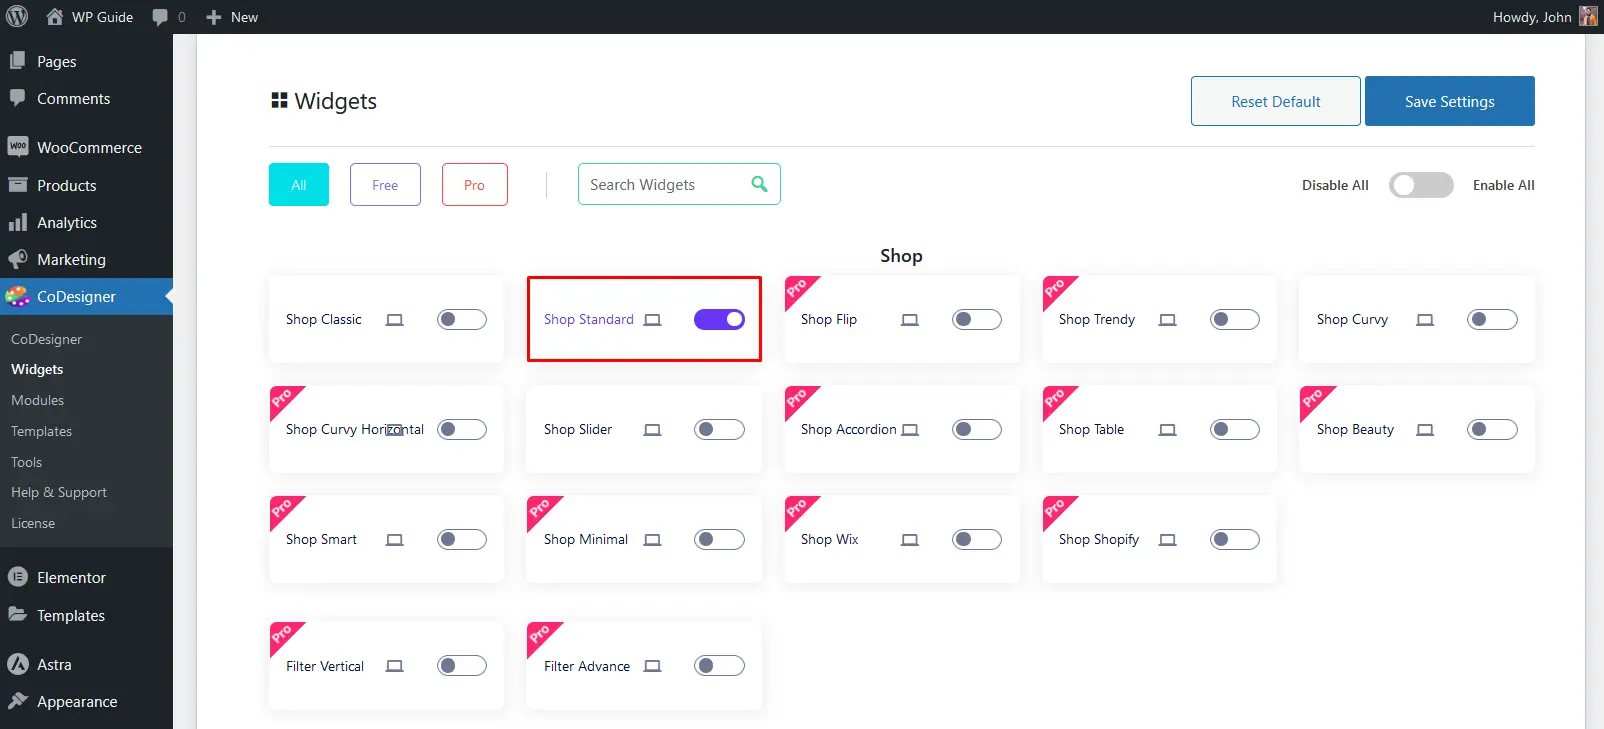
The Quick Checkout button feature is available in the CoDesigner Shop Widget. Don’t forget to hit the Save Settings button.
Step 3: Create a Shop Template
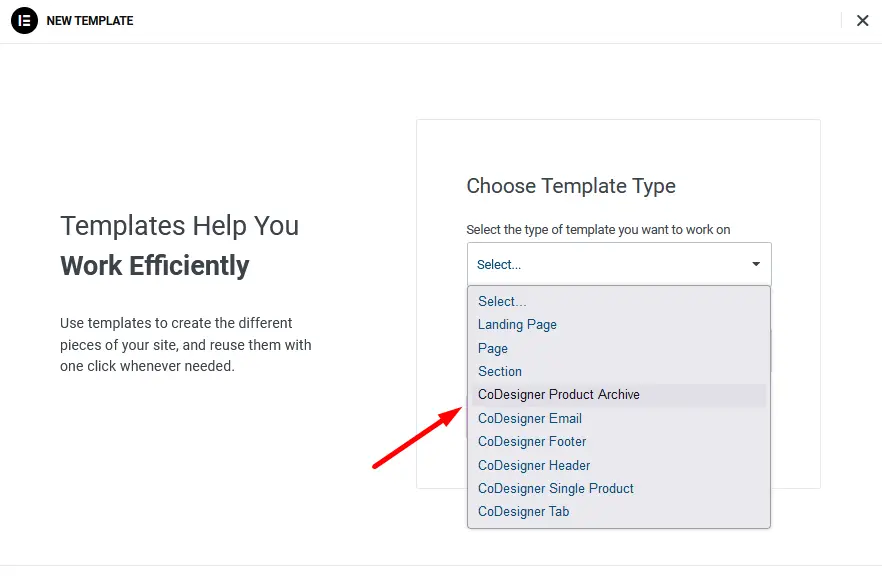
If you haven’t built a Shop Template yet, you need to create one. Go to Templates > Add New> Select CoDesigner Product Archive> Create Template.
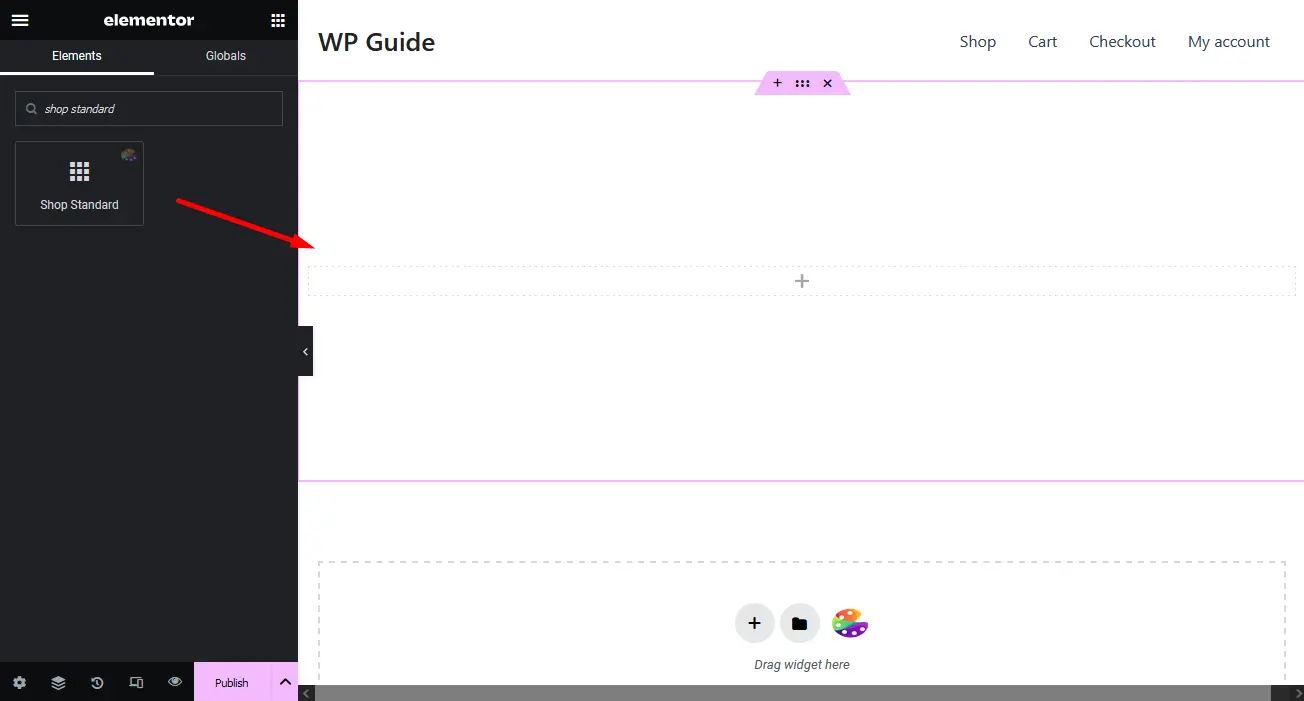
Once you’re in the Elementor Editor page, look for the shop widgets in the search bar. Select your shop widget, drag and drop it to your preferred section.
Step 4: Enable Quick Checkout Button
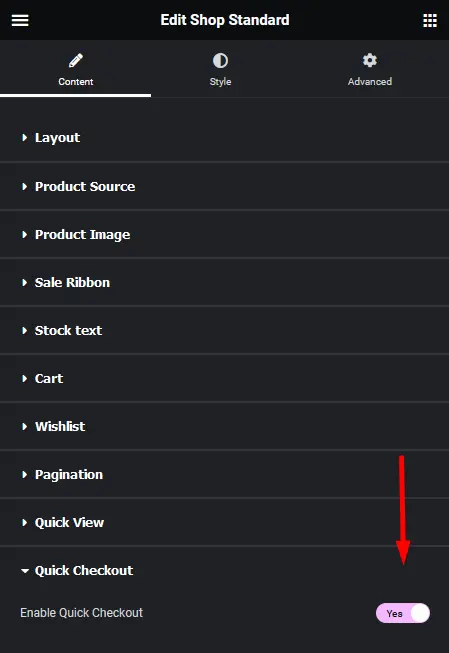
After adding the Shop widget to the Elementor section, you can find the quick checkout function in the Elementor’s content sidebar. Enable the Quick Checkout button.
Step 5: Save Changes
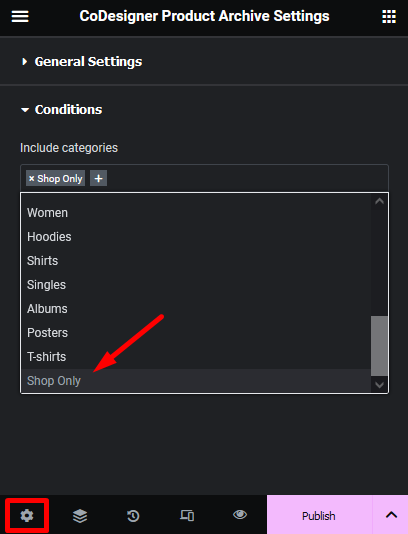
Once your customization is complete, assign the template to your current shop page. Finally, click the Publish button to save the changes on your website.
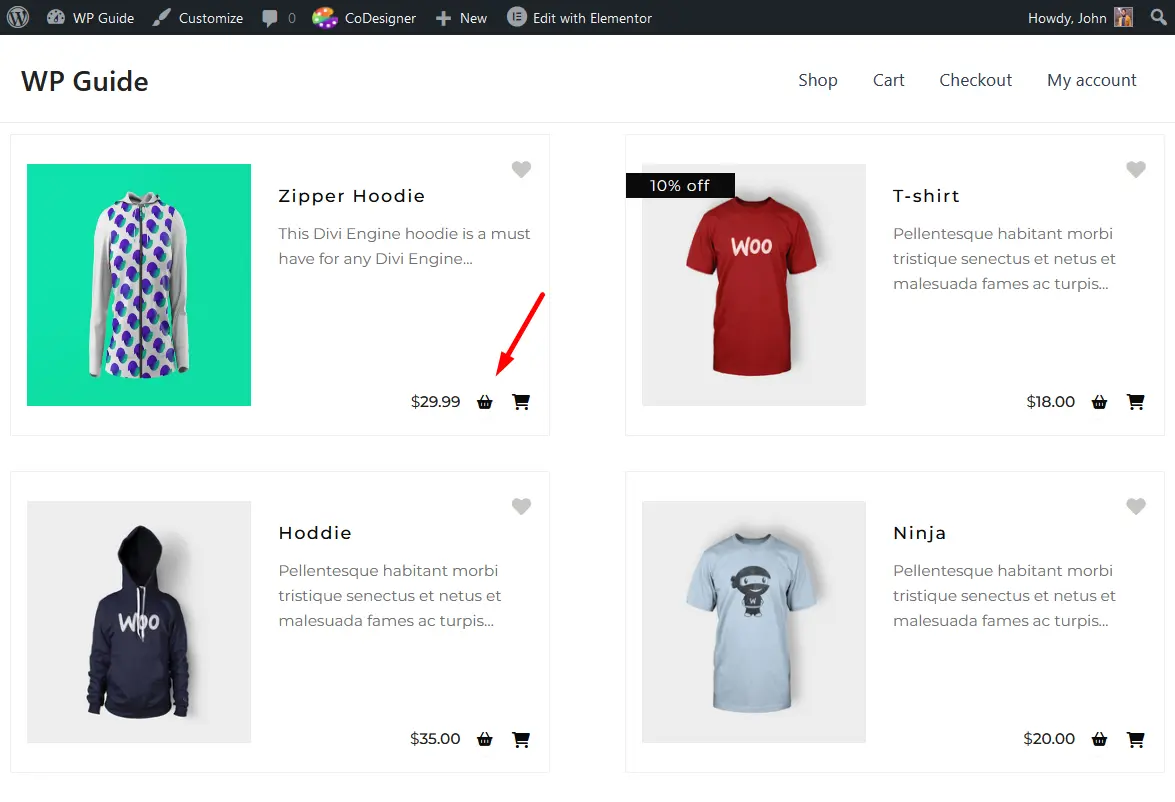
Check out the screenshot below to see how your Quick Checkout button appears on your live store.
Design a One-Page Checkout for Quick Checkout
Use CoDesigner’s Checkout Builder templates to effortlessly create a one-page checkout to replace the default WooCommerce checkout. Here are a few simple steps to create and design a one-page checkout in WooCommerce –
Step 1: Activate CoDesigner Modules
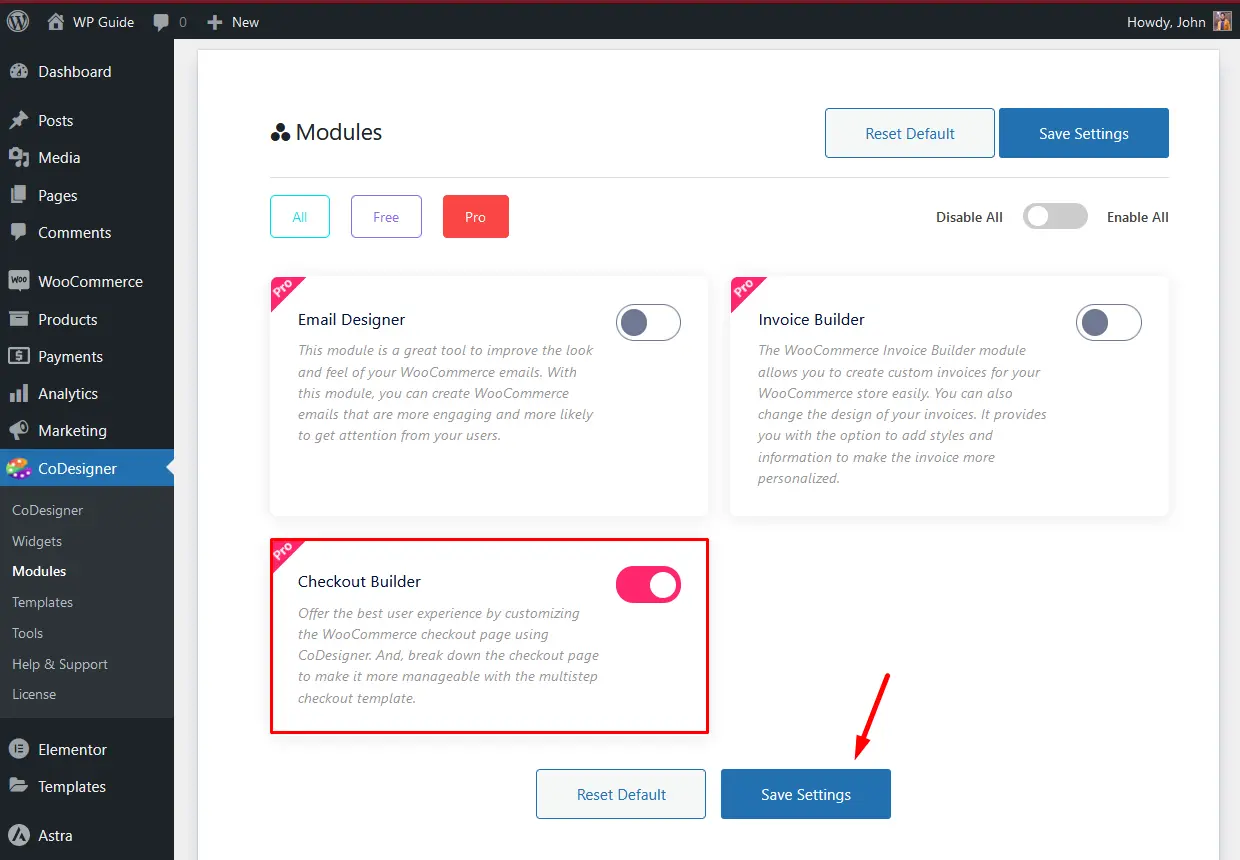
Make sure both CoDesigner and CoDesigner Pro are installed and activated on your site. Go to CoDesigner > Modules tab and enable the Checkout Builder module. Hit the Save Settings button.
Step 2: Add Checkout Module in Elementor Section
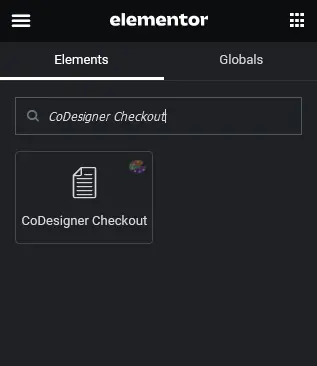
Create a new page and Edit with Elementor. From the Editor, you have to search for the CoDesigner Checkout widget and drag it to the Elementor section.
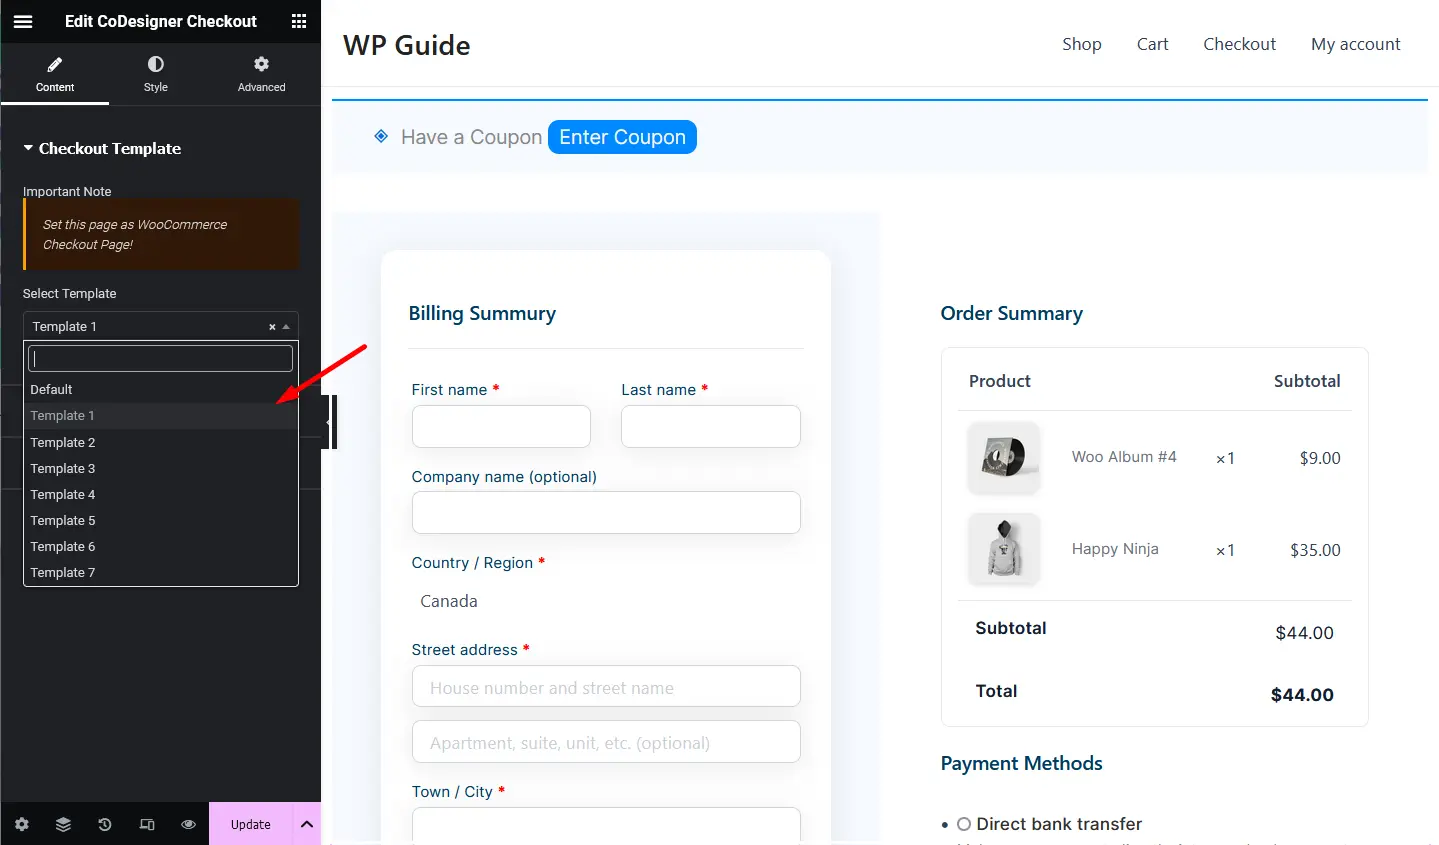
Step 3: Choose a CoDesigner Template
There are multiple designs available for checkout. Choose your desired template and hit the ‘Update‘ button.
Step 4: Add Thank You
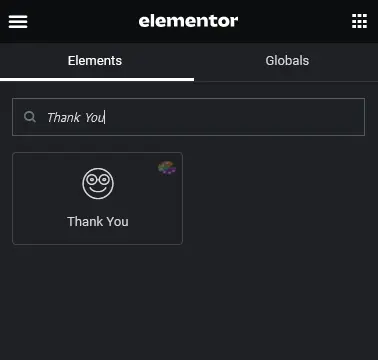
To add a Thank You message, make sure your Thank You widget is enabled. If not, enable it from CoDesigner widgets from the dashboard (see Step 2).
After that, drag the Thank You widget to a new section on your WooCommerce one-page checkout template.
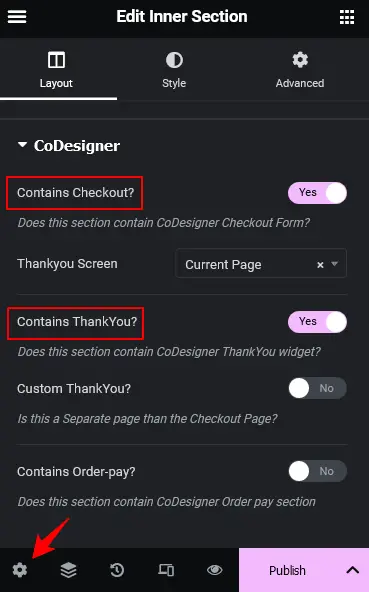
Note: After placing the Checkout and Thank You Widgets, make sure to enable Contains Checkout and Contains Thank You in the editor. Enable Contains Checkout for the Checkout page and Contains Thank You for the Thank You page.
Step 5: Set the Page as Default
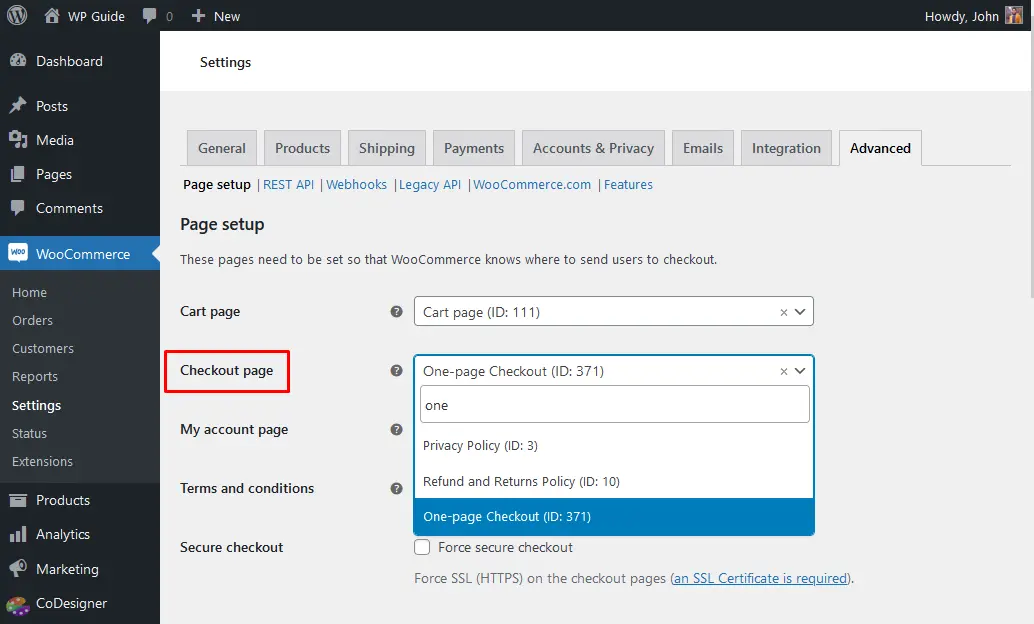
Once you’re happy with the page design, set this as your WordPress site’s default checkout page. To do this, go to Dashboard > WooCommerce > Settings > Advanced and set the customized one-page checkout template in the Checkout Page under Page Setup.
Step 6: Check Results
Now head over to your WooCommerce shop page and click on the quick checkout button to see the changes you’ve made. Here’s a quick video to help you do this –
Final Remarks
The WooCommerce quick checkout button offers numerous benefits, such as reducing cart abandonment rates, improving the overall customer experience, and increasing conversion rates.
Follow the guide above to implement a quick checkout button and a one-page checkout template using the CoDesigner Module. These methods will make it easier for customers to make quick decisions and complete their purchases instantly, dramatically increasing sales opportunities for your business.
Frequently Asked Questions
Download CoDesigner and CoDesigner Pro and install them on your WordPress website. Add the Shop Widget to your template, then enable the Quick Checkout Button. Finally, save your Shop Template.
If you purchased CoDesigner Pro, you must log in to your Codexpert user account. From there, you can easily download the plugin.
– Make sure you install the plugins on your website.
– Enable the CoDesigner Checkout Builder module.
– Next, create a new page and drag the CoDesigner Checkout Module on the page.
– Select the template and then save it.
– Finally, add this page as WooCommerce checkout
Subscribe to Our Newsletter
Get the latest WordPress tutorials, trends, and resources right in your inbox. No Spamming, Unsubscribe Anytime.

Thank you for subscribing to our newsletter!
Table of Content
- 3 Reasons to Add a Quick Checkout Button in WooCommerce
- How to Add Quick Checkout Button in Woocommerce
- Step 1: Install and Activate CoDesigner
- Step 2: Enable the Shop Widget
- Step 3: Create a Shop Template
- Step 4: Enable Quick Checkout Button
- Step 5: Save Changes
- Design a One-Page Checkout for Quick Checkout
- Step 1: Activate CoDesigner Modules
- Step 2: Add Checkout Module in Elementor Section
- Step 3: Choose a CoDesigner Template
- Step 4: Add Thank You
- Step 5: Set the Page as Default
- Step 6: Check Results
- Final Remarks
- Frequently Asked Questions


