Backup WordPress Website – A Complete Guide
A WordPress website can take hours or even months to create. But what happens if disaster strikes? A sudden crash, a malicious attack, or even a simple configuration error can wipe out all your hard work. That’s where regular backups become your lifeline.
In this guide, we’ll walk you through various methods to safeguard your WordPress site. Want to know more? Let’s get started.
Why You Need to Backup Your WordPress Site
Whether it’s for security purposes or to make configurations, there are many reasons to keep an updated backup of your WordPress website. Here are some of the most common reasons to backup your WordPress site –
- Before Making Major Changes
Redesigning your layout, modifying core files, or experimenting with new plugins can introduce risks. A backup ensures you can swiftly restore your website to its previous state if something goes wrong.
- Migrating Your WordPress Site
Moving your website to a new host or domain can be complex. Unforeseen technical glitches, data transfer errors, or configuration issues can lead to data loss. A comprehensive backup ensures you can restore your website to its previous state if anything goes wrong.
- Website Major Content Updates
WooCommerce sites need continuous content updates. Before implementing substantial content updates, backup is the only solution. It allows you to revert to the previous version if the new changes don’t work as expected.
- Before Installing New Plugins
Installing new plugins can sometimes cause conflicts or issues with your site. A backup lets you restore your site to its previous state if the plugin causes any errors. You can also test new plugins without worrying about breaking your site.
- Troubleshooting or Debugging Your Website
When resolving technical issues or bugs, there’s always a risk of unintentional issues. A backup allows you to revert to a stable version of your site if the debugging creates new issues. This ensures that you can experiment and fix problems without the fear of permanently damaging your site.
3 Easy Methods to Back Up Your WordPress Site
There’s no substitute for regular website backups. They are your last line of defense against a multitude of potential disasters.
Whether it’s a malicious attack compromising your site’s security, a critical error caused by a theme or plugin update, or unexpected data loss during a migration, having an updated backup is required for a swift recovery. Here are three ways to take a backup when facing issues stated above –
- Using a WordPress Plugin
- Hosting Backup Tool
- Manual Creating a Backup
Types of Data to Add When Taking a Backup
There are multiple files that make up a WordPress site that you need to backup, including –
- Database
- Media Files
- Plugin and Theme Files
When backing up your WordPress site, it’s best to focus on the most important data. While the front-end design might seem like everything, the database is actually the most critical component. So, when creating a backup, make sure you don’t overlook these essential elements.
And if you’re running a WooCommerce site, it’s especially important to learn how to properly back up your WooCommerce database.
Method 1: Take Backup with a Free WordPress Plugin
If you’re worried about the complexity of backing up your site, this method will show you how to take backup using a free WordPress plugin effortlessly.
Step 1: Install WordPress Backup Plugin
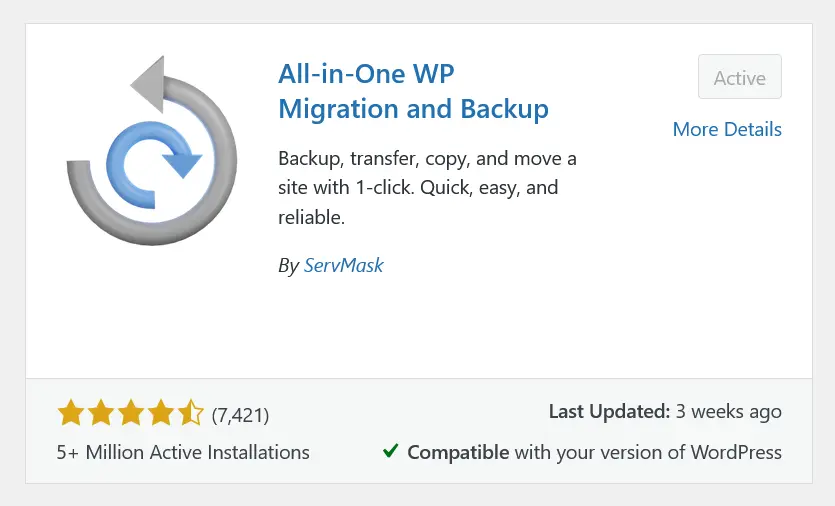
From your WordPress dashboard, go to Plugins > Add New and type All in one WP Migration in the search box. Install and activate the plugin to get started.
Step 2: Configure Settings For Site Backup
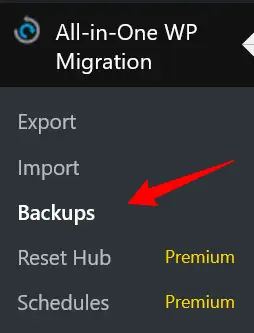
Go to your site Dashboard > All-in-one WP Migration > Backups. This backup page contains all the files (Database, Media Files, Plugins and Themes).
Step 3: Start Taking Your Backup
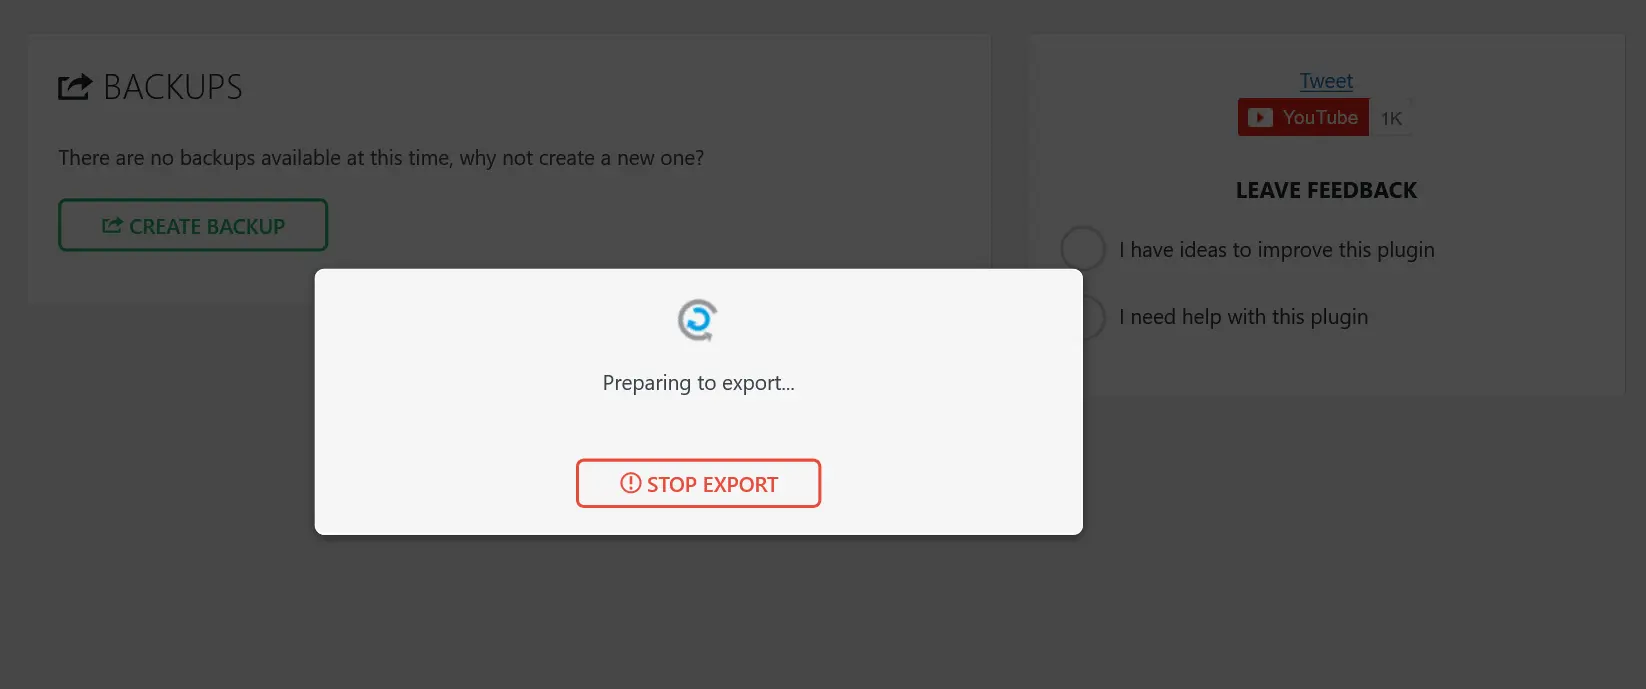
When the setup is ready, click the Create Backup button. Afterwards, your site backup will start immediately.
Step 4: Set up Automatic Backup Settings
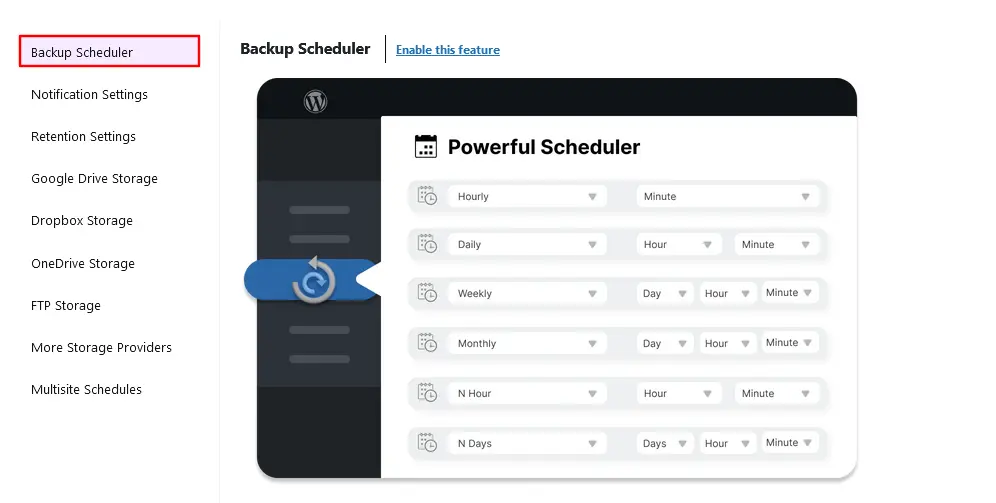
You can schedule your backup from the Schedule tab. Go to the Schedule tab and select the Backup Scheduler option. This tab will give you the option to choose from various scheduling options. Set your preferred time for creating your site backup.
Note: Automatic backup is a premium feature of All-in-One WP Migration.
Step 5: Export Backup To Remote Storage
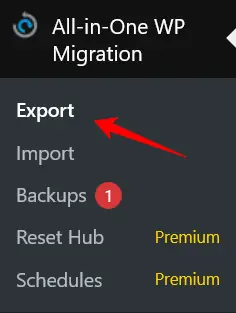
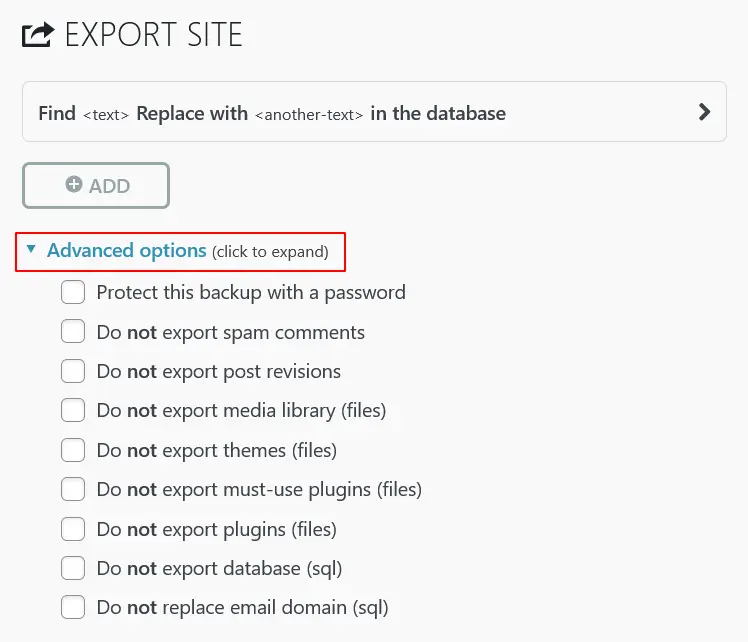
All-in-One WP Migration provides a helpful option to keep your WordPress site in remote storage. For this, navigate to the Export tab of the plugin dashboard.
There are several cloud storage options available for securely storing your website backup files.
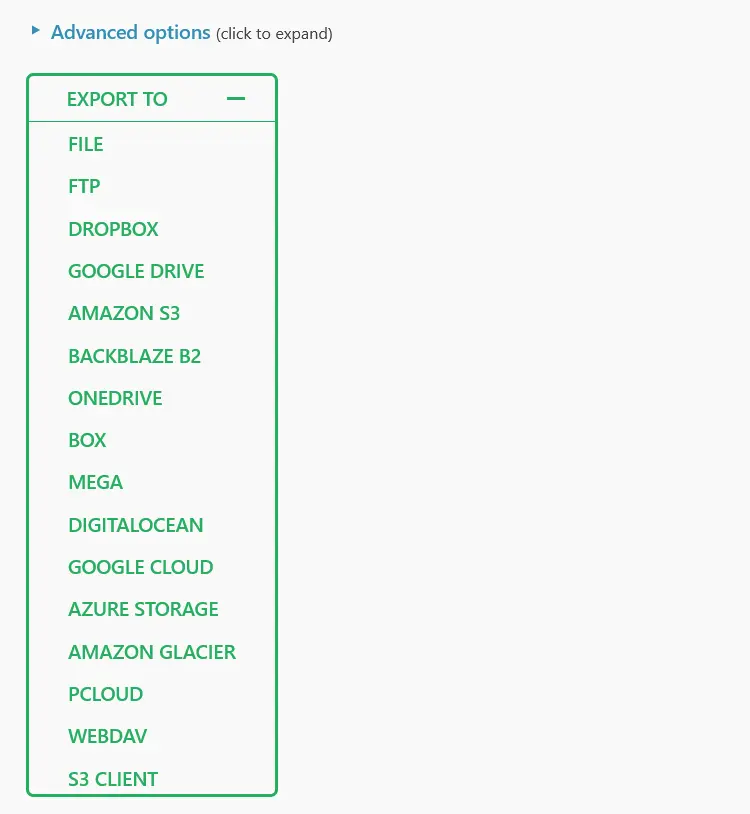
You have the option to access advanced features too. This allows you to select specific content to export like settings passwords, database and exclude unnecessary data and files.
Step 6: Restore Backup of Your WordPress Website
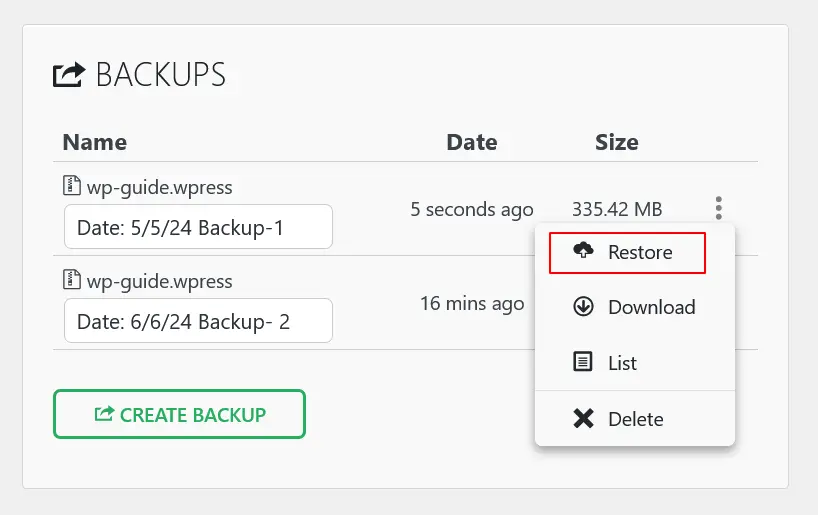
When the backup is complete, you need to learn how to restore it. To do this, go to Dashboard > All-in-One WP Migration > Backups and click on the right button from your dashboard to access the Restore button. You need to click on this to start the restoration process of your WordPress site backup.
You can also import the downloaded backup in the same way.
Method 2: Use Hosting Backup Tool
If you’re using a reputable website hosting, you should be able to access automatic backup options. Some hosting lets you create daily backups and you can easily check them by logging in to your dashboard.
Here’s how to access your automatic backup –
Step 1: Login to Your Hosting Dashboard
To start, you need to login to your hosting dashboard. Select your site and navigate to the backup page to see the overview of your backups.
Step 2: Select Backup Wizard
After that, go to the Files section from cPanel and select Backup Wizard. From the left side of the interface, click the Backup option.
Step 3: Generate a Full Website Backup
Opt for a full backup to create a complete copy of your website’s files and database. Alternatively, you can choose to perform a partial backup if needed.
Click the Generate Backup option from your dashboard. Provide your email to receive a notification when your backup is complete.
Method 3: Manually Backup Your WordPress Website
Taking a full backup of your WordPress site is a step-by-step process that ensures its protection. You can choose to do this manually, starting with the use of your FTP.
Step 1: Connect to Your Website FTP
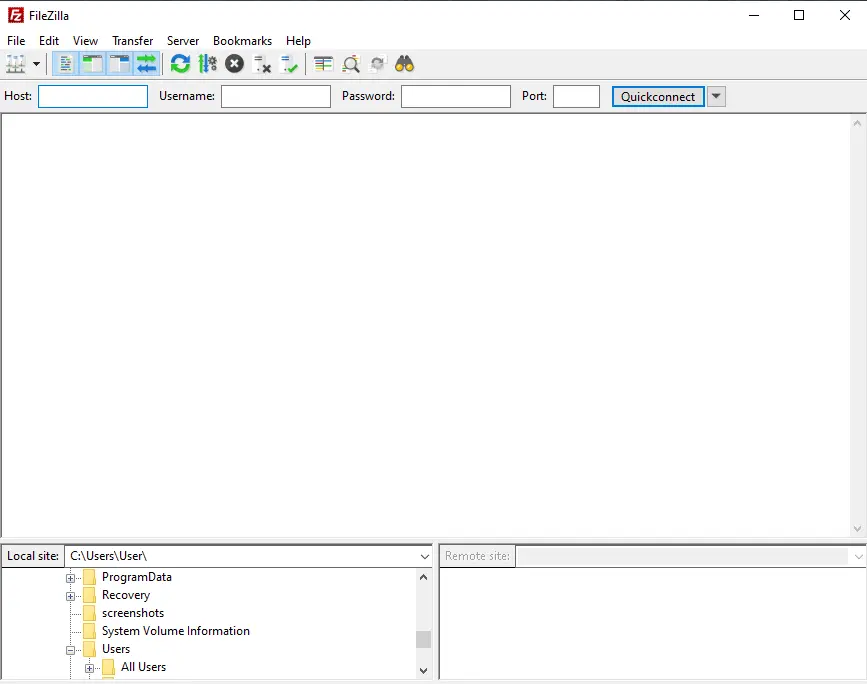
First thing, you have to do is connect with the FTP using FileZilla. Login with your FTP credentials to connect your website.
Step 2: Download Your Backup
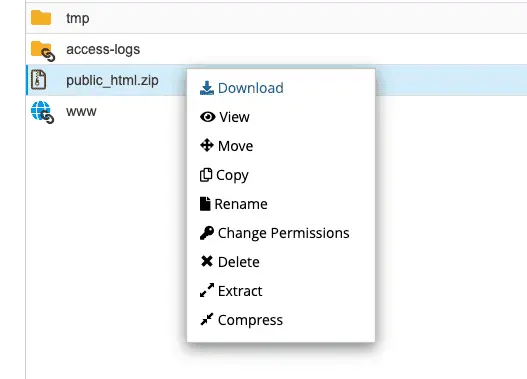
Find your website root directory called public_html. From the root directory, select the necessary files and download those folders. Once the backup is downloaded, keep it in a safe place or in a cloud storage of your choice.
Step 3: Backup Database
Backup your database by clicking the phpMyAdmin option, which will open up the database manager. Select the site’s database from the left of your interface menu.
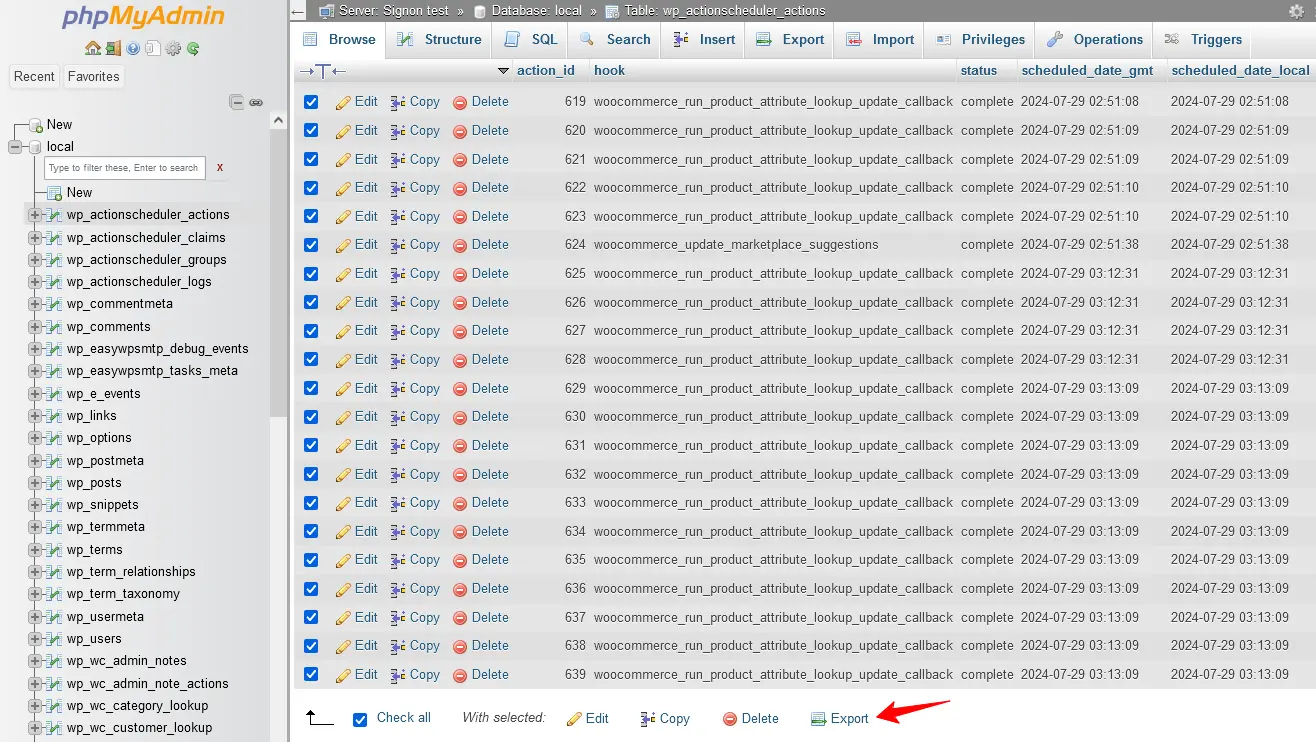
Next, select the database you want to export. Click the Export button showing at the top of the screen and choose the Quick option to automatically download all the site’s database tables.
Step 5: Restore the Manual Backup
If you need to restore your WordPress site from a backup, the best approach is to upload the root folder to your server. While you may already know how to download a backup, understanding the restoration process is equally important.
Note: Ensure the root file is different from the current one.
Once the root file is uploaded, you can delete the existing root file and rename the backup to the original name. The database directory will ask you to select a file to import and specify the format. From here, select your database file you want to import.
Finally, click the Go button at the bottom. When the restoration is complete, visit your site and check if you website is working properly.
Additional Tips to Backup a WordPress Website
Beyond the basic steps, here are additional tips to ensure comprehensive and reliable backups –
- Use a reliable WordPress plugin for backup, as mentioned above. Set the frequency based on how often your site changes.
- Make sure to never store backups on your hosting server alone, instead save them to a cloud storage, which can help if your server ever fails.
- Periodically, download copies of your backups to your local storage or hard drive, which will ensure an extra layer of security.
- Test your backups regularly by restoring them in a staging environment. This helps ensure that the backup process works properly and you can fully restore your site if needed.
- For large sites, use incremental backups to save only the changes made since your last backup. This reduces server load and saves storage space.
- If you are a developer, consider using a version control system like Git. You can track changes and roll back to previous versions using this option.
- Set an email to your host, to confirm that backups are completed successfully. This helps you quickly address any issues with the backup process.
- Include security logs, access logs, and configuration files in your backups. These can be crucial for diagnosing and recovering from security incidents.
- Make sure that critical configuration files like, .htaccess and wp-config.php are included in your backup. These files contain important settings for your WordPress installation.
- Keep a written record of your backup process, including how to access backups, restore your site, and contact information for any services you use. This documentation can be invaluable in an emergency situation.
With this strategy, you can create a robust backup that minimizes the risk of data loss and makes it easier to recover your WordPress site in the event of an issue.
Wrapping Up
Now that you have a clear understanding of how to back up a website, you can choose the method that best suits your needs. Using your hosting provider’s backup feature is often the safest and most reliable approach for backing up a WordPress site.
If you haven’t backed up your WordPress site yet, don’t wait any longer. Start securing your site today by taking regular backups!
Frequently Asked Questions (FAQs)
Q. How to download a backup of your WordPress website?
You can download your backup in several ways. There are 3 methods to take backup of your website. To download these backups follow the below steps:
- Install and activate All-in-One WP Migration.
- Go to Backup tab and setup the configuration.
- When setup is complete click on the Create Backup button.
Q. How to backup WordPress sites from cPanel?
Backup your WordPress sites from cPanel following steps below:
- Access to your hosting dashboard using credentials.
- Go to Files section and select Backup Wizard from you dashboard.
- Click on Generate Backup to perform a full website backup.
Q. How to restore a WordPress website from backup copy?
You can easily restore your website from backup copy. To do this:
- Install and activate All-in-One WP Migration in your site.
- Go to the Import tab from the plugin dashboard.
- From that page, click on Import to upload your backup copy.
- When the upload is complete, restore the uploaded backup.
Q. How many backups should I take at once?
If your website contains a lot of dynamic content, you must keep at least 3 copies of backup. The 3-2-1 backup strategy ensures multiple copies of your data can survive from various threats.
Subscribe to Our Newsletter
Get the latest WordPress tutorials, trends, and resources right in your inbox. No Spamming, Unsubscribe Anytime.

Thank you for subscribing to our newsletter!
Table of Content
- Why You Need to Backup Your WordPress Site
- 3 Easy Methods to Back Up Your WordPress Site
- Method 1: Take Backup with a Free WordPress Plugin
- Step 4: Set up Automatic Backup Settings
- Method 2: Use Hosting Backup Tool
- Method 3: Manually Backup Your WordPress Website
- Additional Tips to Backup a WordPress Website
- Wrapping Up
- Frequently Asked Questions (FAQs)
- Q. How to download a backup of your WordPress website?
- Q. How to backup WordPress sites from cPanel?
- Q. How to restore a WordPress website from backup copy?
- Q. How many backups should I take at once?


