Convert All WordPress Images to WebP: A Complete Guide


Images make your WordPress site visually appealing, but can also slow it down if not optimized properly.
One of the smartest/easiest ways to improve loading speed, SEO, and overall performance is to convert all your images to WebP format. WebP offers smaller file sizes without sacrificing image quality, so your site always stays fast and efficient.
In this guide, we will show you how to easily convert your existing and new images to WebP using a WordPress plugin to ensure that your site stays sharp, fast, and user-friendly.
Let’s start with understanding the WebP format first!
Understanding the WebP Format for Websites
WebP is a modern image format developed by Google specifically for the web. It’s designed to create, smaller, faster-loading image without sacrificing visual quality. WebP supports three main types of image compression:
(i) Lossy Compression: Reduces file size by permanently removing some image data (Similar to JPEG)
(ii) Lossless Compression: Compress images without losing any quality (like PNG)
(iii) Support for Transparency (Alpha channel): Allows images with see-through backgrounds, just like PNG.
(iv) Animation Support: Can replace GIFs with smaller, higher-quality animations.
WebP’s flexibility makes it ideal for websites that need fast load times, efficient performance, and high-quality visuals. It combines the best features of JPEG, PNG, and GIF in a single format, optimized for modern web usage.
Why You Should Convert Images to WebP
According to Google, WebP images are 26% smaller than PNGs and 25-34% smaller than comparable JPEGs at equivalent quality. If you run a WordPress site, performance and user experience should be at the top of your priorities.
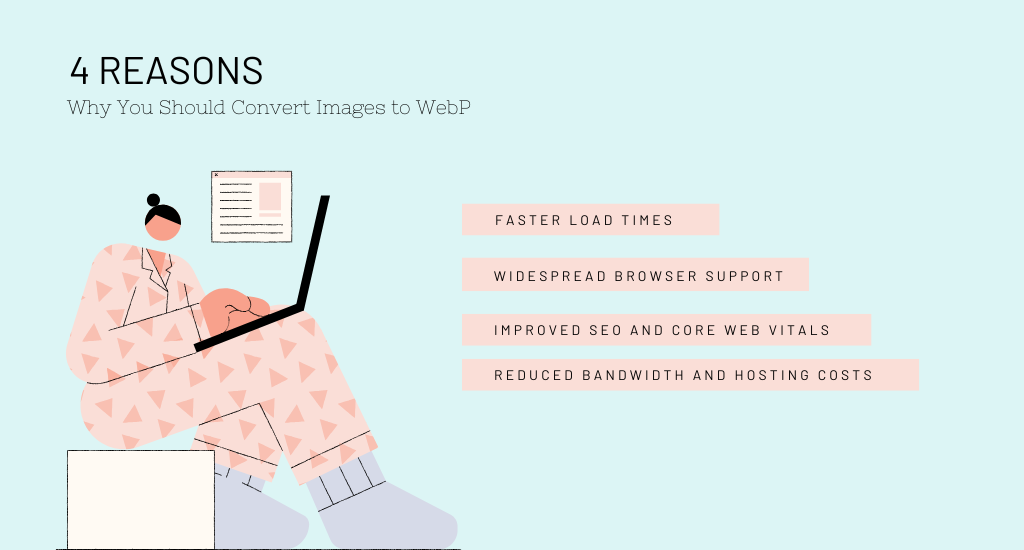
Here’s why you should consider converting all your images to WebP format:
Faster Load Times
One of the most effective ways to improve your website’s performance is by reducing your page load, and image optimization plays a big role in that.
For example, if your homepage has ten images totaling 2.5MB, converting them to WebP could reduce the size to 1.5 MB. That 1 MB savings can cut 1-2 seconds off load time.
These offload times improve the overall user experience and directly impact your search engine rankings. WebP images also use less memory and bandwidth, so your site remains quicker and more efficient.
Improved SEO and Core Web Vitals
Page speed is a confirmed ranking factor for Google. Using WebP can directly boost your core web vitals, such as:
Largest Contentful Paint (LCP): By loading smaller images faster.
First Contentful Paint (FCP): Helping your page become interactive sooner.
Also, improved speed lowers bounce rates and keeps your site visitors engaged longer. So, converting all your WordPress images to WebP lets you improve performance and align with Google’s page performance standards.
Reduced Bandwidth and Hosting Costs
Converting all WordPress Images to WebP can significantly help you reduce bandwidth usage and hosting costs. WebP images are much smaller in size compared to traditional formats like JPEG and PNG.
And smaller image files mean less data is transferred when any users access your site. This leads to faster load times and less strain on your server, improving overall site performance.
For high-traffic websites, the savings on bandwidth and hosting fees can add up over time. With less data being transferred, your server can handle more visitors without additional costs.
Widespread Browser Support
One of the major advantages of using WordPress WebP images is their broad compatibility across modern web browsers. WebP is supported by over 95% of browsers, including Google Chrome, Firefox, Microsoft Edge, Safari, and more.
This means you can safely use WebP images on most of your WordPress websites without worrying about display issues for the vast majority of users. With such wide adoption, WebP has become a reliable and future-proof choice for image optimization.
Convert All Images to WebP: WordPress Plugin Guide
In this section, we will show you how to convert all WordPress images to WebP using a plugin. Using a WordPress WebP image plugin will help you improve load times, including SEO. Before you start, you have to install and activate ThumbPress on your website.
After that, follow the steps below –
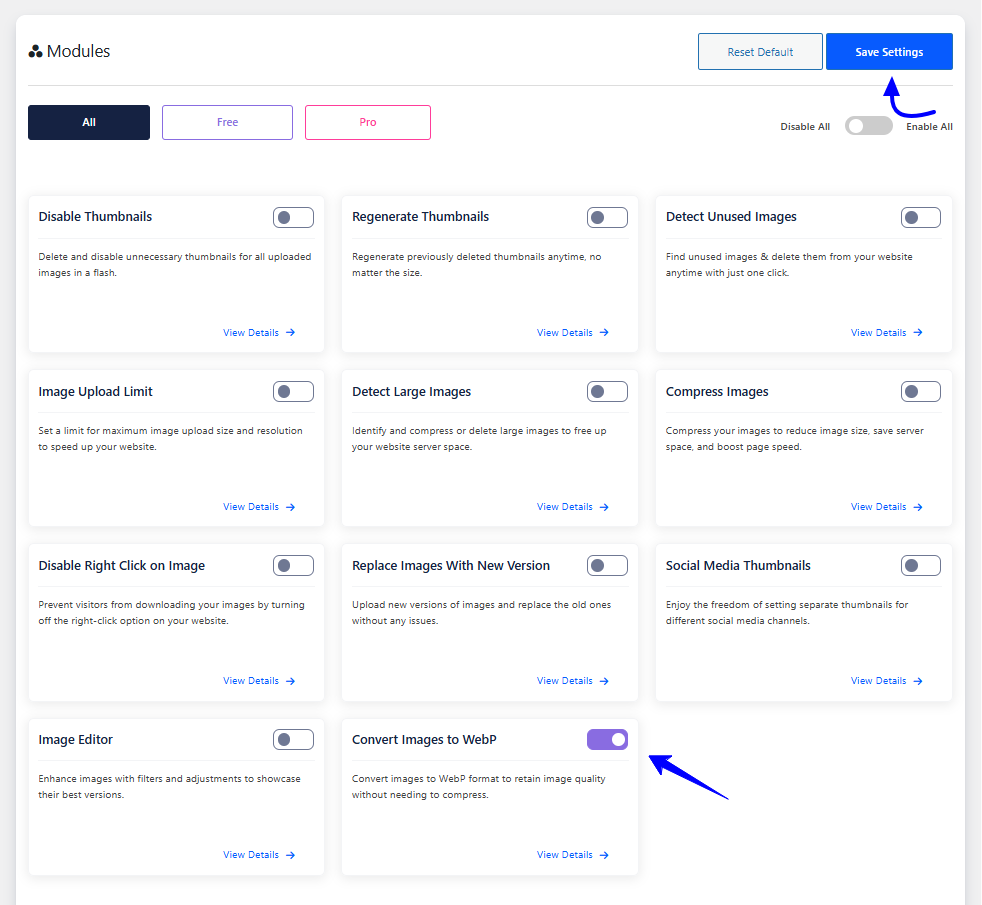
Step 1: Activate the ThumbPress WebP feature
When the plugin is activated on your WordPress site, navigate to ThumbPress >> Modules and look for the feature Convert Images to WebP. Click to enable it. After that, click on the Save Settings button.
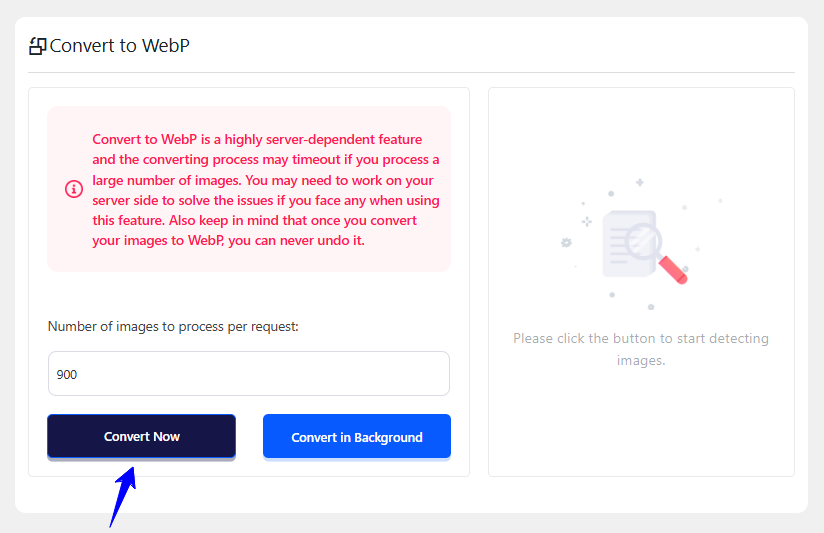
Step 2: Convert Images to WebP in Bulk
After saving the settings, you will discover a submenu under ThumbPress. Head over to ThumbPress >> Convert to WebP.
On this page, you have to provide the number of images you want to process per request. Next, click on the Convert Now button. You can also use the button Convert in Background.
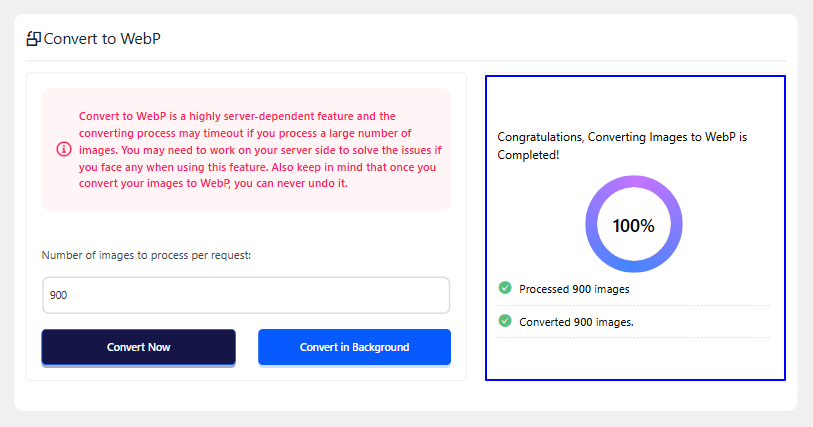
You will see a success message when the conversion of images is completed on your site like below.
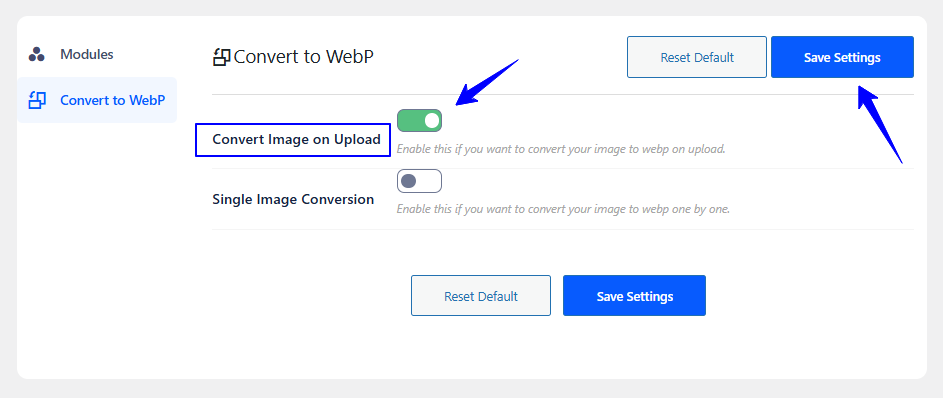
Step 3: Convert Images Automatically
There is much more you can do with the ThumbPress Convert all Images to WebP WordPress plugin.
You can convert all your WordPress images to WebP automatically. Go to ThumbPress >> Modules >> Convert to WebP page.
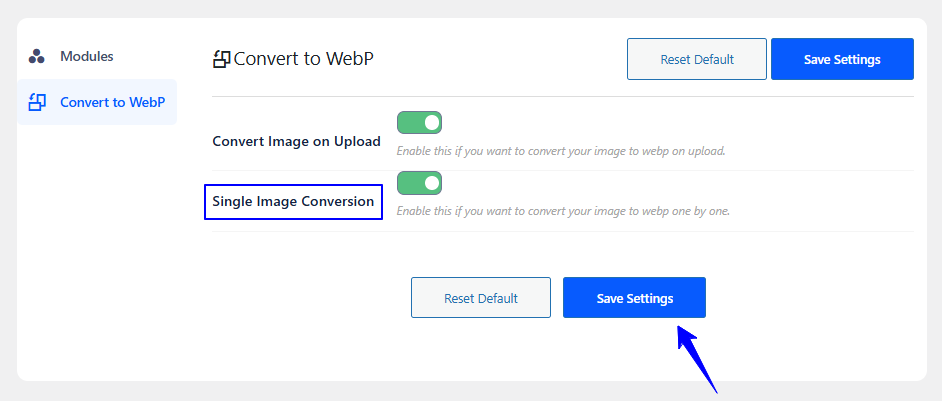
Step 4: Single Image Conversion
This is the last step for WordPress image conversion to WebP. To convert a single image in WordPress using this plugin, navigate to ThumbPress >> Modules >> Convert to WebP and enable the Single Image Conversion feature.
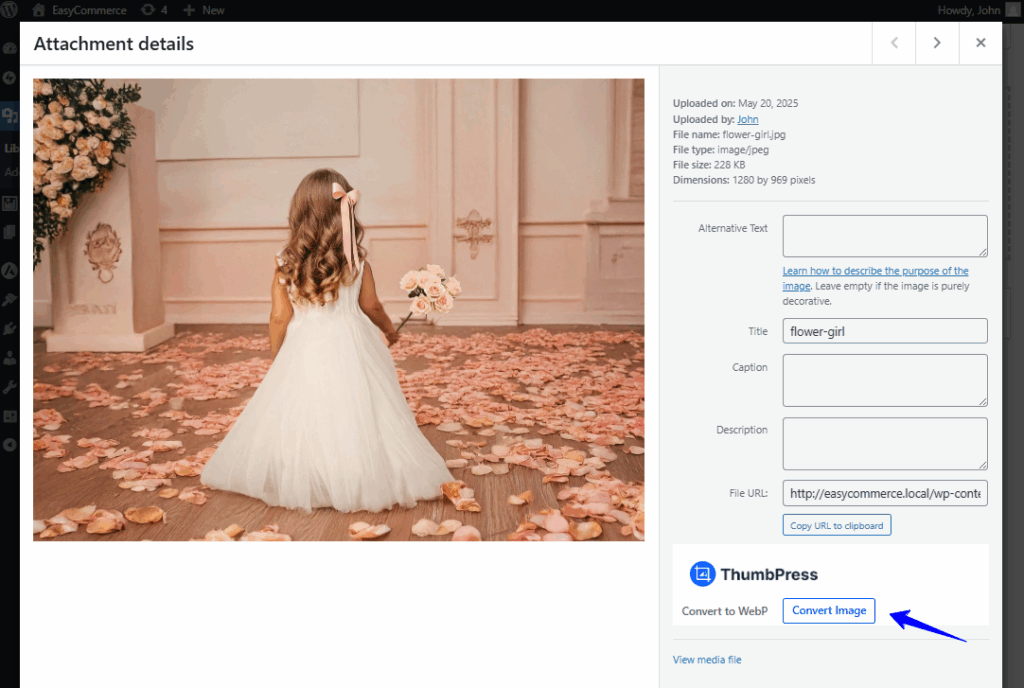
Then go to your Media >> Library. You need to click on Add Media file and select the image from your device. If the image is already on your site, then click it. You will find the option Convert to WebP right below your image.
8 Best Tips to Optimize WordPress Images
Optimizing WordPress Images is one of the easiest ways to speed up your website’s page. And faster pages mean better SEO, happier visitors, and improved performance on all devices. Here are the top tips to help you get it right:
1. Use the Right Image Format: Convert all WordPress images to WebP for web-friendly, smaller file sizes without losing quality.
2. Resize your Image Before Uploading: Don’t upload massive images and rely on WordPress to scale them. Resize to the actual display size your theme uses.
3. Compress Images Without Losing Quality: Use ThumbPress to reduce image file sizes. This keeps load times fast while maintaining the image quality.
4. Enable Lazy Loading: Load images only when they are about to be seen on scroll. WordPress has lazy loading by default, but you can use a lazy load plugin to enhance better.
5. Use a Content Delivery Network (CDN): Serve your images from servers closer to your visitors. CDNs like Cloudflare, Sucuri, and Rocket CDN to reduce load times across different regions.
6. Use Proper ALT Tags: Add descriptive alt text for every image. It helps with SEO and accessibility. Especially for screen readers and Google Image search.
7. Configure Browser Caching: Configure caching so repeat visitors don’t have to reload the same images every time. This will improve speed on return visits.
8. Delete Unused Image: Find and delete old, unused images from your media library to keep your site lightweight and organized.
Wrapping Up
Converting your images to the WebP format is an easy way to make your site faster and smoother. With a plugin like ThumbPress, you can convert all WordPress images to WebP, old and new, without any technical steps or extra work.
This small change can lead to faster loading pages, fewer people leaving your site, and less strain on your hosting. WebP helps your site run better on any device or browser.
So, if you’re ready to boost performance without sacrificing quality, now’s the time to make the switch!
Frequently Asked Questions(FAQs)
Q. What is the easiest way to convert all WordPress images to WebP?
The easiest way to convert all WordPress images to WebP is by using a plugin like ThumbPress. It automatically converts your existing and new images to WebP format without requiring technical skills.
Q. How do I convert all WordPress images to WebP in bulk?
ThumbPress supports bulk conversion, so you can convert all existing images with just a few clicks.
- Install and activate ThumbPress on your website.
- Navigate to ThumbPress > Modules and enable Convert to WebP.
- Go to ThumbPress > Convert to WebP.
- Provide the number of images you want to process per request.
- Click on the Convert Now button
Q. Is WebP supported by all browsers?
Absolutely. Over 95% of global web traffic comes from browsers that fully support WordPress WebP images.
Q. Will converting images to WebP improve my site’s performance?
Absolutely, converting images to WebP will improve your site performance. WebP images are smaller and load faster, which helps improve page speed and SEO rankings.
Subscribe to Our Newsletter
Get the latest WordPress tutorials, trends, and resources right in your inbox. No Spamming, Unsubscribe Anytime.

Thank you for subscribing to our newsletter!

A seasoned Business Developer & Support Engineer who is deeply passionate about resolving WordPress-related issues and contributing to WordPress. His expertise lies in enhancing user experiences and driving success within the WordPress ecosystem.
Table of Content
- Understanding the WebP Format for Websites
- Why You Should Convert Images to WebP
- Faster Load Times
- Improved SEO and Core Web Vitals
- Reduced Bandwidth and Hosting Costs
- Widespread Browser Support
- Convert All Images to WebP: WordPress Plugin Guide
- Step 1: Activate the ThumbPress WebP feature
- Step 2: Convert Images to WebP in Bulk
- Step 3: Convert Images Automatically
- Step 4: Single Image Conversion
- 8 Best Tips to Optimize WordPress Images
- Wrapping Up
- Frequently Asked Questions(FAQs)
- Q. What is the easiest way to convert all WordPress images to WebP?
- Q. How do I convert all WordPress images to WebP in bulk?
- Q. Is WebP supported by all browsers?
- Q. Will converting images to WebP improve my site’s performance?