Create Shopify Style Checkout in WooCommerce – Complete Step by Step Guide


If you have a WooCommerce store, you’re likely concerned about your online shop’s design and SEO optimization. While WooCommerce default checkout has its perks, it doesn’t have as many features as you may need to attract a loyal customer base.
Baymard’s research on checkout UX found that the average website has 31 preventable usability flaws in its checkout process, which means most stores have room for improvement and development.
However, if you already have a WooCommerce shop and you’re looking to optimize your checkout process, designing it like Shopify will help you achieve higher conversions in no time.
In this article, we will explore everything you need to know about the Shopify style checkout in WooCommerce, and how you can create and customize your default WooCommerce checkout to get the look, feel, and features of Shopify.
Pros and Cons of WooCommerce Default Checkout
The WooCommerce default checkout page may be plain and unoptimized, but there are a couple of important features you won’t be able to get with Shopify and vice versa.
Here are some pros and cons of WooCommerce default checkout to help you design the best Shopify style checkout.
Pros of WooCommerce Default Checkout
- One-Page Checkout: WooCommerce gives you the option to add a one-step checkout process, where all input fields are given on a single page, simplifying the shopping experience.
- Testimonials on Checkout Page: You can add testimonials to the checkout page to boost conversion rates and positively influence buyer decisions. Unfortunately, you cannot include reviews on the Shopify checkout page.
- Cart Editing Options: You can let customers edit their cart directly from the checkout page—such as adjusting quantities or removing items with default checkout from WooCommerce.
- Order Bumps for Increased Value: Adding order bumps on the checkout page lets you promote complementary items and encourage customers to increase their order value with minimal effort.
Cons of WooCommerce Default Checkout
- Complex Checkout Process: The standard WooCommerce checkout is often too complex and lengthy for customers. It also lacks a progress indicator to show them where they are in the checkout process.
- Plain Design: Many WooCommerce themes result in a checkout page that needs visual appeal. Features like call-to-action buttons (CTA), field text, and guest checkout options often require editing for a better user experience.
- Limited Customization: The WooCommerce checkout page has limited options for rearrangement. Customizing this page typically requires coding skills or third-party plugins, which can be complex and cumbersome for new website owners.
- Single-Column Layout: The default layout of the WooCommerce checkout page is a single column, making the page seem too long and daunting.
Create a Shopify Style Checkout in WooCommerce Using CoDesigner
If your online shop still has the WooCommerce default checkout, you may be falling behind on both customer retention and conversions. Fortunately, you can create and customize a Shopify style checkout in minutes using the CoDesigner Pro plugin.
Here’s a step-by-step process to create a Shopify style checkout with CoDesigner –
Step 1: Install & Activate Plugins
Start by installing the following WordPress plugins and activating them from your website dashboard.
Go to your dashboard and navigate here –
Plugins > Add New Plugin > Search Plugins
Note: The checkout builder is only available in the premium version of CoDesigner plugin. To use the Pro features buy the plugin here.
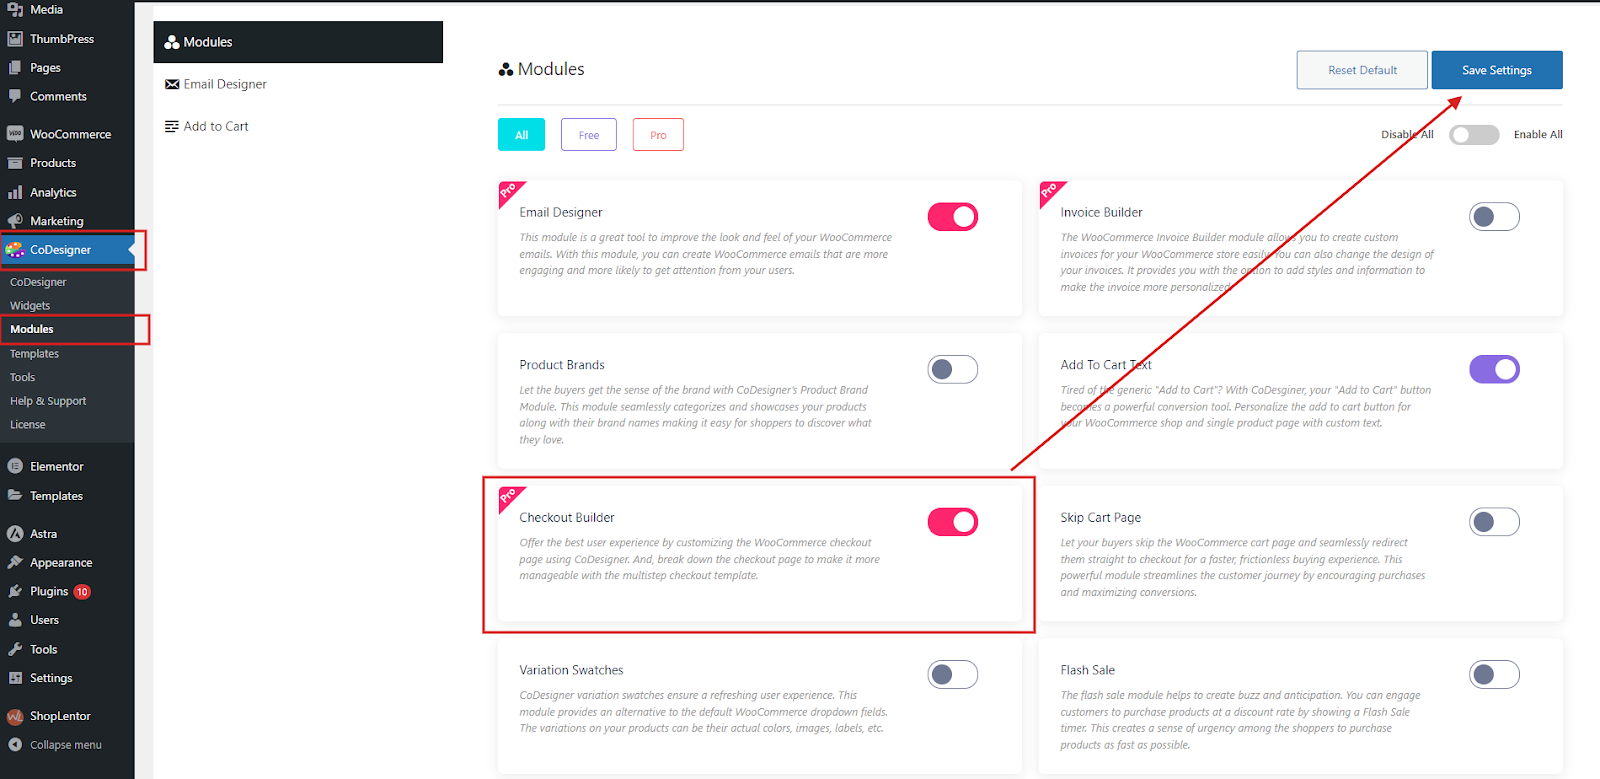
Step 2: Enable Checkout Modules
Go to the CoDesigner Tab and click on the Modules section. Enable the Checkout Builder module and Save Settings.
Step 3: Create a New Checkout Page
Now go back to your WordPress dashboard, and create a new page from the Pages section. Give a name to your new page and click on the Edit with Elementor button.
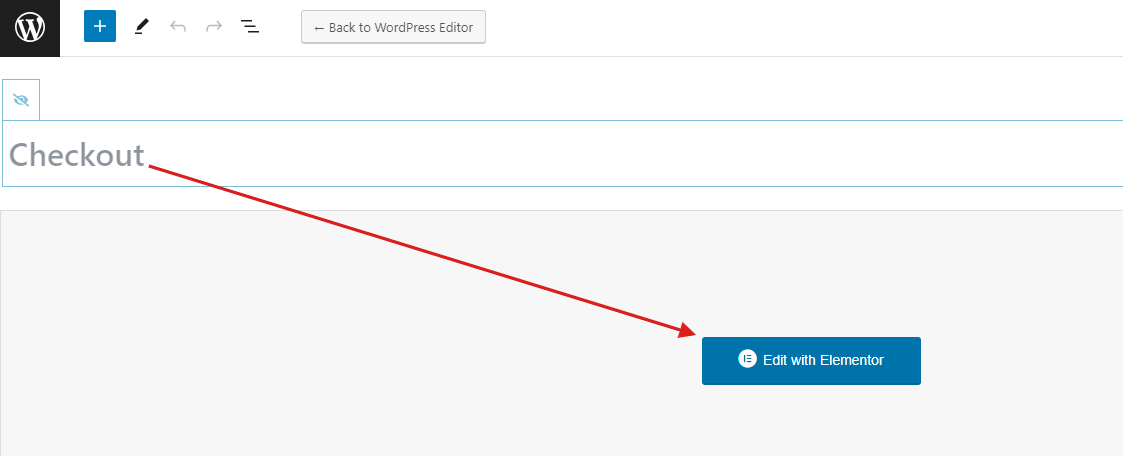
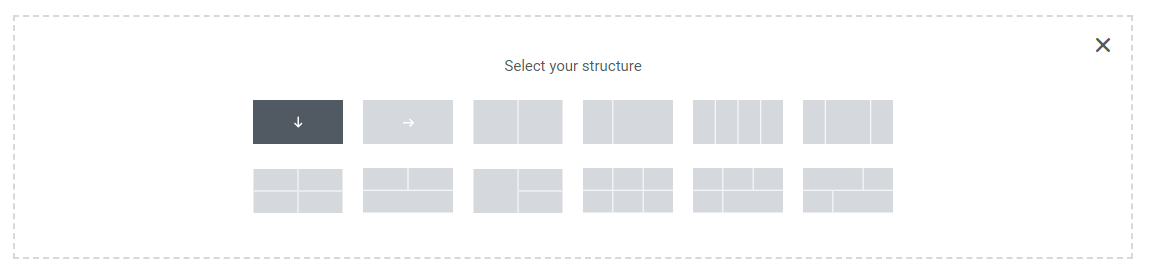
You will be redirected to the editor page for Elementor. From here, you can create a new structure and edit the size of each container to fit your site’s requirements.
Step 4: Add & Customize Checkout Page
In the ‘Elements’ section, search for CoDesigner Checkout and drag and drop it into your container.

- With CoDesigner, select Template 4 to get the Shopify style checkout page.
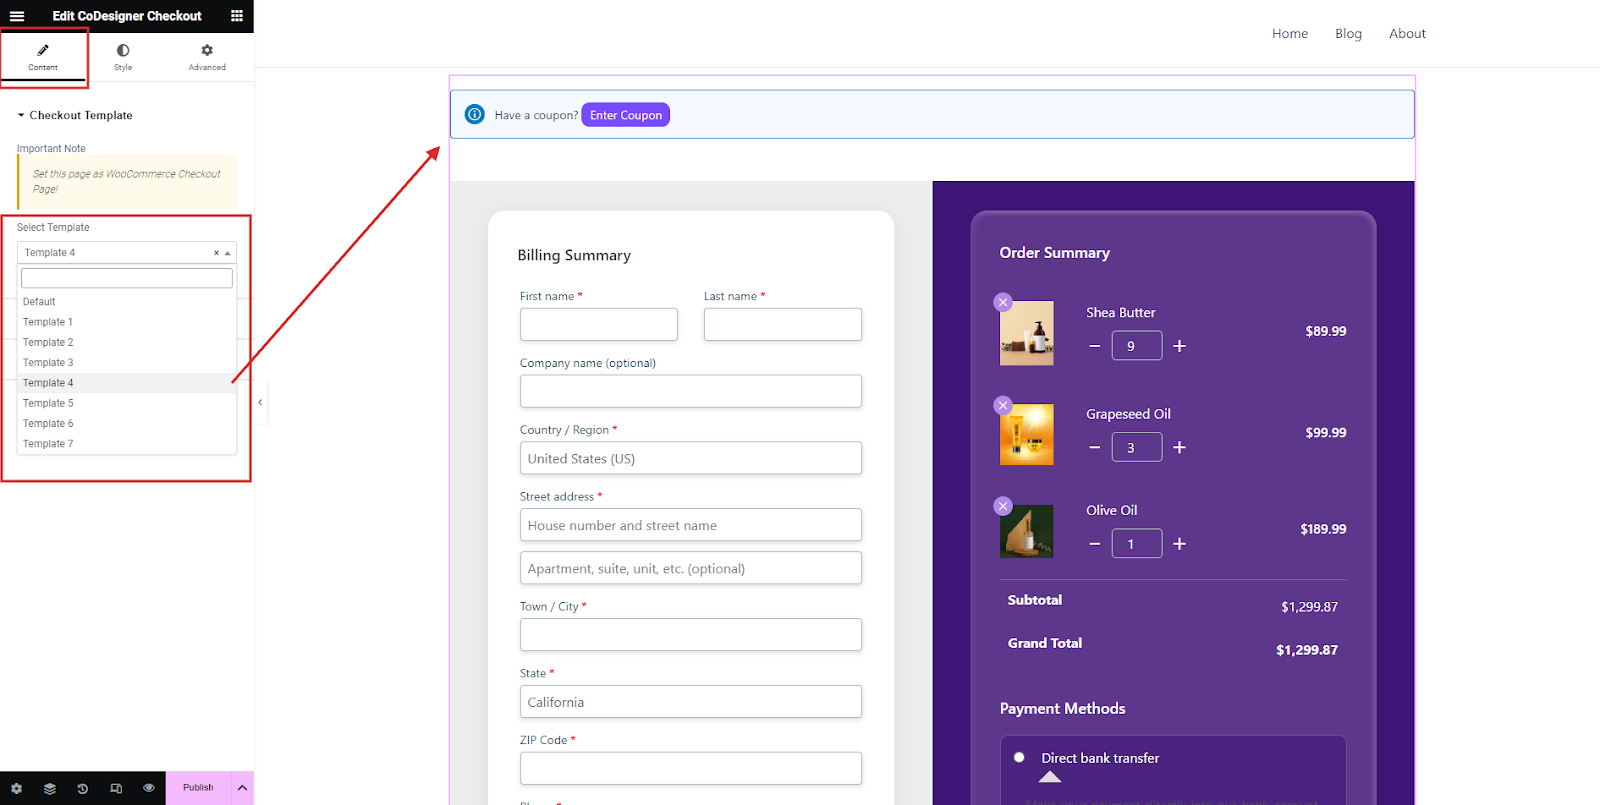
- From the Content section, you have the freedom to customize text for the input fields.
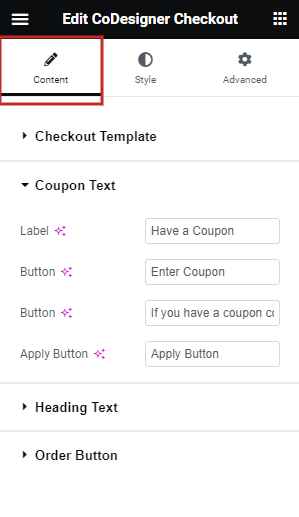
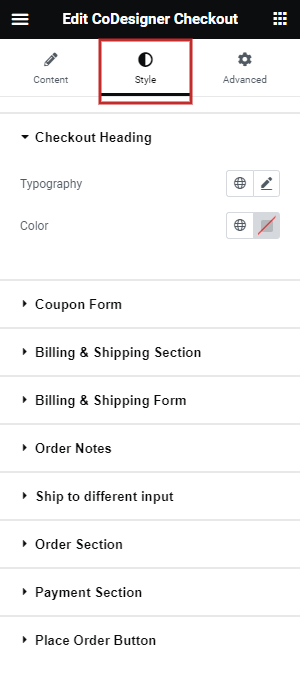
- In the Style section, you can design the look and feel for each of your widgets. You can edit typography, text color, background color, border design, and more.
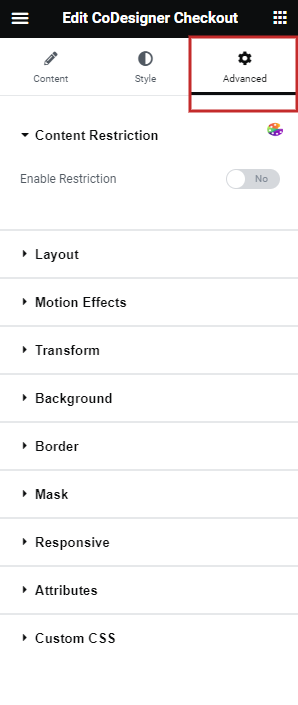
- If you want advanced settings to further customize then you can click the Advanced tab to apply motion effects, mask, positioning, and many more.
Step 5: Save & Update
You can preview your changes, and if you’re happy with your design, simply click on Publish to save your Shopify style checkout in WooCommerce.

Remember to always be in the loop with your checkout analytics, and conduct continuous tests, and adjustments to refine the process and boost customer conversions.
And done! Now you have your fully optimized WooCommerce checkout like Shopify and you’re on your way to maximize conversions and sales for your online shop.
Wrapping Up
WooCommerce is an open-source e-commerce platform created with efficiency and flexibility in mind, yet it falls short in terms of its Checkout. However, the CoDesigner plugin paired with Elementor can quickly level up your online store, by providing you with the layout you need to create a stunning checkout page that’s both conversion-optimized and user-friendly.
Get CoDesigner Pro today to customize every element of your website and make your WooCommerce shop stand out among the best!
Subscribe to Our Newsletter
Get the latest WordPress tutorials, trends, and resources right in your inbox. No Spamming, Unsubscribe Anytime.

Thank you for subscribing to our newsletter!

I'm a seasoned creative content writer with 4+ years of experience in crafting well-researched blogs, web copies, & social media posts in and outside of WordPress. I also enjoy reading fiction, experimenting with different art mediums, and playing with my cats in my spare time.
Table of Content
- Pros and Cons of WooCommerce Default Checkout
- Pros of WooCommerce Default Checkout
- Cons of WooCommerce Default Checkout
- Create a Shopify Style Checkout in WooCommerce Using CoDesigner
- Step 1: Install & Activate Plugins
- Step 2: Enable Checkout Modules
- Step 3: Create a New Checkout Page
- Step 4: Add & Customize Checkout Page
- Step 5: Save & Update
- Wrapping Up