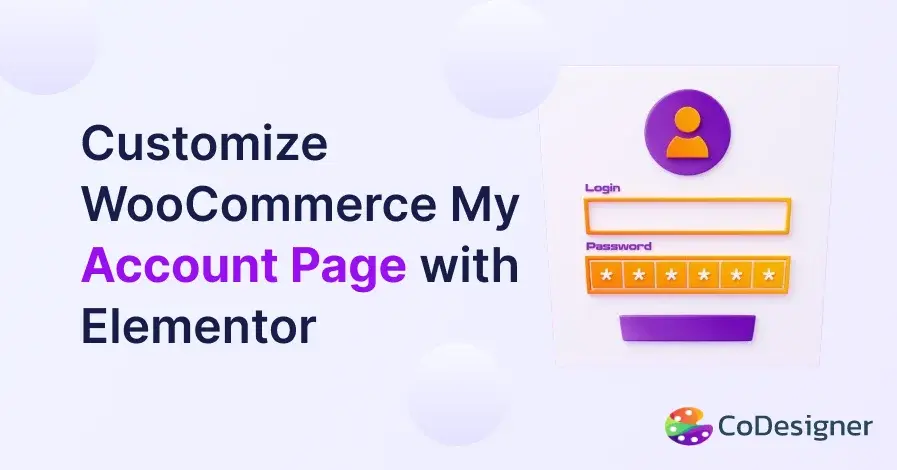
Customize WooCommerce My Account Page with Elementor – Step by Step Guide


A well-designed My Account page is an essential part of any WooCommerce site. It lets customers access their orders, downloads, and account information, all from one convenient page. It also helps repeat customers quickly feel more connected to your shop or brand.
Sticking to the default layout of the WooCommerce My Account page might challenge your ability to keep customers satisfied. Customizer plugins like CoDesigner and Elementor can help you add extra functions to personalize the page with subscriptions, bookings, course enrollments, and many more.
In this article, we will show you how to create and customize My Account page in WooCommerce with Elementor to drive more sales and traffic to your business.
Create And Customize WooCommerce My Account Page in 6 Simple Steps
Making a personalized WooCommerce My Account page is a simple process with CoDesigner and Elementor. You don’t need any coding skills, follow the steps below to get your custom My Account page up and running.
Step 1: Install & Activate Plugins
Make sure you have the following WordPress plugins installed on your site –
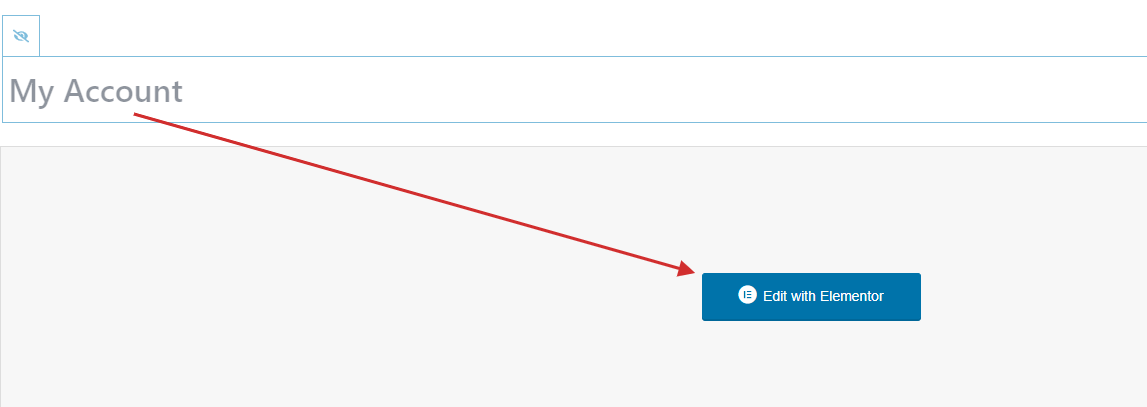
Step 2: Create or Edit My Account Page
Once you delete the WooCommerce My Account shortcode, create a new My Account page or edit the existing My Account page.
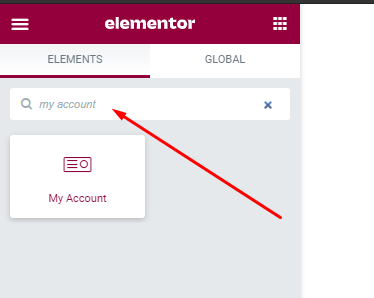
Step 3: Add My Account Widget
Click on ‘Edit with Elementor’ and search for the My Account widget in the ‘Search’ bar under the ‘Elements’ tab. Then simply drag and drop the widget in a new section of the page.
Step 4: Style Tab with CoDesigner
Add a custom tab on the My Account page using CoDesigner. CoDesigner has two basic tab styling options – Tab Design and Active Tab Design.
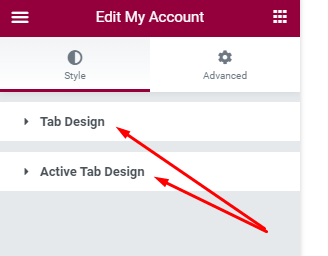
“Tab design” includes the overall visual and interactive elements of all tabs in their default state, while “active tab design” specifically refers to the visual changes applied to a tab to show it is currently selected or in use.
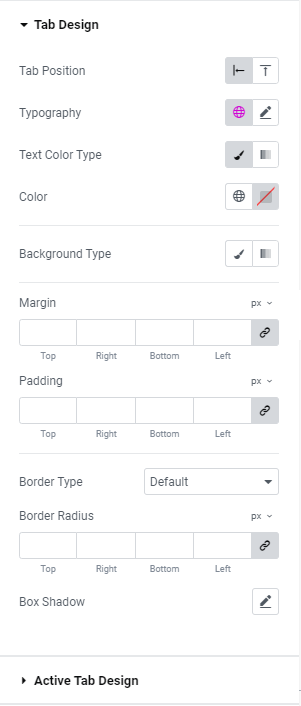
Step 5: Edit Tab and Active Tab Design
With Tab Design and Active Tab Design, you can change Tab Position, Typography, Text Color Type, Background Type, Margin, Padding, Border Type, and Border Radius.
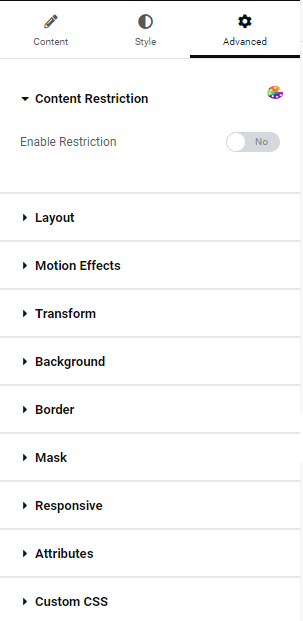
Step 6: Advanced Customizations
If you want advanced settings to further customize then you can click the Advanced tab to apply motion effects, mask, positioning, and many more.
Final Words
Having a custom My Accounts page on your website helps encourage customers to make repeated purchases from your shop. Giving a central hub for users to manage their profiles, orders, wishlists, and addresses, not only helps improve user experience but also streamlines customer support and increases trust in your platform.
So, if you want to give your users a personalized user experience, and build trust and loyalty for your brand; create a personalized My Account page with CoDesigner‘s ready-made widgets and modules today!
Subscribe to Our Newsletter
Get the latest WordPress tutorials, trends, and resources right in your inbox. No Spamming, Unsubscribe Anytime.

Thank you for subscribing to our newsletter!