How to Add Live Sales Notifications in Your WooCommerce Store
Building trust with potential customers is a major challenge for online store owners. With so many options available, visitors often hesitate before making a purchase, fearing scams or low-quality products. Without social proof, convincing them to buy can be difficult.
Imagine a visitor lands on your WooCommerce store, browses your products, but leaves without purchasing because they don’t see any signs of credibility. You lose potential sales simply because shoppers aren’t confident enough to take the next step. Studies show that social proof can increase conversions by up to 15%, yet many store owners miss out on this opportunity.
That’s where live sales notifications come in. By displaying real-time purchases happening on your store, you instantly build trust, create urgency, and encourage hesitant buyers to take action.
In this guide, we will walk you through how to easily add live sales notifications to your WooCommerce store. Let’s dive in!
What is Live Sales Notification?
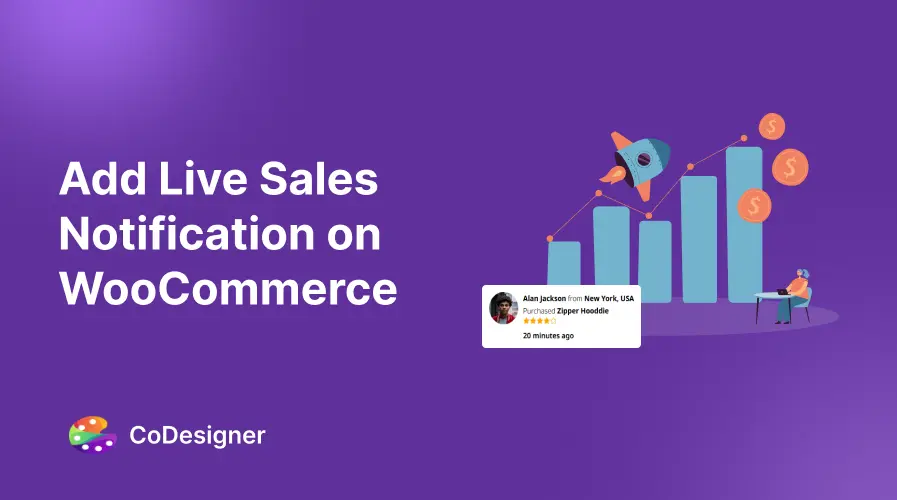
Live sales Notification is an instant pop-up or notice on the website of an online store that pops up to inform individuals browsing the site that a sale has just been made. Such notices typically display the name of the product, where the sale was made, and when the sale was made, and are presented to surfers on the site.
The main purpose of live sales notifications is to create a feeling of urgency and social proof. By showing that other people are buying the same or similar products, these notifications leverage the psychology principle of social proof, where people tend to trust and follow others’ actions. Seeing that others are purchasing gives potential buyers confidence in their decision and can encourage them to make a purchase themselves.
Why Add Live Sales Notifications in WooCommerce?
Have you ever hesitated to buy something online because you weren’t sure if it was a legitimate store? Most of us have. That’s where social proof comes in.
Seeing proof that others have purchased and trust a product makes us feel more comfortable doing the same. Here are more reasons to add live sales notifications to your WooCommerce website –
Builds Trust and Credibility
Adding live sales notifications to your website demonstrates to potential customers that your store is reliable and trustworthy.
You can also boost this effect by using social reviews and testimonials as additional social proof of your products. When people see this real-time information, they feel more confident in making a purchase.
Encourages Impulse Purchases
If you have proof that people are buying from your site, it can create a sense of urgency and excitement for your customers. This concept is often referred to as the Fear of Missing Out (FOMO).
Live notifications amplify this sense of urgency, prompting customers to make quicker decisions, which can lead to more impulse purchases. The dynamic nature of live notifications makes your store feel more active and positively influences the buying behavior of potential customers.
3 Easy Methods to Add Live Sales Notifications in WooCommerce
Live sales notifications are a powerful tool to showcase social proof and demonstrate that others are actively buying your products. While you can implement this using some coding know-how, there are free and pro WooCommerce add-ons to make this process beginner-friendly.
Here are three effective ways to implement them –
Directly from the Website
Step 1: Install CoDesigner
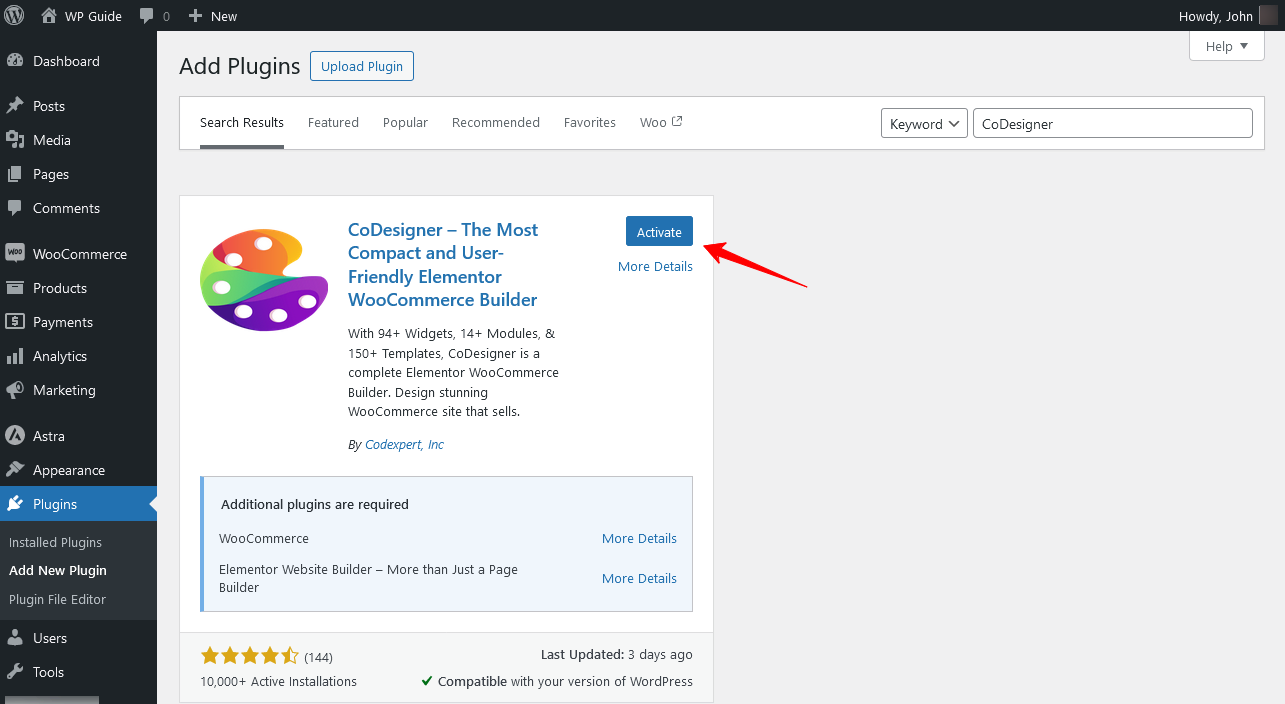
The first step is to install and activate the necessary plugins, including Elementor, CoDesigner, and CoDesigner Pro. These plugins will enable you to add live sales notifications in WooCommerce.
Step 2: Enable the Live Sales Notification Widgets
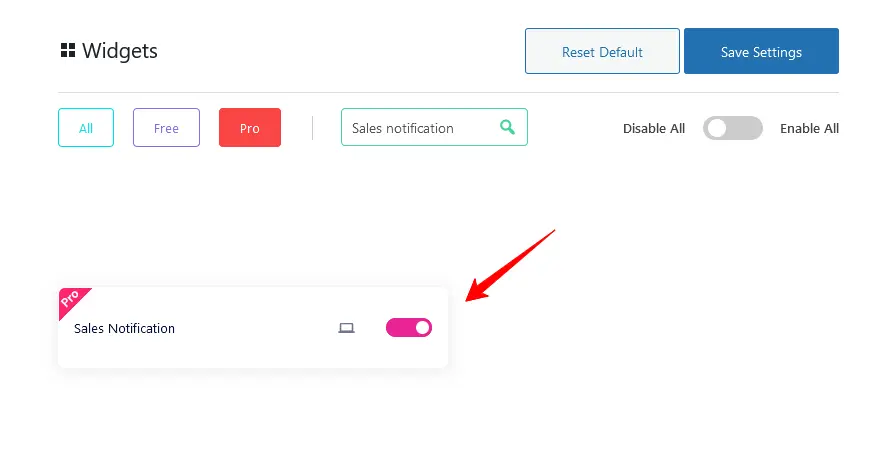
Once you have successfully installed the plugin, go to CoDesigner > Widgets > Sales Notification and enable the widgets.
Don’t forget to click the Save Settings button, once you’re done.
Step 3: Customize Sales Notification Widgets
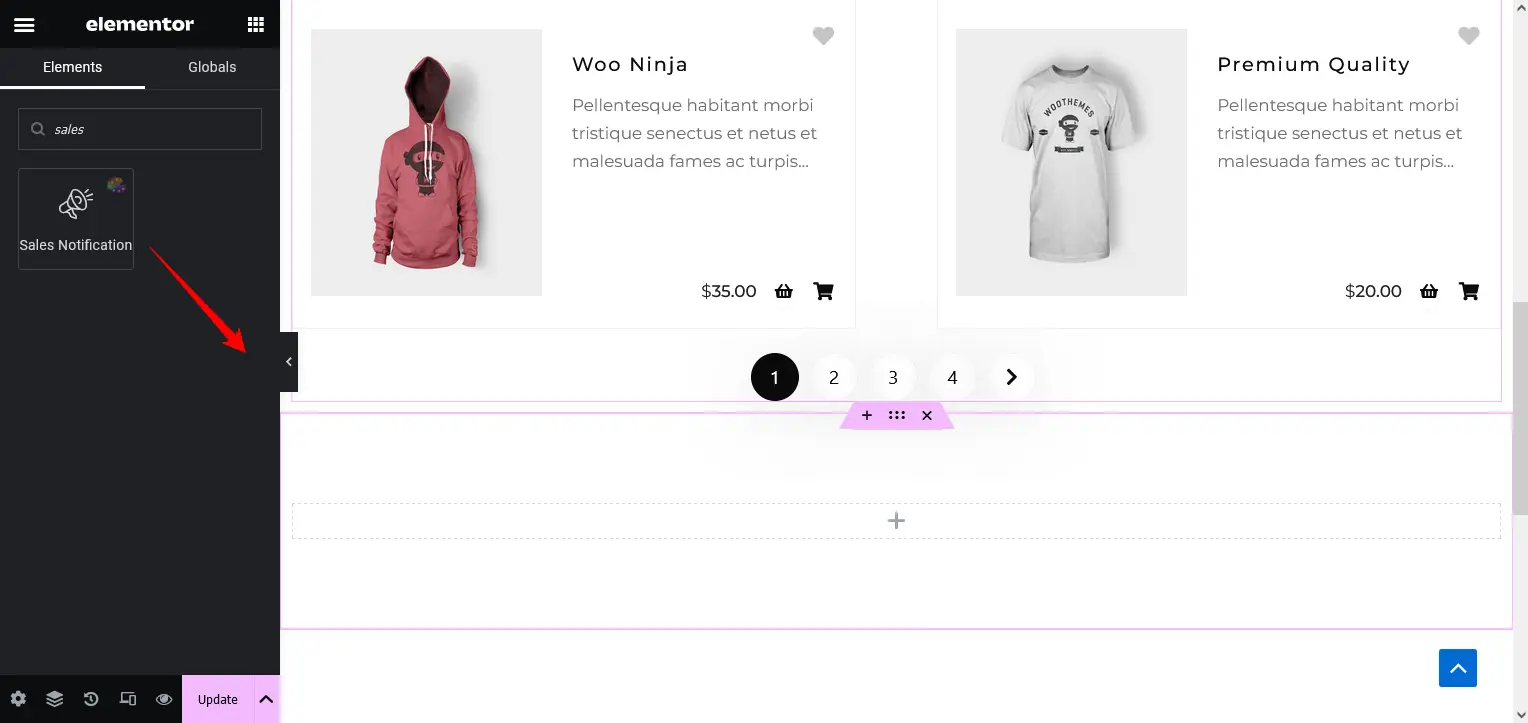
You can add a live sales notification to WooCommerce on any page of your website. In this instance, we’re using the shop page template.
Create a new section below your shop page and drag the Sales Notification widget from CoDesigner to the new section.
Before starting the customization, ensure that your settings are properly configured.
First, make sure your content source is set to “From This Site.” Next, enable the “Link to Product” button. Finally, set the content type to “Real Data.“
These settings are essential for proper implementation of live sales notifications.
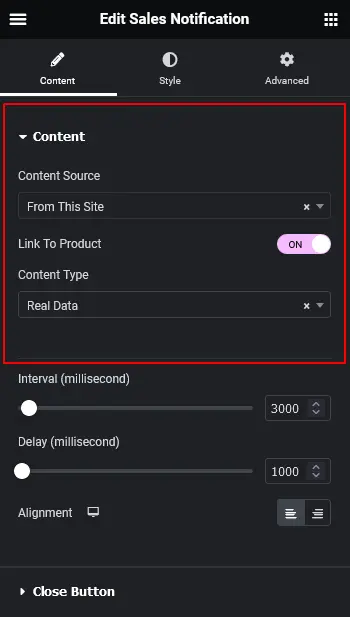
Besides these details, you can also add Numbers of Orders, Specific Product Notifications, Order statuses, and Intervals to each notification.
Step 4: Preview and Publish Changes
Finally, your customization is complete! Here’s a video to show how you can check out your new changes –
Add Live Sales Notification on WooCommerce Using WordPress REST API
With CoDesigner, you can use API to add live sales notification in your WooCommerce store. If you are new to creating a WordPress API, then you can follow the Beginner’s Guide to the WordPress REST API by Hubspot to get started.
If you have already created the API to collect order data, open the page where you are using the CoDesigner Live Sales Notifications widget.
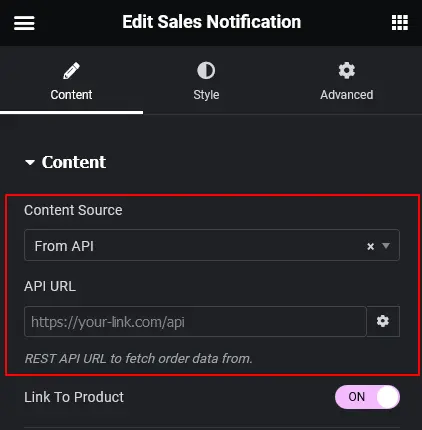
Set the content source to “From API“. This will show you new fields to where you can add data and customize attributes. From here, fill in the necessary information and click the Update button to save your changes once you’re done.
Create Fake Sales Notifications in WooCommerce
Suppose you have started a new online eCommerce business, and a few orders are not enough to show on live notifications. In this case, you can use fake sales notification to rake in the sales. Here’s how you can add fake sales notifications for WooCommerce –
Open the page where you have added the CoDesigner Sales Notifications widget. Set the content type to “Fake Data” or “Both” to include both real and fake sales notifications. Finally, save the changes to apply the updates.
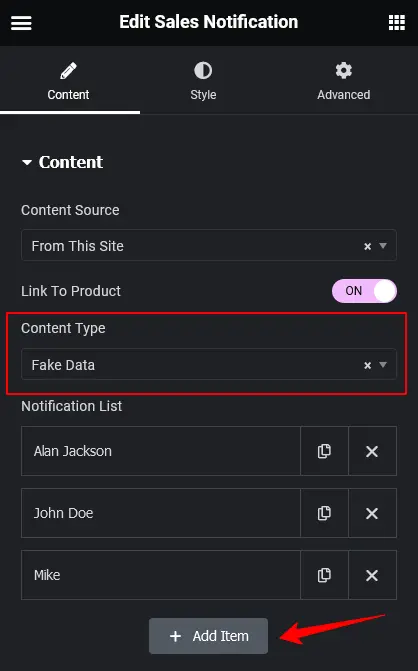
You can easily add multiple reviews by clicking on the “Add Item” button, which will automatically generate a new review entry. You can then customize the review by editing the person’s name, profile image, address, and product link to suit your needs.
Final Words
In this blog, we explored how live sales notifications can use the power of social proof to build trust and credibility for your WooCommerce store. Remember, trust is essential for converting visitors into loyal customers. Live sales notifications showcase real customer activity, demonstrating your store’s legitimacy.
However, for new stores with limited sales history, we explored alternative strategies like highlighting real reviews or showcasing popular products. Regardless of the method, focus on building genuine social proof for long-term success!
Frequently Asked Questions (FAQ)
Q. What is a Sales Notification Widget?
Sales Notifications allow your site visitors to learn about a recent purchase from your website.
– Add our CoDesigner & CoDesigner Pro to your Website.
– Enable the Sales Notifications, and add this widget to your shop page using Elementor.
– Follow the above steps described in this blog.
– After customization, Save the changes.
– Finally, your Live Sales Notification is live.
Yes. CoDesigner is fully compatible with popular Plugins and Themes, including Elementor, WooCommerce, Hello Elementor, Astra, and more.
Subscribe to Our Newsletter
Get the latest WordPress tutorials, trends, and resources right in your inbox. No Spamming, Unsubscribe Anytime.

Thank you for subscribing to our newsletter!
Table of Content
- What is Live Sales Notification?
- Why Add Live Sales Notifications in WooCommerce?
- Builds Trust and Credibility
- Encourages Impulse Purchases
- 3 Easy Methods to Add Live Sales Notifications in WooCommerce
- Directly from the Website
- Add Live Sales Notification on WooCommerce Using WordPress REST API
- Create Fake Sales Notifications in WooCommerce
- Final Words
- Frequently Asked Questions (FAQ)


