How to Remove Related Products in WooCommerce
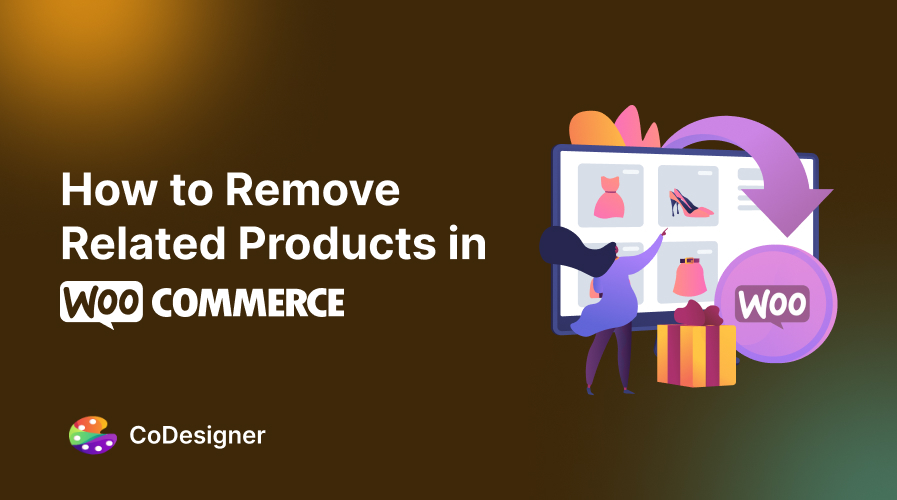
While related products are a great way to showcase your variety and potentially boost sales, they might not always be the right fit for your store’s design or strategy.
This guide shows you how to manage related products in WooCommerce and give you the power to both create and customize them, or if needed, completely remove them from your product pages.
Want to know more? Stay tuned!
What are WooCommerce Products and Related Products?
WooCommerce lets you sell a wide range of products and services. This includes physical goods like clothing and shoes, digital downloads like ebooks and software, or even services like consultations and subscriptions.
While browsing your products, customers might appreciate suggestions for similar or complementary items. This is where related products come in! They act as personalized recommendations which helps customers discover more of what they might be interested in.
Add Related Products in WooCommerce for Free
Before jumping to the main topic, let’s learn how to add related products in WooCommerce –
Step 1: Install and Activate Necessary Plugin
Start by installing and activating CoDesigner in your WooCommerce store.
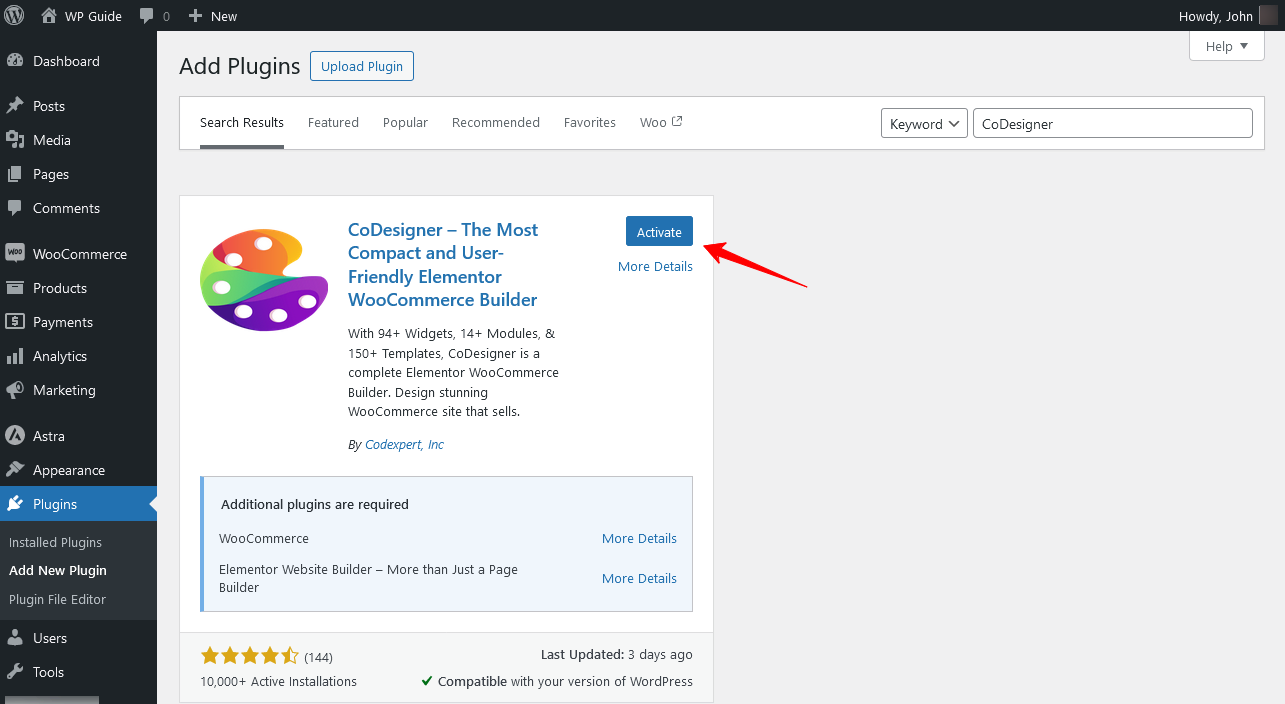
Note: WooCommerce and Elementor are required plugins for CoDesigner.
Step 2: Enable Related Widgets
Go to the CoDesigner > Widgets menu and enable the Single Products widget.
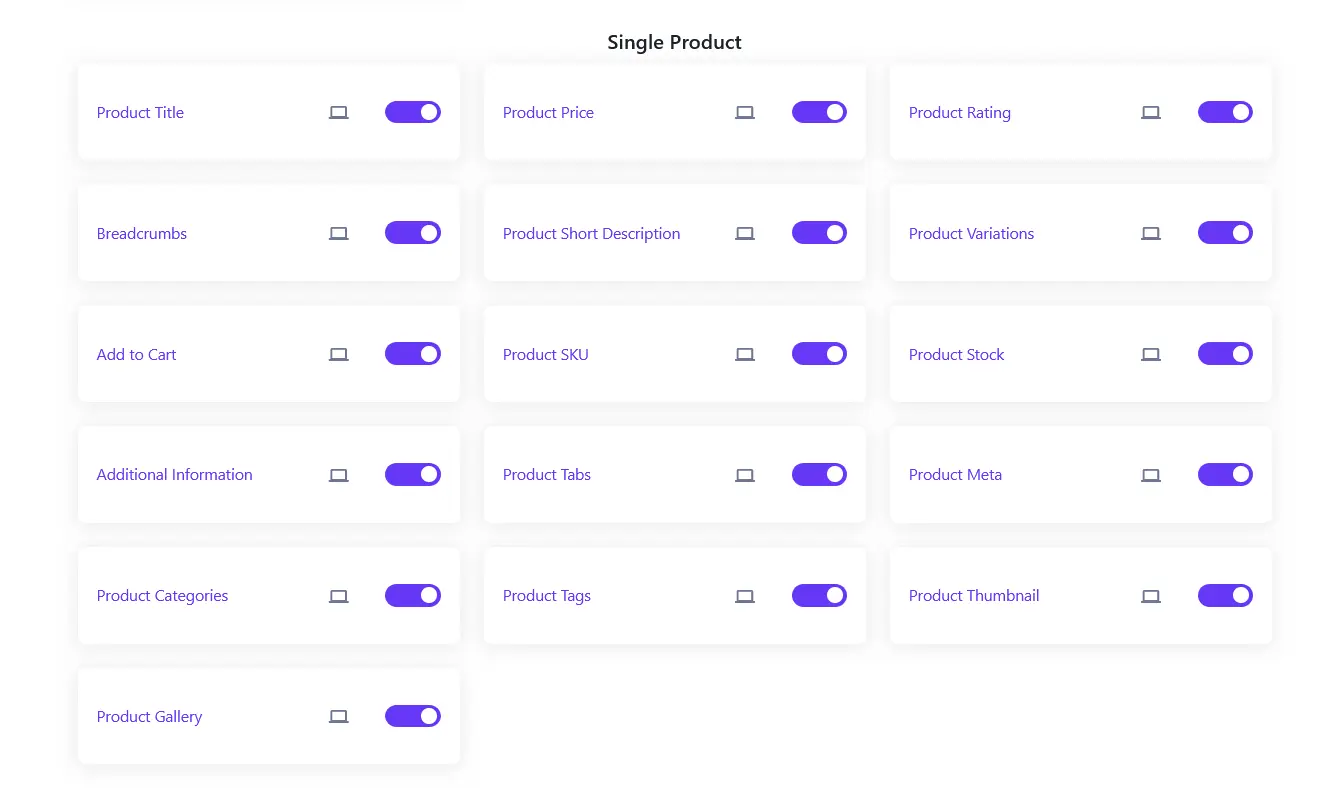
Also, enable the Related Products widgets

Step 3: Add Shop and Related Products Widgets
Create a new template by navigating to Dashboard > Templates > Add New and select CoDesigner Single Product. And open the new template with Elementor.
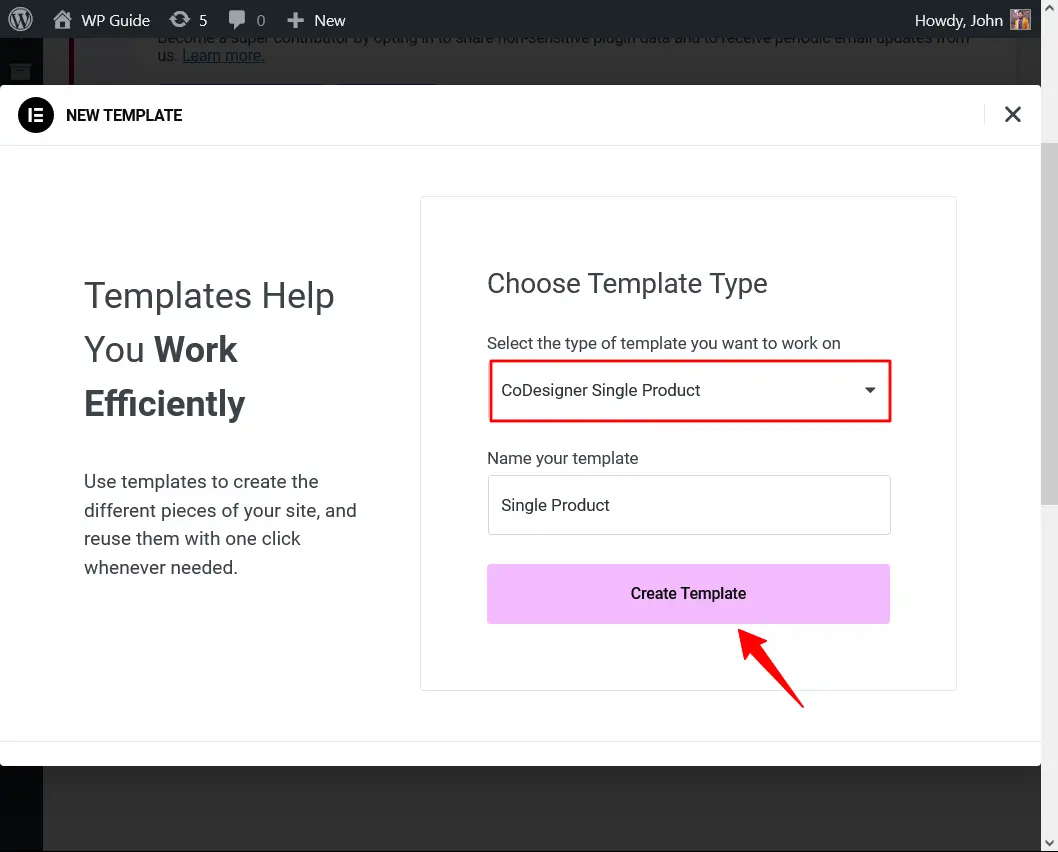
In Elementor, drag the Related Products widgets onto the desired sections below the single product page section.

Step 4: Customize Related Products Widget
Select any section to start customizing. From the Related Products section, you can customize everything from content, styles, advanced, and more. CoDesigner lets you to choose specific products including Current, Custom, and Cart Items and customize its text, background, and typography.
Finally, assign this template to your shop products adding conditions from Elementor settings.
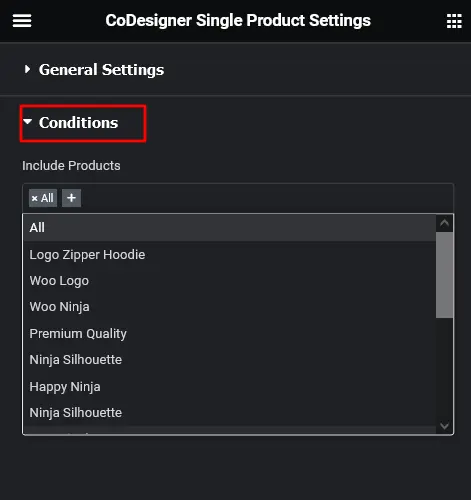
Note: Make sure you have assigned the Single product template in WooCommerce products.
2 Ways to Remove WooCommerce Related Products
Now that we know the process of creating a stunning WooCommerce shop page and related products section. We’ll show you how to remove related products from that section. While there are multiple ways to do this, we’ll go through the easiest ones –
Step 1: Remove Related Products in WooCommerce
This is the easiest part of removing related products from your WooCommerce store. Start by going to Templates, and locate the Single Product Template you’ve created, hover over it and click on the Edit with Elementor button
From the editor page, manually remove the related products section from the Elementor section.
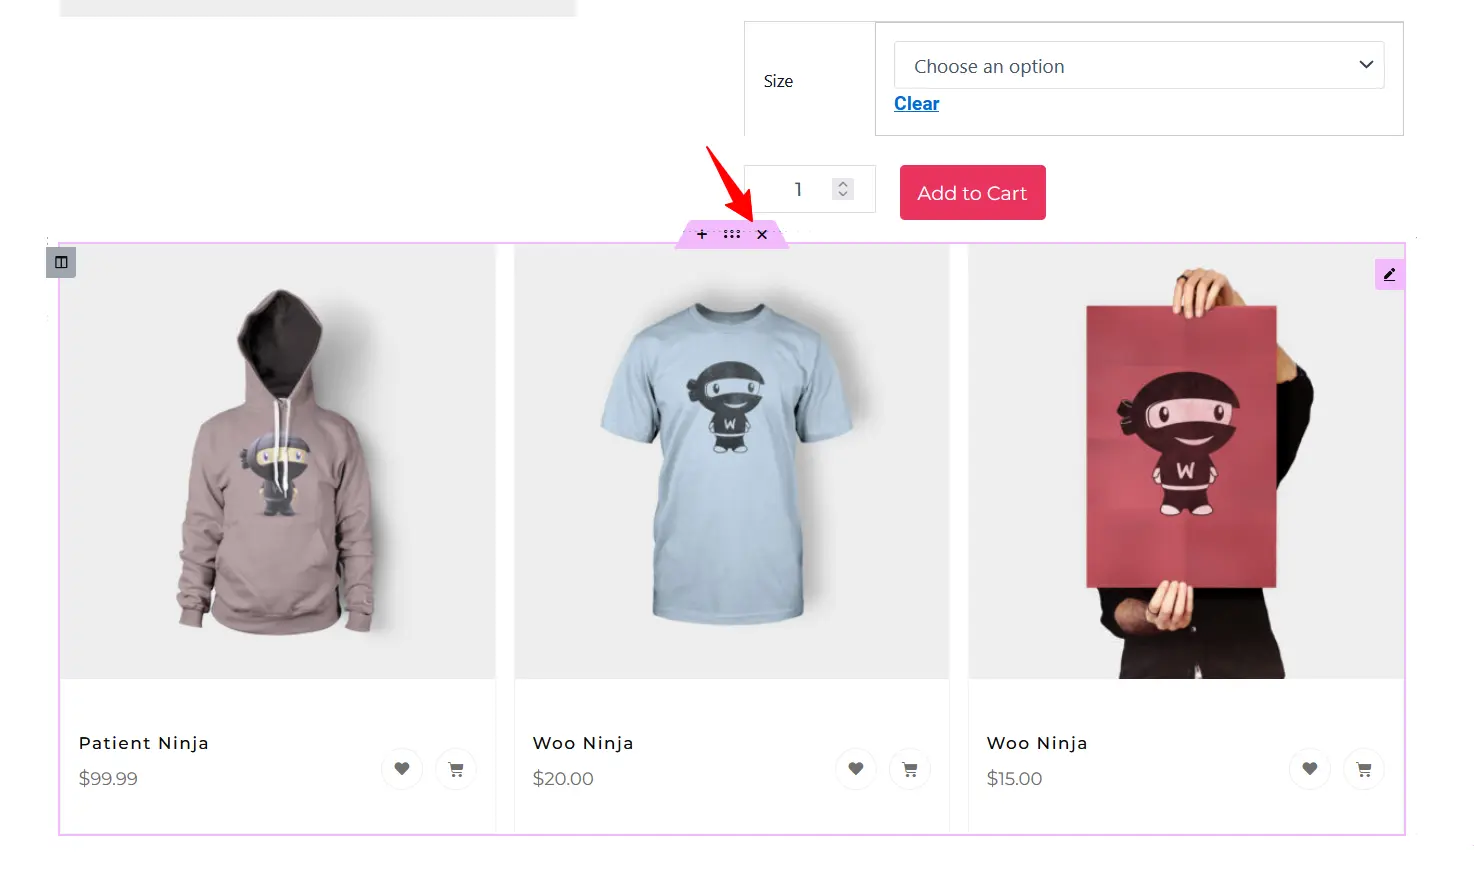
Step 2: Remove Related Products with Custom Code and CSS
This method is for those who have coding knowledge or have studied in that field. If you don’t have experience with coding, you can skip this part.
- Create a Child Theme
I always request my readers to not to edit the parent theme files, as you may lose them when the theme gets updated. New updates can often override important old files, which is why, it’s best to start with a child theme.
To create a child theme, Install the WP Child Theme Generator Plugin and activate it.
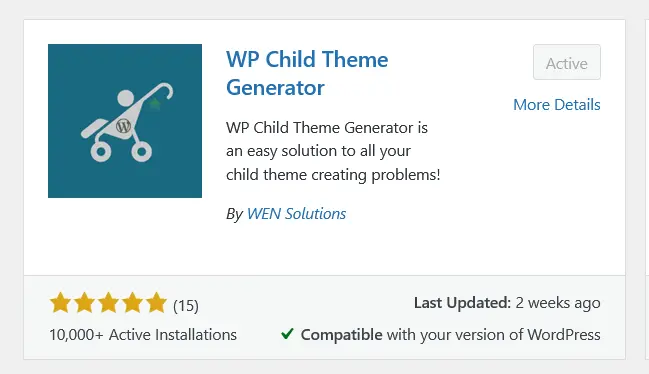
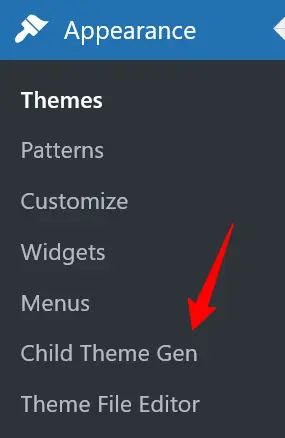
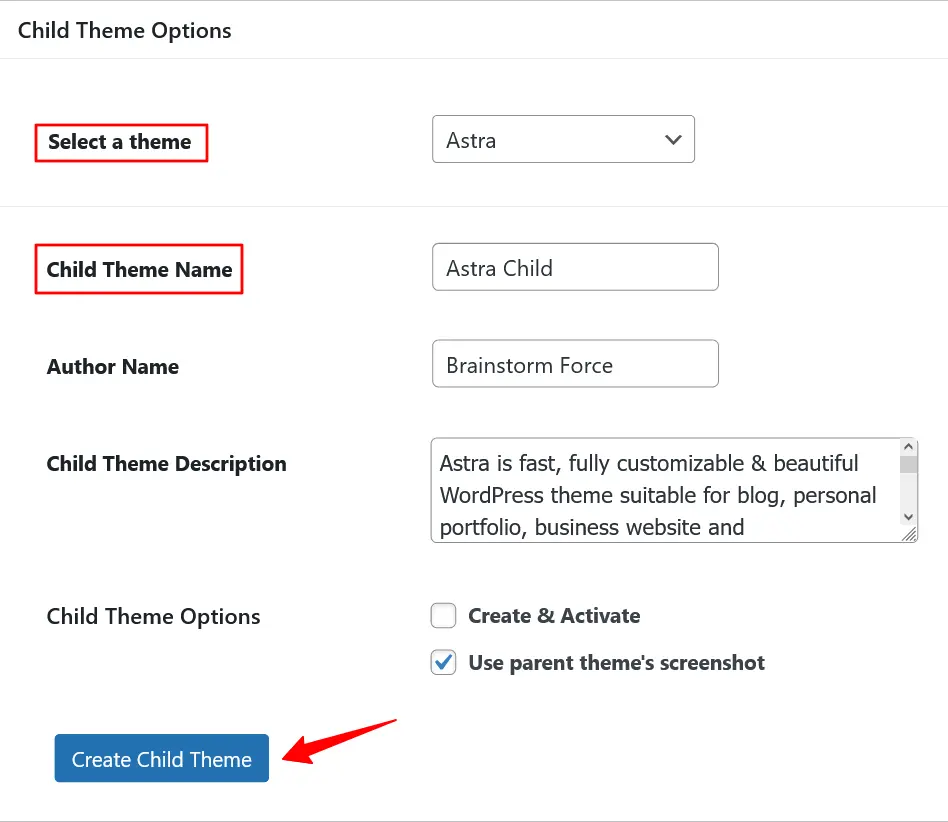
Then go to the Child Theme Gen Submenu from your dashboard and select the necessary fields on that page. After that, click on the Create Child Theme button.
Note: You need to select the theme, child theme name, and configure the options.
Once you’re done creating a child theme, go to Theme Editor from Appearance. Select function.php from the right column and copy the code from below.
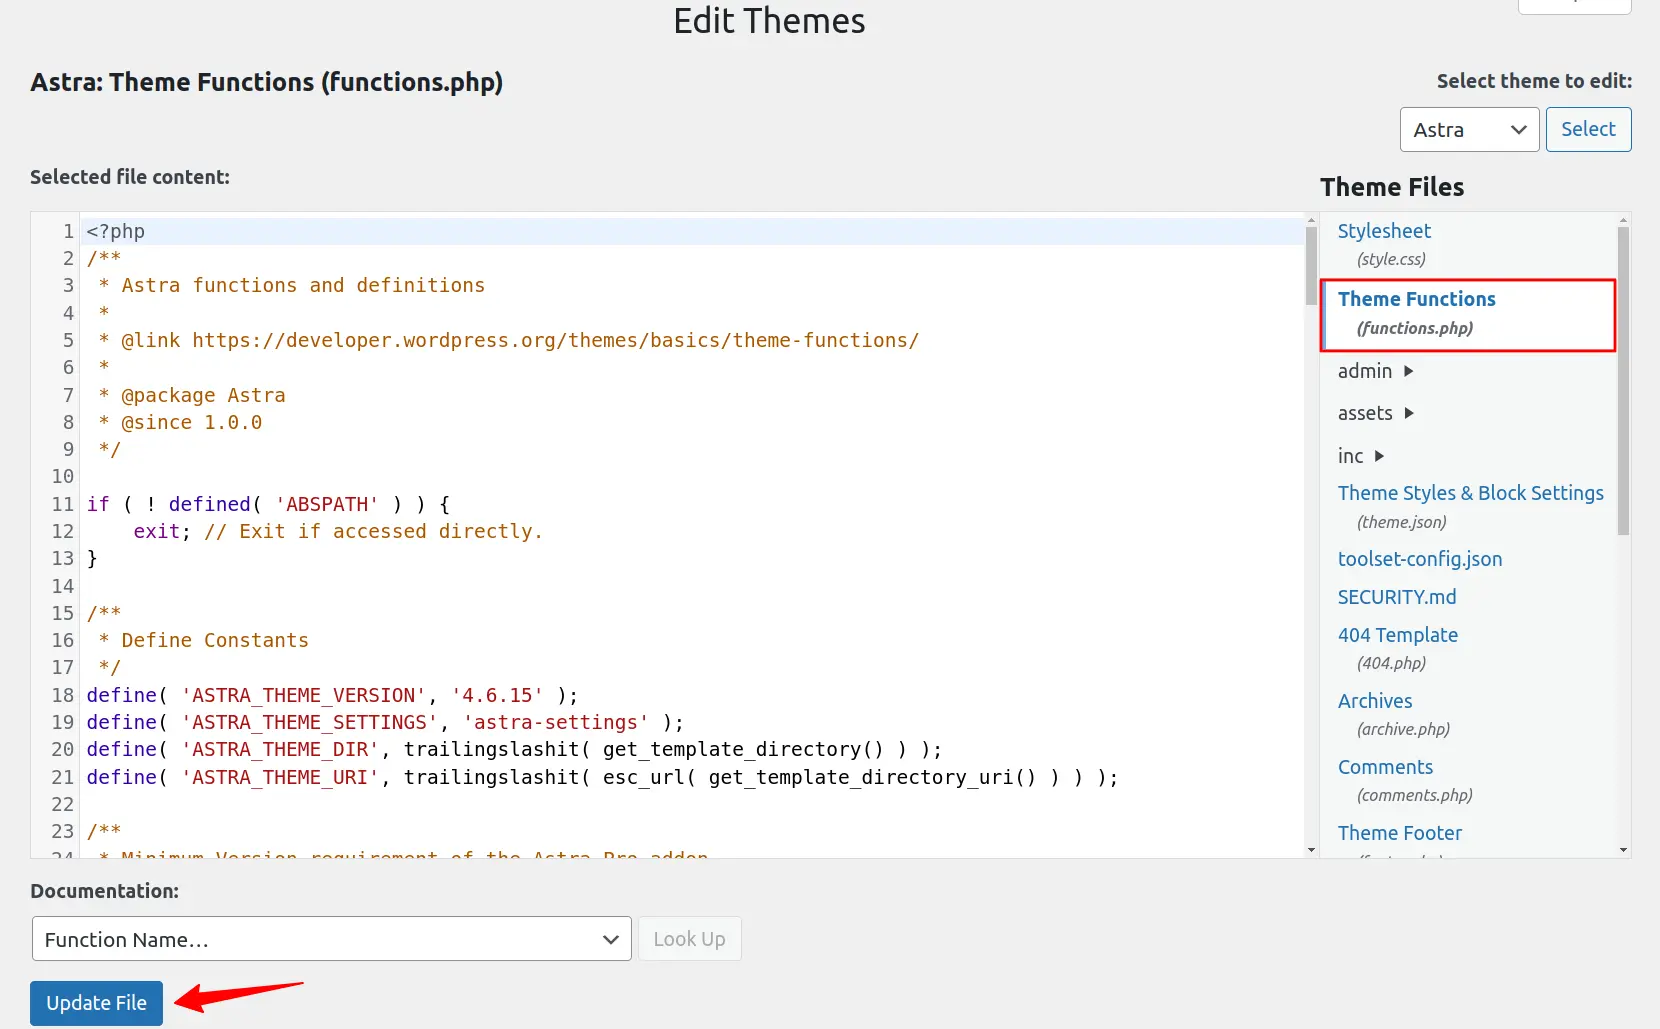
Paste the code into the child theme function.php file and click on the Update button to save the changes you’ve made.
- With Custom CSS
Using a custom CSS is the default way to remove related products in WooCommerce. To start, navigate to Appearance > Customize from your dashboard
Press the Additional CSS menu and add the following code –
.related.products { display:
none;
}
Step 3: Hide or Remove Related Products with a Premium Plugin
If you don’t want to try a custom CSS, this method can be a good alternative. To do this, go to Plugins > Add New and Install the NS remove related products for WooCommerce.
When you activate the plugin, a new menu will appear on your site dashboard. Go to that menu and set the settings to remove related products.
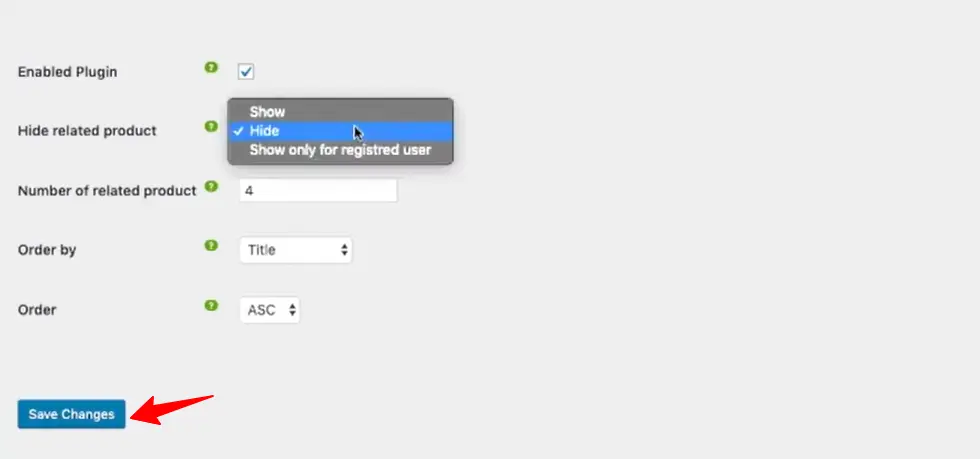
Note: This plugin hasn’t released any new updates for a long time. So, it might conflict with other themes and plugins.
Wrapping Up
While displaying related products in your WooCommerce store can be a powerful tool for boosting sales and enhancing the customer experience (easily done with CoDesigner!), there are situations where you might want to take them off the table.
This guide dives into the world of customizing related products in WooCommerce. We covered both sides of the coin: how to use them effectively and how to remove them entirely when necessary.
So, thank you for reading this far! If you have any questions about managing related products in your store, feel free to leave a comment below.
Frequently Asked Questions (FAQs)
What is a related product?
Related products in WooCommerce are items that you show your customers based on what they are currently viewing. These suggestions are meant to help them find similar products potentially enhancing user experience and driving more sales.
For example, if someone is looking at a laptop, related products might include laptop bags, Windows CDs, external hard drives, or laptop stands.
How do I remove related products in WooCommerce?
To remove WooCommerce related products:
- Install the necessary plugins on your site
- Go to the Shop page and open it with Elementor
- Finally, remove the related product section from the Elementor
How do I remove stock-out products from related products in WooCommerce?
To remove out-of-stock product in WooCommerce:
- Go to WooCommerce > Settings > Products from your site dashboard
- Then click on the Inventory tab
- On that page, enable Hide out of stock items
- Finally, save this setting.
Subscribe to Our Newsletter
Get the latest WordPress tutorials, trends, and resources right in your inbox. No Spamming, Unsubscribe Anytime.

Thank you for subscribing to our newsletter!
Table of Content
- What are WooCommerce Products and Related Products?
- Add Related Products in WooCommerce for Free
- Step 1: Install and Activate Necessary Plugin
- Step 2: Enable Related Widgets
- Step 3: Add Shop and Related Products Widgets
- Step 4: Customize Related Products Widget
- 2 Ways to Remove WooCommerce Related Products
- Step 1: Remove Related Products in WooCommerce
- Step 2: Remove Related Products with Custom Code and CSS
- Step 3: Hide or Remove Related Products with a Premium Plugin
- Wrapping Up
- Frequently Asked Questions (FAQs)


