How to Replace an Image in WordPress

Fresh visuals are crucial for any online business, from clothing stores to supermarkets. Luckily, WordPress makes adding images and media a breeze. But what happens when you find a better image and need to update your existing ones?
Forget the hassle of adding and removing – this guide will show you how to replace images within your WordPress site. Forget the hassle of adding and removing – we’ll show you how to seamlessly swap out outdated images for a more polished and up-to-date website.
Why You Can’t Replace Images in WordPress
While adding images in WordPress is easy, replacing existing ones requires a different approach, as WordPress doesn’t come with a built-in “replace” function for media.
When you upload an image, WordPress creates various-sized versions for different display purposes, all with unique URLs.
Simply swapping the image file would break these links, potentially causing broken images throughout your site. This is why additional methods, like the one we’ll explore next, are needed to maintain a smooth user experience.
3 Ways to Replace Images in WordPress
- Using a WordPress Plugin
- With Gutenberg Editor
- In WordPress Classic Editor
1. Using a WordPress Plugin
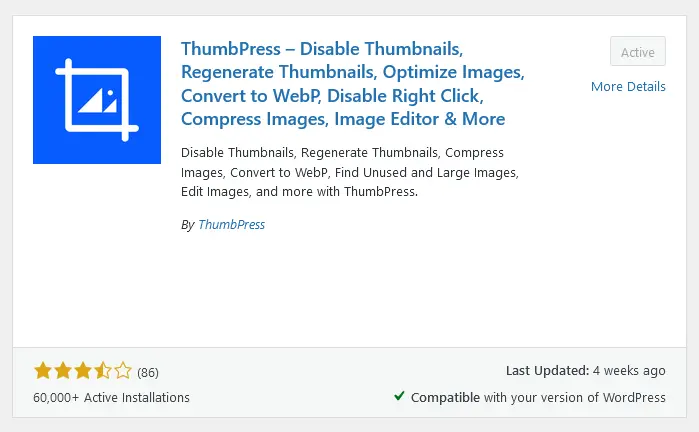
Step 1: Install and Activate ThumbPress
To replace images in WordPress, you need to first install ThumbPress and ThumbPress Pro – as Replace Images is a premium feature of ThumbPress.
Step 2: Setup Necessary Settings
You need to enable the Replace Images with the New Version module. Go to ThumbPress > Modules and enable the button.

Step 3: Start Replacing Images
To replace a specific image, go to Media Library and open an image you want to replace. You will find a Replace New File button at the bottom after opening the image.
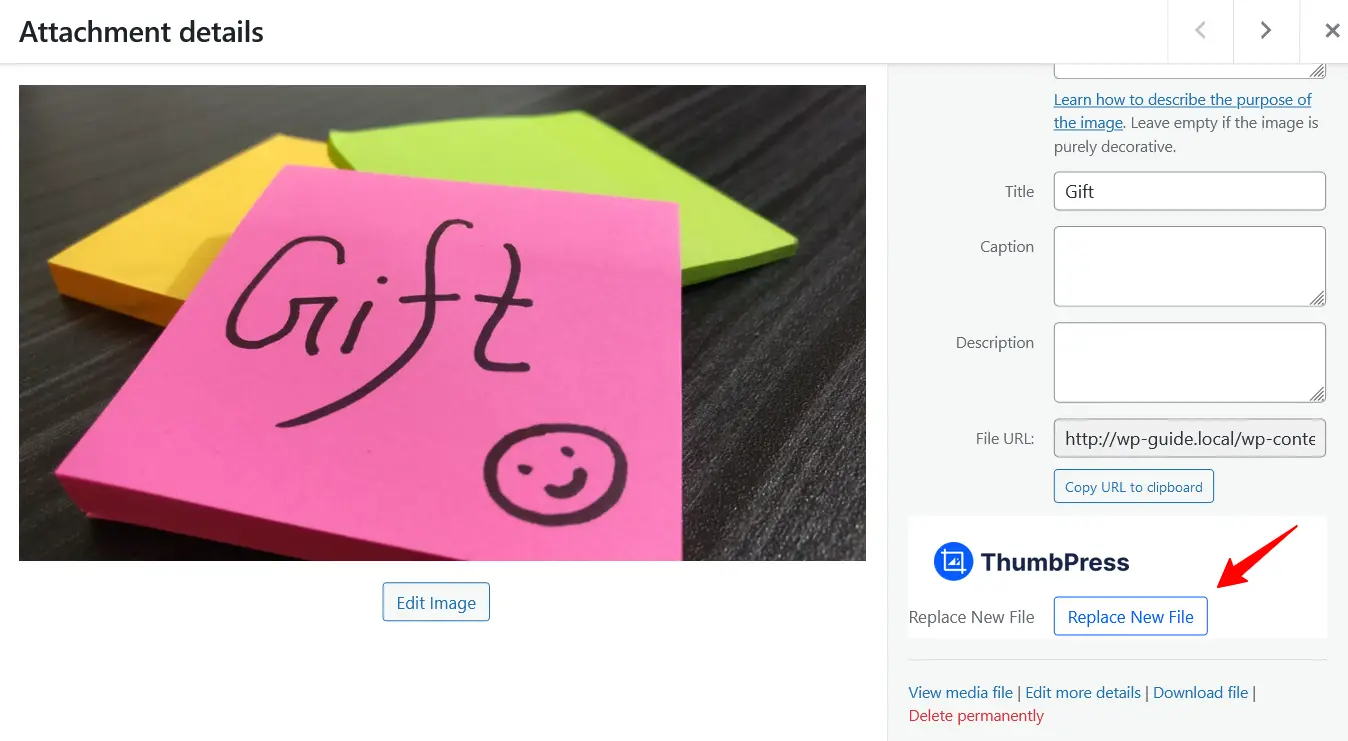
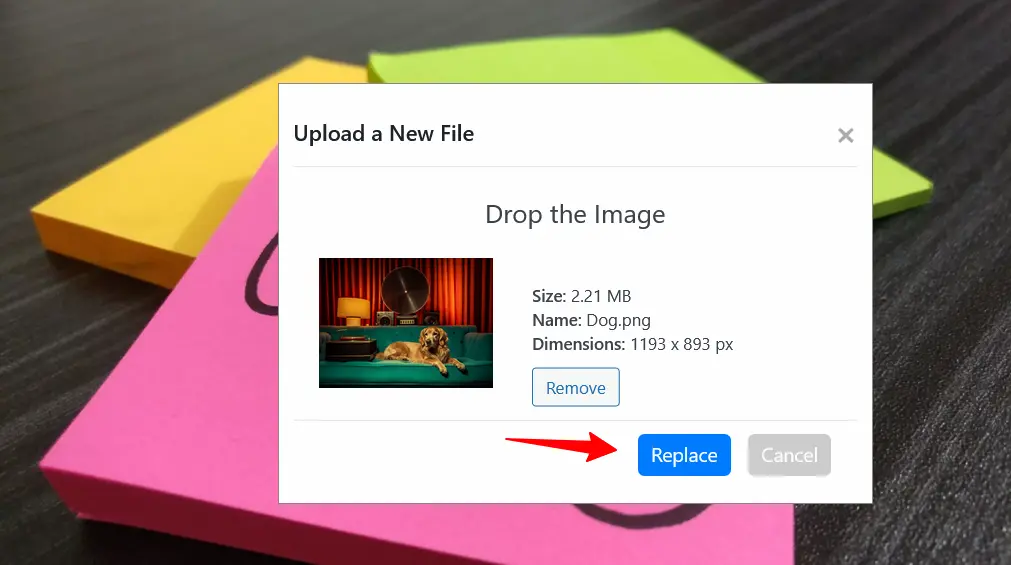
Now click the button and a popup will appear. Click on Browse to upload the new file you want to replace with the outdated one.
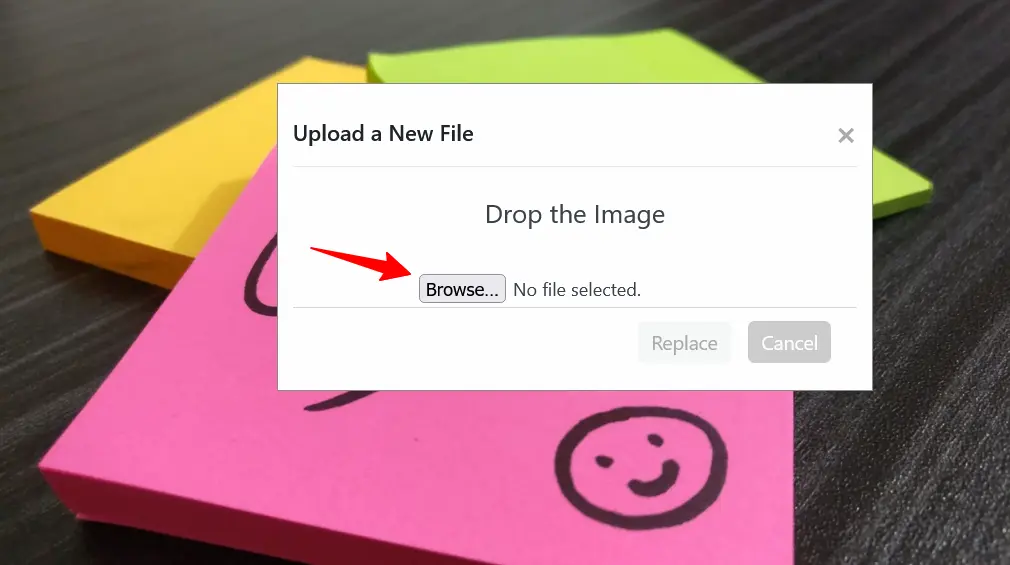
Finally, click on the Replace button to upload the new image to your website.
2. Replace an Image from Gutenberg Editor
Step 1: Open Media Files
Log in to your WordPress site and navigate to the page or post that features the image you want to replace.
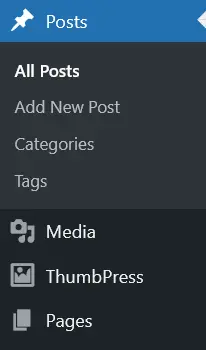
Step 2: Select the Image to Replace
Select any image you want to replace then click on the Replace button.
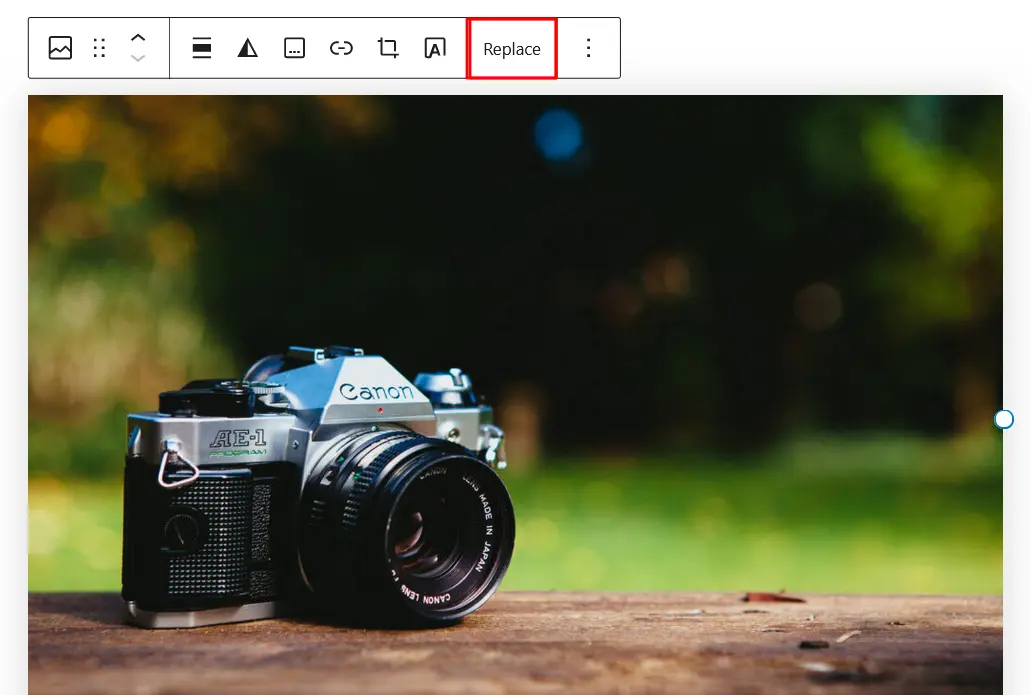
Step 3: Replace Image and Save Changes
Replace the image and click on the Update button to save the changes. You can replace the image from the media library or even upload a new image altogether.
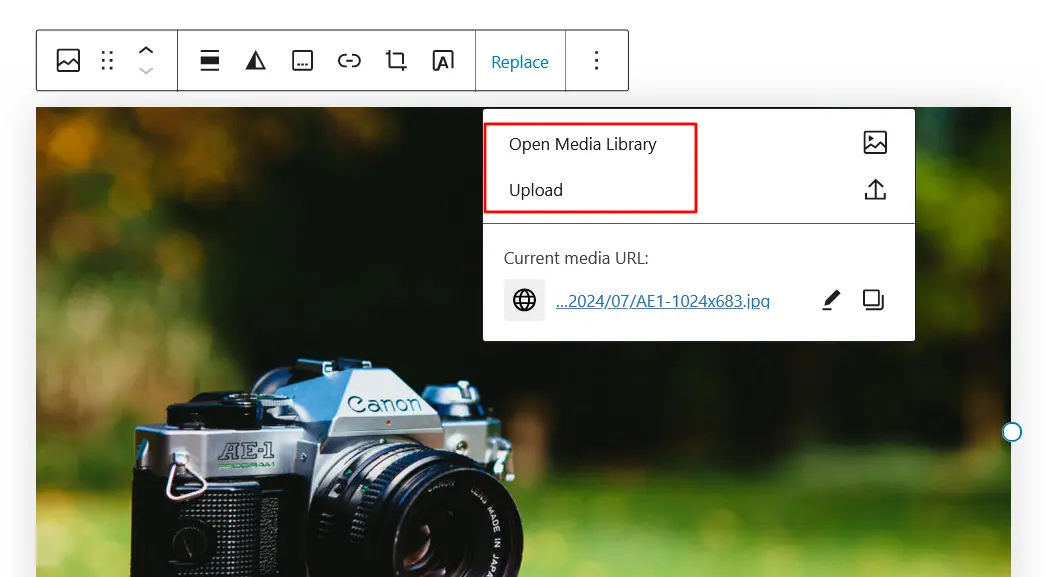
3. Replace an Image from Page/Post in Classic Editor
Step 1: Open a Page/Post or Media Library with the Editor
Go to Pages and open the page that features the image you want to replace.

Step 2: Select the Image to Replace
Click the image you want to replace. Then click the Replace button from the menu.
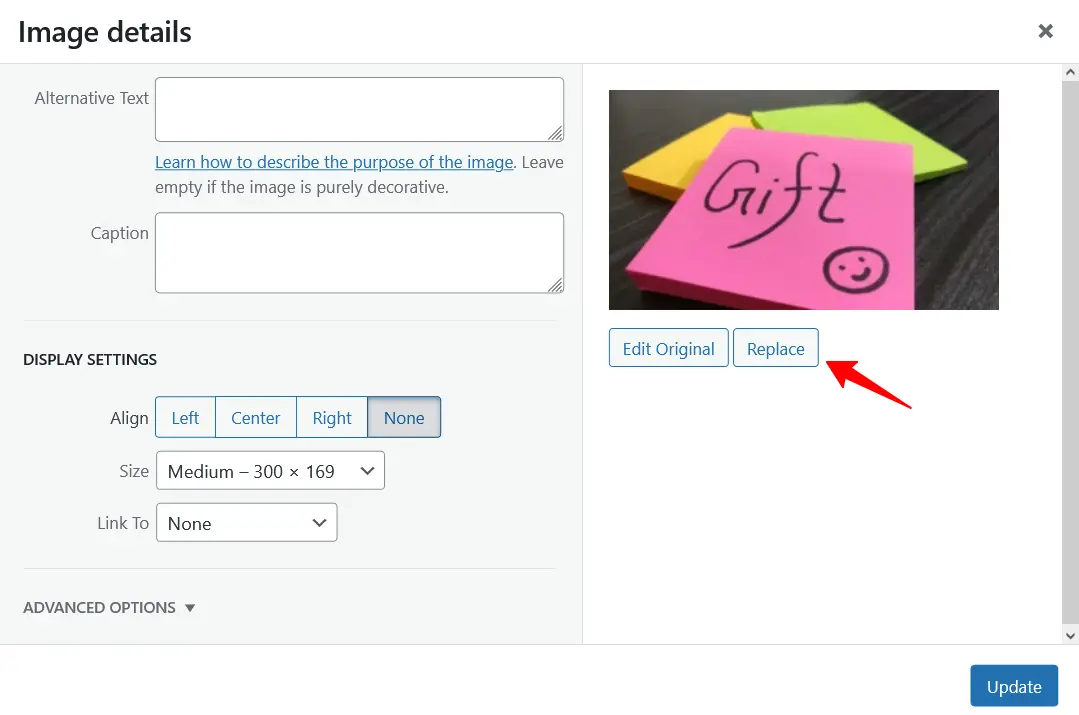
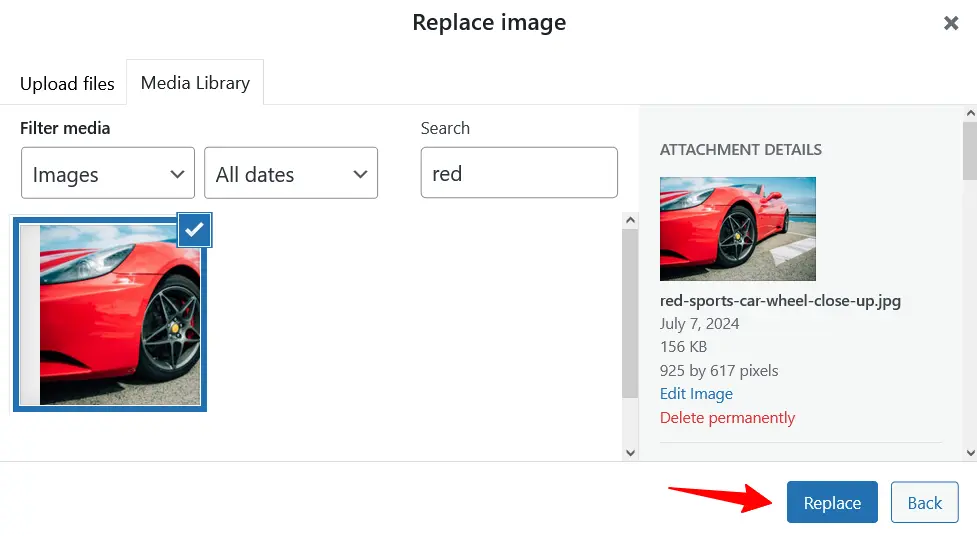
Step 3: Replace Image and Save Changes
Click the Replace button. Once it’s been replaced, click the Save button.
Resolve Common WordPress Image Issues with ThumbPress
1. Disable Unnecessary Thumbnails
WordPress automatically generates four default image sizes: thumbnail, medium, large, and full-size. Additionally, custom sizes may be generated based on the themes used on your WordPress site.
Disable Unnecessary Thumbnails, a ThumbPress module, can help you disable thumbnails of your choice.
Benefits
With this helpful module, you can –
- Reduce server load,
- Save precious website storage
- Get a clean and attractive interface
2. Detect Large Images and Compress
Large file sizes can make your website slower and take up significant server space. You can identify oversized WordPress images by using the Detect Large Images module and compress them accordingly.
Benefits
With this ThumbPress feature, you can –
- Save up on server space
- Speed up the WordPress site
3. Convert Image into WebP
Different image formats, such as JPG, JPEG, PNG, and GIF, are commonly used. When you upload these formats to your WordPress site, they can consume significant server space.
For example, if you have 500 images, each with a size of 1MB, they will occupy a substantial amount of storage. But Convert Image into WebP, a ThumbPress module can help remedy this. You can simply convert images to your website into WebP.
Benefits
This feature can help you –
- Reduce bandwidth consumption.
- Get faster loading times
- And support transparency and animation
4. Set Maximum Upload Size
If your website has multiple portals, you can maintain consistency in uploading images using the Set Maximum Upload Size feature of ThumbPress.
Benefits
Setting the maximum upload size for your website image can help –
- Keep consistency of website images
- Improve user experience
- And keep a professional brand image.
Final Words
Managing an online business is a full-time juggling act. You have to keep your website running smoothly, handle payments, and on top of it all, provide a flawless customer experience. This includes staying on top of errors, outdated images, and regular backups.
However, when it comes to WordPress images, there are simple strategies you can implement to maintain a visually appealing and SEO-friendly website. And ThumbPress can help you do all that and more!
Frequently Asked Questions(FAQs)
How do I replace an existing image in WordPress?
- Install and activate ThumbPress and ThumbPress Pro.
- Set up settings to replace your site images
- Start replacing images from your website
How do I replace a broken image in WordPress?
- Install ThumbPress and ThumbPress Pro on your site
- Go to ThumbPress > Modules and enable Replace Image with New Version
- Navigate to the Media library and select the broken image you want to replace
- After selecting, upload the new image from the popup Browser
- Finally, Click on the Update button.
How do I replace images without plugins in WordPress?
There is no way to replace the image directly from a WordPress site. You need ThumbPress and ThumbPress Pro plugins to replace images on the WordPress site easily.
Subscribe to Our Newsletter
Get the latest WordPress tutorials, trends, and resources right in your inbox. No Spamming, Unsubscribe Anytime.

Thank you for subscribing to our newsletter!
Table of Content
- Why You Can’t Replace Images in WordPress
- 3 Ways to Replace Images in WordPress
- 1. Using a WordPress Plugin
- 2. Replace an Image from Gutenberg Editor
- 3. Replace an Image from Page/Post in Classic Editor
- Resolve Common WordPress Image Issues with ThumbPress
- 1. Disable Unnecessary Thumbnails
- 2. Detect Large Images and Compress
- 3. Convert Image into WebP
- 4. Set Maximum Upload Size
- Final Words
- Frequently Asked Questions(FAQs)
- How do I replace an existing image in WordPress?
- How do I replace a broken image in WordPress?
- How do I replace images without plugins in WordPress?


