Setup WooCommerce One Page Checkout – A Complete Guide


When setting up a WooCommerce store, it’s easy to follow the basic checklist to make sure your site is set up for success. This process includes getting top-tier WooCommerce hosting and adding a shopping cart and contact form, among other essentials. While these steps are crucial, they often leave room for improvement, specifically when it comes to optimizing the customer checkout experience.
Simplifying the checkout experience to a single page can significantly improve the buying experience, and directly influence conversion success. This article will explore the concept of one page checkout, discussing its pros and cons, and how you can setup a one page checkout and customize it.
So, if you’re looking to minimize abandoned carts and maximize sales, you’re in the right place.
Let’s dive right in!
What is a One Page Checkout in WooCommerce?
An unoptimized checkout process can result in lower conversion rates and fewer sales for businesses. However, a one page checkout for WooCommerce lets customers access all checkout information from a single page, effectively speeding up the entire process.
Long checkout processes can discourage potential buyers from revisiting your shop. Having to fill up several pages of extensive, and often redundant forms, can lead customers to abandon their carts, even if they’re in the final stage of their buying journey.
Research gathered from around 50 studies shows that the average cart abandonment rate is around 69.2%. Among the reasons for abandonment, 17% of consumers mentioned that the checkout process was either too long or too complex.
Tips to Optimize WooCommerce Checkout
If your WooCommerce shop requires your customers to fill out multiple pages of information, then spreading out the process over a few pages with a visible progress indicator can help manage customer expectations about the time required to finish their purchase.
You can also lower the number of input fields and combine them in just one page to reduce completion time.
For repeat customers, you can add an auto-fill option for previously entered information in your one page checkout. Or simply add a ‘buy now’ button next to your ‘add-to-cart’ button to bypass the cart process entirely.
Pros and Cons of One Page Checkout for WooCommerce
Before moving on to the setup and editing process, let’s look at the pros and cons of a one-page checkout for WooCommerce.
Pros of WooCommerce One Page Checkout
- Reduced Cart Abandonment: A shorter checkout process keeps customers engaged and reduces the chances of frustration or second thoughts.
- Increased Conversion Rates: Customers appreciate a frictionless buying experience, which can encourage them to complete their purchases more readily than if they were faced with a multi-step process.
- Simplified User Experience: A one-page checkout simplifies the payment process by keeping all the steps on a single page.
- Easier to Analyze and Optimize: With all the checkout components on a single page, it’s easier to analyze how customers interact with the checkout process and identify areas for improvement.
Cons of WooCommerce One Page Checkout
- Design Constraints: Creating a one-page checkout that includes all necessary information without appearing cluttered or confusing requires careful design.
- Difficulties in Tracking Drop-off Points: With a one-page checkout, pinpointing the exact point of abandonment or dissatisfaction can be more challenging, making it harder to identify and address issues.
- Performance Issues: One-page checkouts can suffer from slower loading times, particularly if the page includes a lot of content, scripts, or form fields.
- Limited A/B Testing Opportunities: With everything on one page, it can be more challenging to isolate and test specific elements of the checkout process.
Customize WooCommerce One Page Checkout in 6 Easy Steps
If you have the right plugin, creating and customizing WooCommerce one page checkout becomes a breeze. This is where CoDesigner comes into play. CoDesigner is a one-stop solution for customizing every element of your WooCommerce store with Elementor.
Here’s a step-by-step on how to create and customize WooCommerce one page checkout with CoDesigner –
Step 1: Install & Activate Plugins
You can do this by downloading the plugin from the dashboard or the specific website, and uploading it as a .zip file to your WP site under Plugins > Add New. Once it’s activated, you’ll be forwarded to your Plugins page and you can go to the plugin’s settings to start customizing.
Make sure all the following plugins have been installed and activated.
Get CoDesigner Pro to access exclusive checkout widgets, modules, and templates.
Step 2: Create a One Page Checkout Page
You can create a checkout page from scratch using the Elementor editor with CoDesigner widgets in WooCommerce or use simply a ready-made template.
To begin, go to your WordPress dashboard, navigate to the Pages section, and create a New Page. Write a title for this page, and click on ‘Edit with Elementor’.
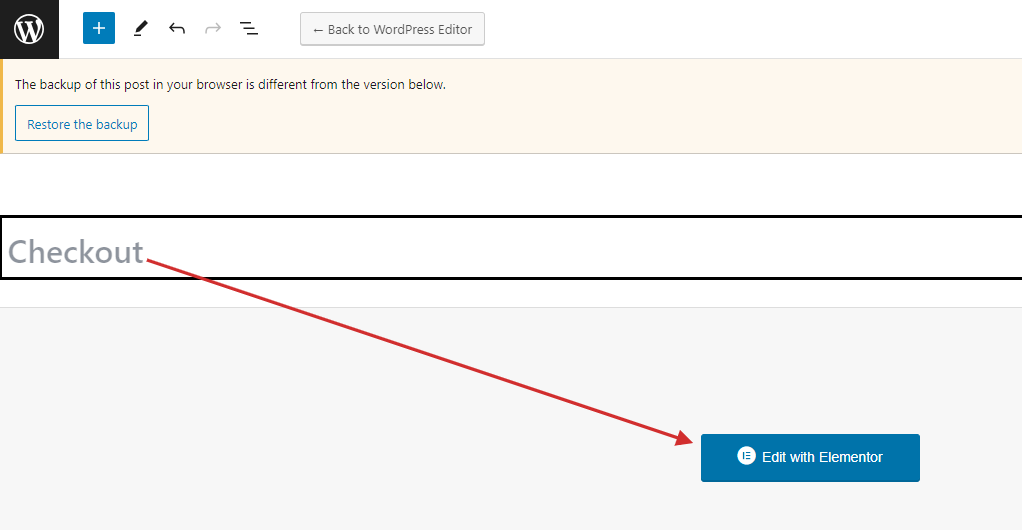
You will be redirected to the editor page for Elementor. From here, you can create a new structure and edit the size of each container to fit your needs.

Step 3: Add & Design your Widgets
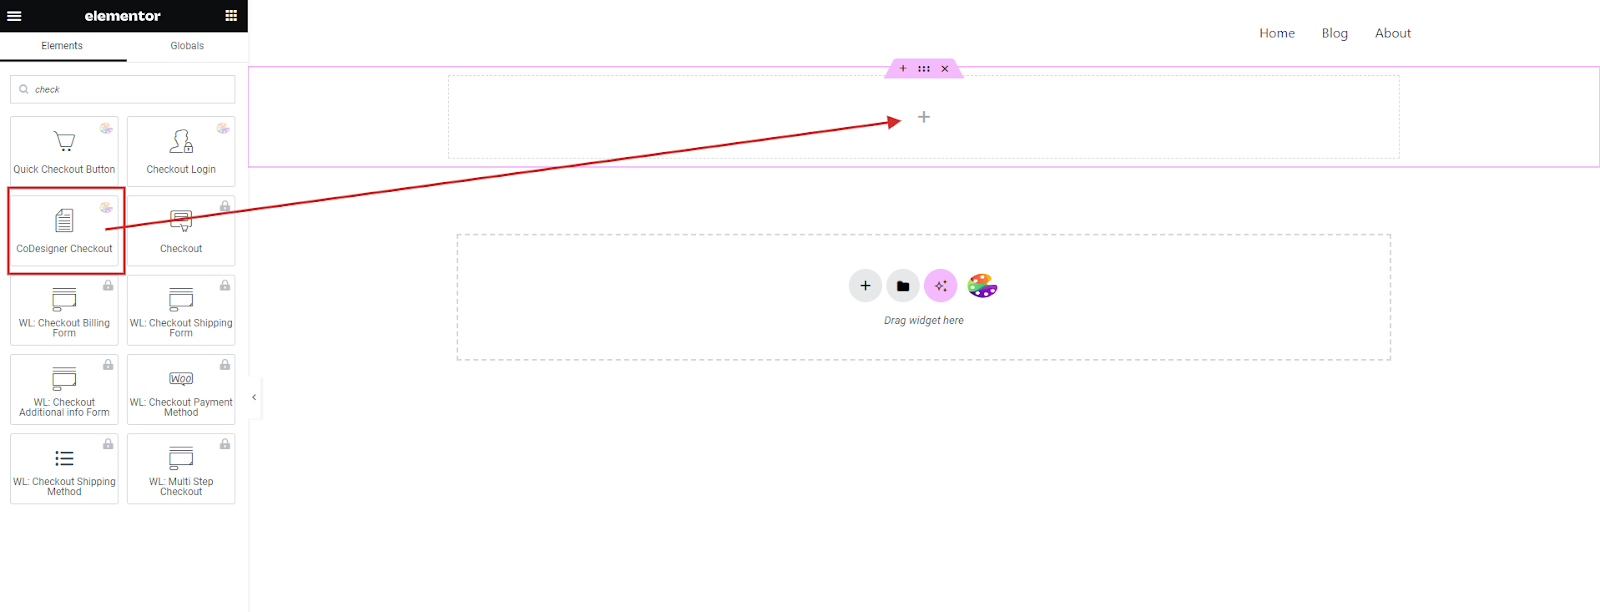
In the ‘Elements’ section, search for the widgets you need and drag them to the container of your choice.
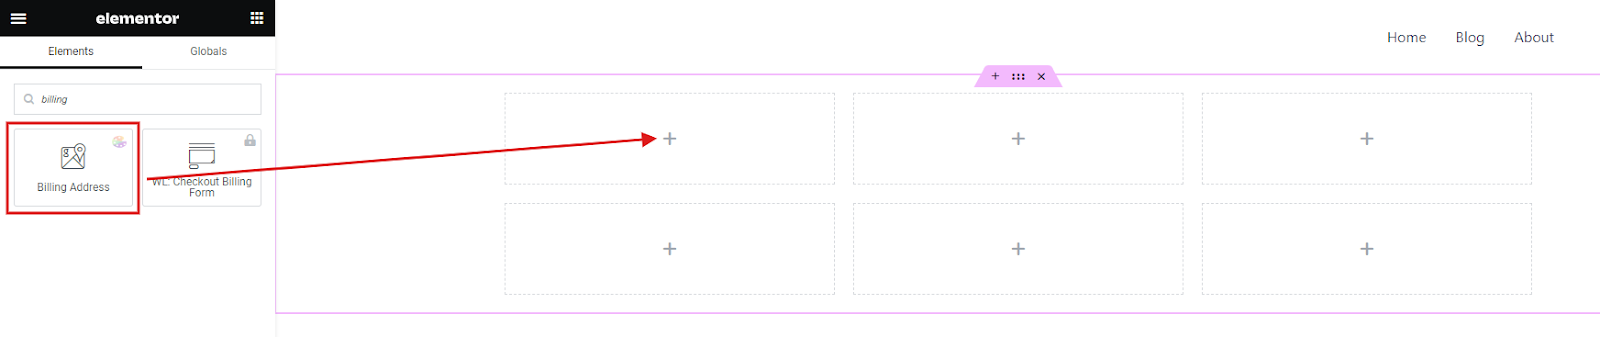
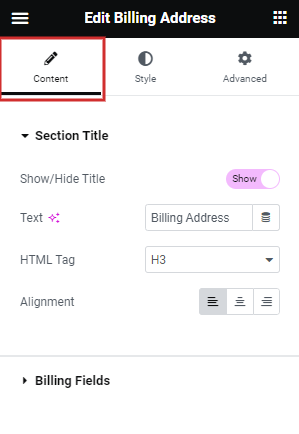
- With CoDesigner, you have the freedom to add new sections and edit the content from the Content section.
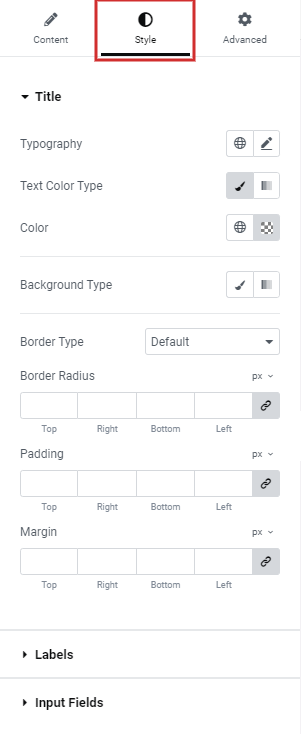
- In the Style section, you can design the look and feel for each of your widgets. You can edit typography, text color, background color, border design, and more.
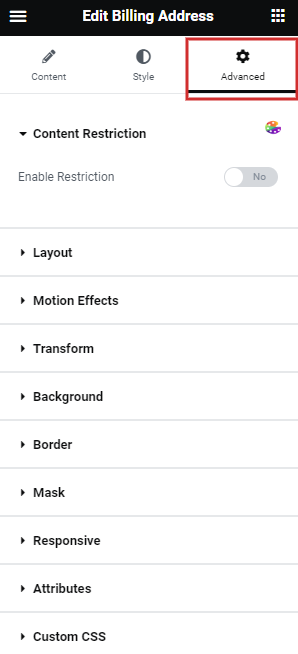
- If you want advanced settings to further customize then you can click the Advanced tab to apply motion effects, mask, positioning, and many more.
Note: Here are some widgets from CoDesigner that you can add for WooCommerce one page checkout –
- Billing Address
- Shipping Address
- Order Review
- Order Notes
- Quick Checkout Button
- Payment Methods
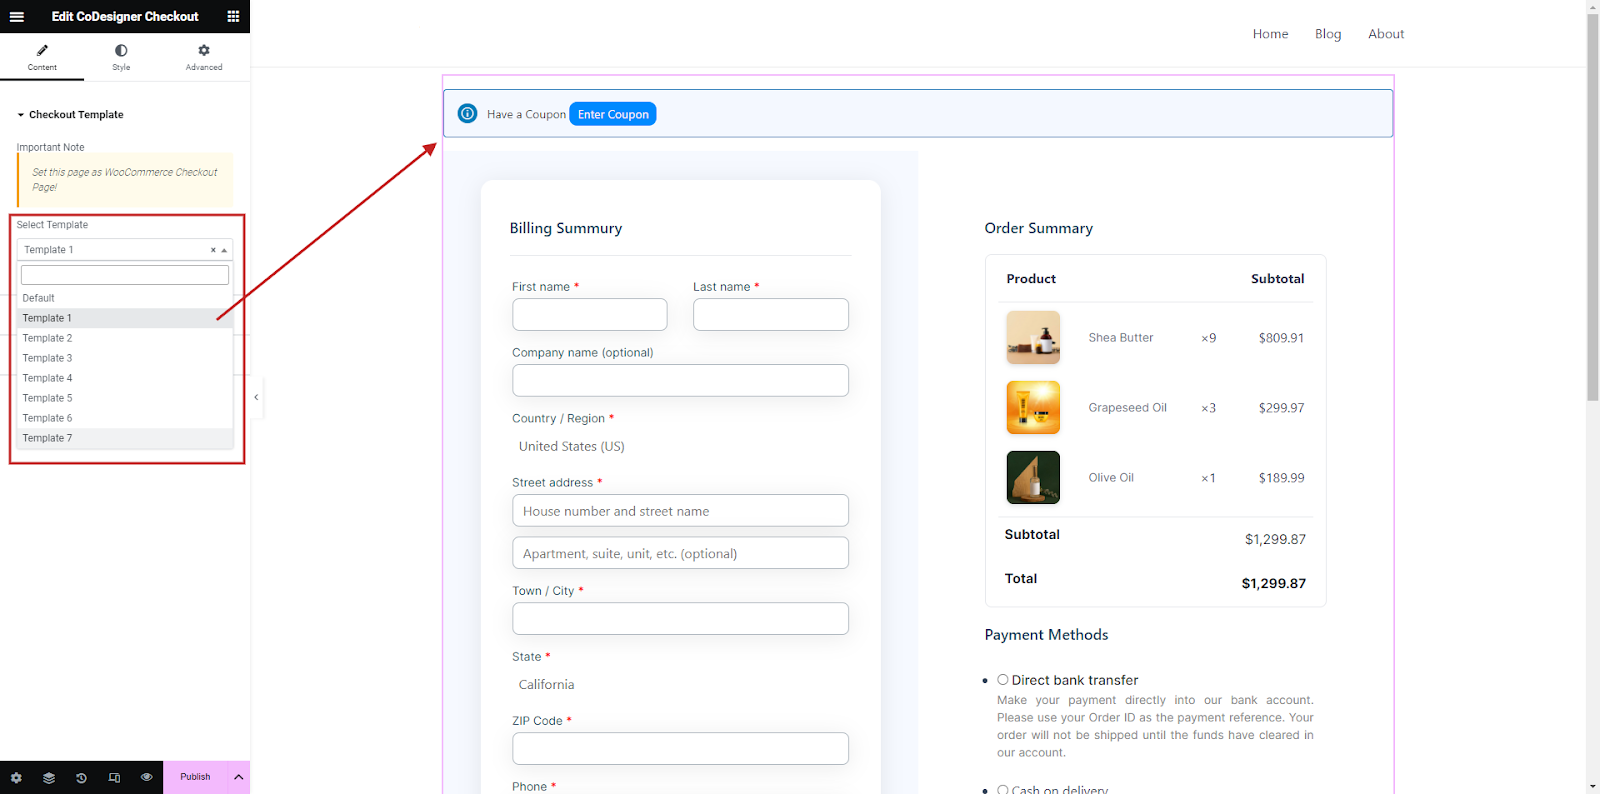
Step 4: Use the CoDesigner Checkout Template
You can also add the CoDesigner Checkout template for a ready-made layout for your checkout page. No need to design or code.
- You can select from the range of checkout templates, and edit from the Style section to suit your website.
Step 5: Update & Save
You can preview your changes, and if you’re happy with your design, simply click on Publish to save your one page checkout for WooCommerce.

Step 6: Change the Default Checkout Page
If you haven’t edited your checkout before, it is most probably set to the default WooCommerce checkout page. To set your new one page checkout to your website, navigate here –
Dashboard > WooCommerce Settings > Advanced
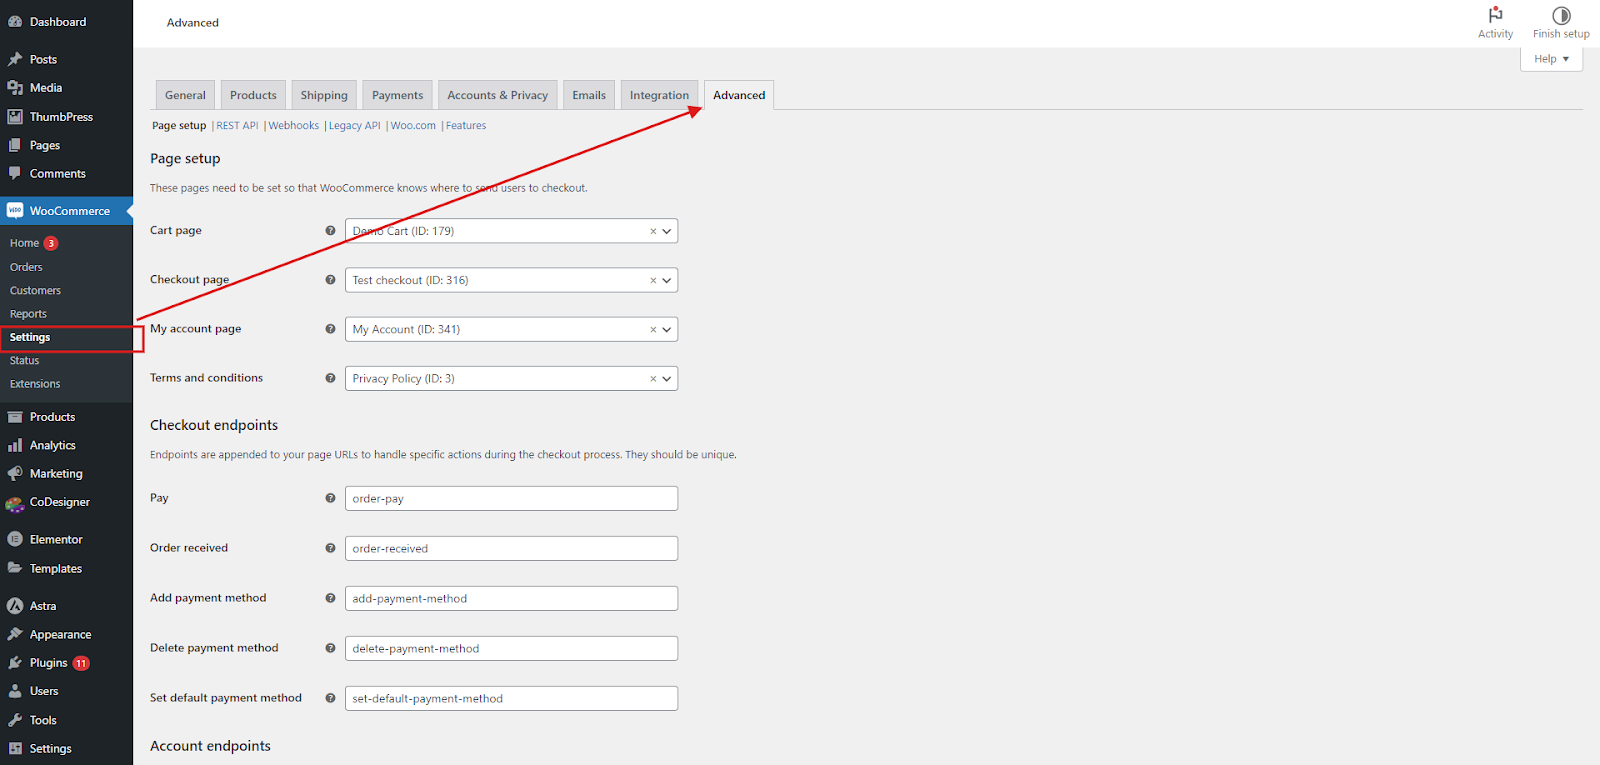
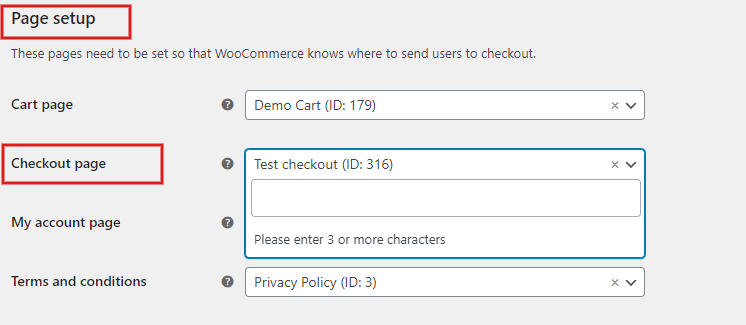
Then find the Checkout Page under Page Setup and select the new page template you have created.
Once you’re done, simply Save Changes to publish your new one page checkout on your website.
Wrapping Up
Having one page checkout in your WooCommerce shop can encourage customers to complete their transactions faster, effectively improving conversion rates.
Using a WooCommerce one page checkout plugin like CoDesigner streamlines your web-designing efforts and helps you cater to your customers effectively. Once your customers have their desired products in their carts, completion is as simple as one click, that’s it!
Subscribe to Our Newsletter
Get the latest WordPress tutorials, trends, and resources right in your inbox. No Spamming, Unsubscribe Anytime.

Thank you for subscribing to our newsletter!

I'm a seasoned creative content writer with 4+ years of experience in crafting well-researched blogs, web copies, & social media posts in and outside of WordPress. I also enjoy reading fiction, experimenting with different art mediums, and playing with my cats in my spare time.
Table of Content
- What is a One Page Checkout in WooCommerce?
- Tips to Optimize WooCommerce Checkout
- Pros and Cons of One Page Checkout for WooCommerce
- Pros of WooCommerce One Page Checkout
- Cons of WooCommerce One Page Checkout
- Customize WooCommerce One Page Checkout in 6 Easy Steps
- Step 1: Install & Activate Plugins
- Step 2: Create a One Page Checkout Page
- Step 3: Add & Design your Widgets
- Step 4: Use the CoDesigner Checkout Template
- Step 5: Update & Save
- Step 6: Change the Default Checkout Page
- Wrapping Up