WooCommerce Inventory Management – A Complete Guide

There’s nothing worse than seeing a customer’s excitement turn to frustration at checkout. Poor inventory management can lead to a cycle of disappointment, with customers left empty-handed and your business missing out on valuable sales.
Let’s fix this, shall we? This guide will equip you with the knowledge and strategies to keep your stock levels optimized and your customers happy.
Stay tuned to learn more!
How WooCommerce Inventory Management Works
WooCommerce lets you track how much stock you have for each product. When a customer buys something, the stock level goes down automatically.
You can also see all your orders and how they’re shipped from the dashboard. These reports help you avoid buying too much or too little stock, and check which items are selling well.
All of these are handled using built-in inventory tracking, which is enough for basic needs. While it may not be the ideal solution for niche situations, you can easily expand on these functionalities using free and paid plugins.
Pros and Cons of WooCommerce Inventory Management

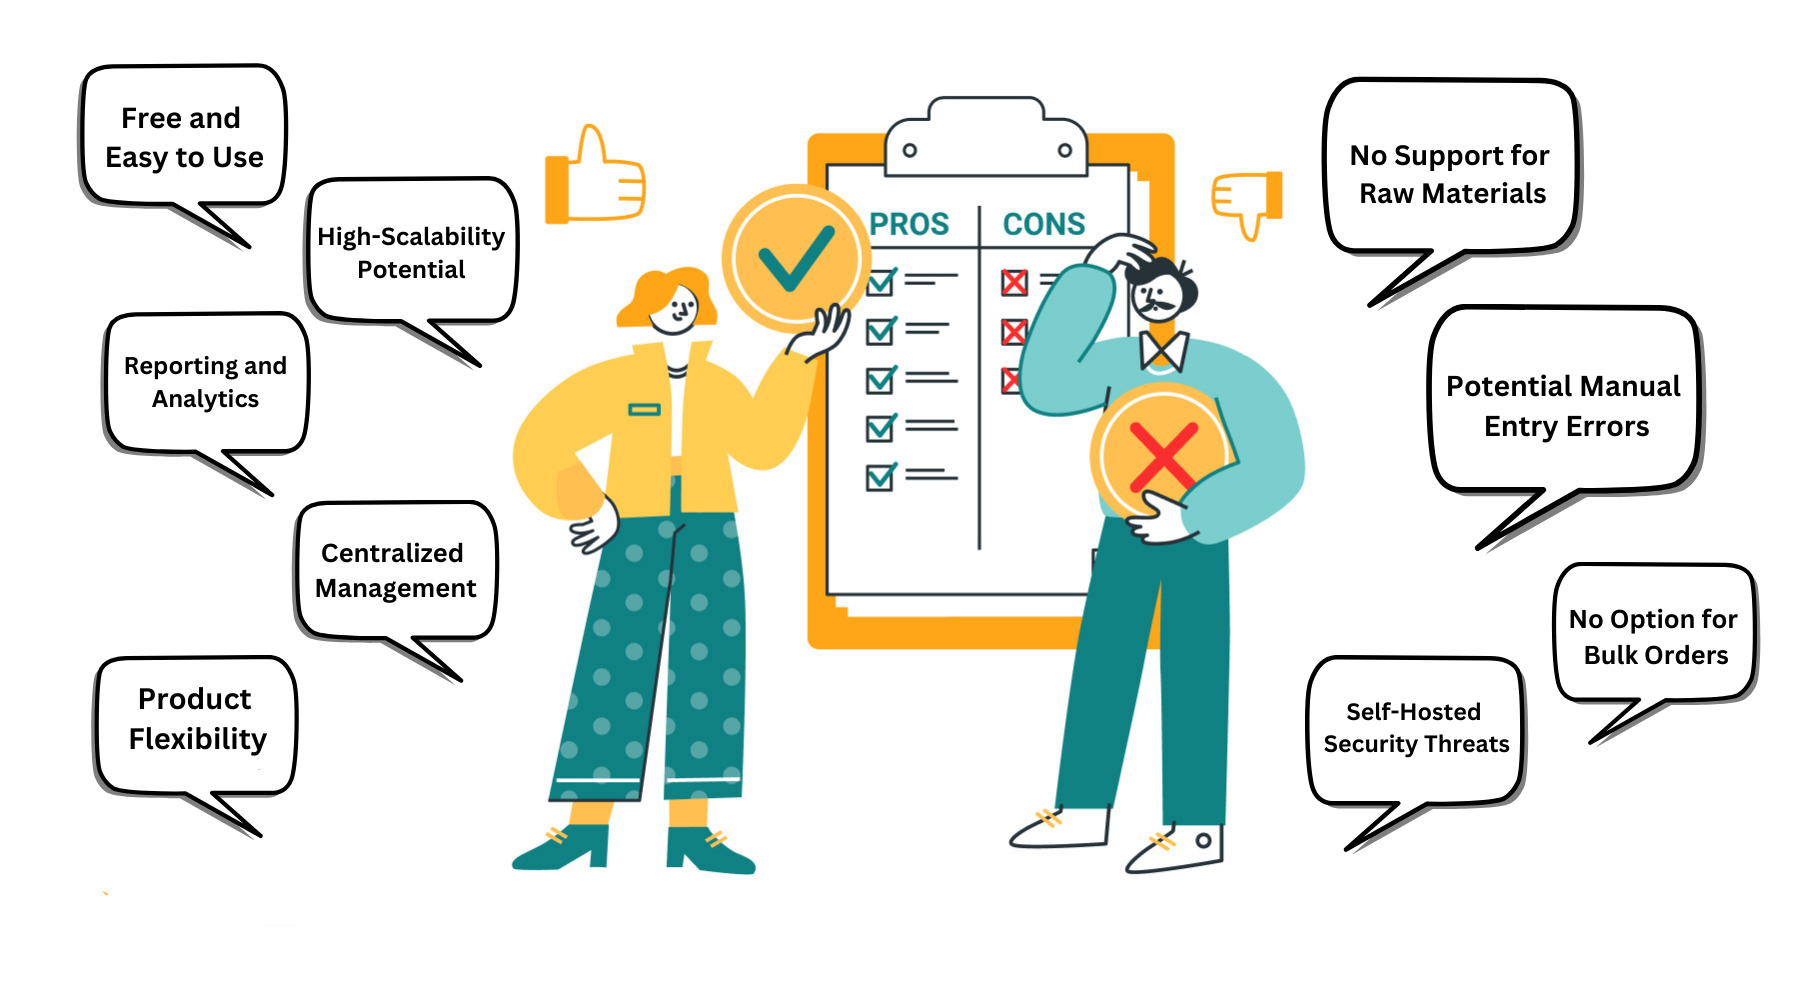
WooCommerce’s built-in inventory management, though not the strongest contender, can be a great starting point for many businesses. Here’s a breakdown of the pros and cons to help you decide if WooCommerce’s inventory management is right for you.
Pros of WooCommerce Inventory Management
- Free and Easy to Use: The core inventory management features come built-in with WooCommerce, so there’s no additional cost. Adding and tracking products with stock levels is easy and perfect for beginners.
- High-Scalability Potential: WooCommerce has an extensive plugin library to accommodate the complex requirements of growing businesses. Free and paid plugins can address specific needs like barcode scanning, low-stock alerts, and purchase order generation.
- Reporting and Analytics: WooCommerce gives you detailed reports that provide insights into your inventory performance. See stock levels, identify top-selling items, and analyze trends to optimize your purchasing decisions.
- Centralized Management: WooCommerce integrates seamlessly with other store functionalities like orders and shipping – which lets you manage entire store operations from one location.
- Product Flexibility: WooCommerce caters to a wide range of product inventory including, physical, digital, or even subscriptions.
Cons of WooCommerce Order Management
- No Support for Raw Materials: WooCommerce is designed to handle inventory of only finished products. Managing raw materials and MRO will require a third-party plugin from WordPress.
- Potential Manual Entry Errors: Inventory levels are updated manually, which can lead to inaccuracies if not managed carefully. Mistakes during order processing or stock adjustments can create discrepancies and disrupt your operations.
- No Option for Bulk Orders: WooCommerce doesn’t have the option to change product details in bulk. If you have to change the design or pricing of a product, you will need to do it individually – which can be frustrating and time-consuming.
- Self-Hosted Security Threats: As security depends on the store owner, there can be a significant threat to sensitive inventory data like stock levels and product details.
How to Setup WooCommerce Inventory
There are a couple of settings and features you need to know about to get started. For your convenience, we will detail each of them below –
Inventory Settings
To begin, you need to enable the inventory tracking option from the dashboard. To do this, go to WooCommerce > Settings > Products > Inventory.
Check the box for ‘Enable stock management‘, which will allow WooCommerce to subtract and change stock status automatically. You can also handle this manually by leaving it unchecked.
Configure Inventory Options
- Manage Stock: Tick the checkbox to enable stock management. This allows WooCommerce to track inventory levels.
- Hold Stock (minutes): Specify the time (in minutes) to hold stock for unpaid orders. After this period, the order is canceled, and the stock is released.
- Enable Low Stock Notification: Tick this to receive alerts when stock is low.
- Enable Out of Stock Notification: Tick this to receive alerts when items are out of stock.
- Notification Recipient(s): Enter the email addresses that should receive stock notifications.
- Low Stock Threshold: Set the number of items remaining when a low stock notification should be sent.
- Out-of-Stock Threshold: Set the number of items that trigger an out-of-stock notification.
- Out-of-Stock Visibility: Tick this option to hide out-of-stock items from the catalog.
- Stock Display Format: Choose how you want stock levels to be displayed on product pages.
Product Stock Settings
If you want to edit stock-by-stock basis, there are individual product stock settings you can configure. To do this, go to Products > All Products and click the Edit button next to any product.
Scroll down to the data box of any product and go to the Inventory tab.
Configure Product Inventory Options
- SKU: Set a product SKU number.
- Manage Stock: Tick the ‘Manage stock?’ checkbox to enable stock management for this product.
- Stock Quantity: Enter the number of units you have available for this product.
- Allow Backorders: You can deny, permit, and notify customers about backorders.
- Low Stock Threshold: Set a custom low stock threshold for this product.
- Sold Individually: Tick this to limit the product to one per order.
Managing Stock Status
WooCommerce has two ways of managing stock status: globally and on an individual product basis. Here’s how you can manage both –
Global Settings: From the WooCommerce inventory page, you can control how stock levels are displayed in your store. You can show or hide out-of-stock items and set low-stock and out-of-stock thresholds. Setting these thresholds can trigger notifications or enable other actions.
Individual Product Settings: On each product’s edit screen, you can enable inventory management and set individual stock levels, low-stock thresholds, and the current stock status.
Note: For automatic inventory updates based on sales, you need to have “Enable stock management” turned on globally as well.
Variable Product Settings: If you have products with variations (i.e. size or color), you can manage stock status thresholds for each variation individually within the product edit page.
Checking Stock Status Reports
You can get detailed reports of your stocks to get insights into how your inventory is performing. To check out these reports, go to Dashboard > Analytics > Stock to get an overview of the in-stock status and number of units.
You can sort out values for Product/Variations, SKU, Status, and Stock and download the reports from here. You can also narrow down products of specific status (out-of-stock, low-stock, in-stock, on backorder) from the Show menu on top.
Picking Product Types
WooCommerce lets you add your products in four categories: Simple, Grouped, External/Affiliate, and Variable.
Simple Products
As the same suggests, these are the most basic product types found in WooCommerce. These products don’t come in any other variable and you only need the product information and marketing materials when adding these to your store.
Grouped Products
These types of products are only sold in bundle and they can also be brought individually, but once out-of-stock the bundle will no longer be available.
So, if your WooCommerce store thrives on bundle offers, you need to ensure all your products are stocked up and available.
External/Affiliate Products
These are items you promote on your store but don’t directly sell yourself. You earn a commission for each sale referred through your unique affiliate link.
Variable Products
While these work similarly to simple products, they are set apart by variations like colors or sizes. This function helps you save time by letting you add variants for each product – all from one screen.
Step-by-Step Guide to Updating WooCommerce Inventory
Updating WooCommerce inventory is a simple process, but you need to ensure all the right functions are enabled.
Step 1: Enable Stock Management
Go to WooCommerce > Settings > Product > Inventory, and tick the box for ‘Enable stock management’.
Step 2: Edit Product Data
To update the stock for a specific product, go to Products > All Products and select a product by clicking on the Edit button.

Scroll down to product data and go to Inventory from the side menu. You can set stock status and individual sales from here.
Step 3: Track Stock Quantity
Enable the option for ‘Track stock quantity for this product’ to manage stock at the product level.
You can update your inventory and even set backorders for specific products from here. WooCommerce keeps track of inventory and reduces it with each sale. It even marks products as low or out of stock.
But you will need to manually update stock levels when you receive new shipments, as WooCommerce can only decrease, not increase, stock numbers.
Streamline Your WooCommerce Inventory Today!
Mastering WooCommerce order management is about creating a frictionless customer experience. Keeping them informed and minimizing order-related inquiries frees valuable staff time and fosters customer satisfaction.
Take your order management to the next level with CoDesigner‘s Invoice Builder module. Create beautiful, branded invoices that leave a lasting impression on your visitors and make your inventory tracking experience easier!
Frequently Asked Questions (FAQs)
How do I maintain stock in WooCommerce?
- Go to Products > Inventory and tick ‘Enable stock management’
- Set individual stock levels for each product on their edit page from the inventory tab.
- WooCommerce will deduct stock when a sale is made and update stock status.
- You’ll need to manually update stock levels whenever you receive new shipments.
How to set Inventory quantity in WooCommerce?
On the edit page for each product, you’ll find the Inventory tab. From here, you can –
- Enable stock management for that specific product.
- Set the starting stock quantity.
How do I edit Inventory in WooCommerce?
There are two ways to edit inventory in WooCommerce –
- For individual products: Go to the product’s edit page and navigate to the Inventory tab. Here, you can update the stock quantity and other inventory-related settings.
- For all products: Go to WooCommerce settings. This page allows you to set global inventory settings and bulk edit stock levels for all products.
Subscribe to Our Newsletter
Get the latest WordPress tutorials, trends, and resources right in your inbox. No Spamming, Unsubscribe Anytime.

Thank you for subscribing to our newsletter!
Table of Content
- How WooCommerce Inventory Management Works
- Pros and Cons of WooCommerce Inventory Management
- Pros of WooCommerce Inventory Management
- Cons of WooCommerce Order Management
- How to Setup WooCommerce Inventory
- Inventory Settings
- Configure Inventory Options
- Product Stock Settings
- Configure Product Inventory Options
- Managing Stock Status
- Checking Stock Status Reports
- Picking Product Types
- Step-by-Step Guide to Updating WooCommerce Inventory
- Step 1: Enable Stock Management
- Step 2: Edit Product Data
- Step 3: Track Stock Quantity
- Streamline Your WooCommerce Inventory Today!
- Frequently Asked Questions (FAQs)
- How do I maintain stock in WooCommerce?
- How to set Inventory quantity in WooCommerce?
- How do I edit Inventory in WooCommerce?
Get CoDesigner
Build awesome WooCommerce websites with CoDesigner’s 14+ Modules, 94+ Widgets and 150+ Templates.
Get Now


