WordPress Image Compression – Definitive Guide


Your WordPress site often loads slowly because of heavy, unoptimized images. These oversized files don’t just take up space, they quietly drag down your page speed.
And every extra second your site takes to load, it increases bounce rates, frustrates visitors, and chips away at your search rankings. That’s where WordPress image compression comes in.
This guide walks you through exactly how to compress images in WordPress using three simple, effective methods to keep your site fast, clean, and SEO-friendly from the very first click.
Understanding the Basics of Image Compression
Image compression is all about shrinking file sizes without making your visuals look bad. It plays a huge role in web performance, especially for WordPress sites where large images can slow everything down.
To really understand how it works, it helps to know the types of compression and how each one handles your image data.
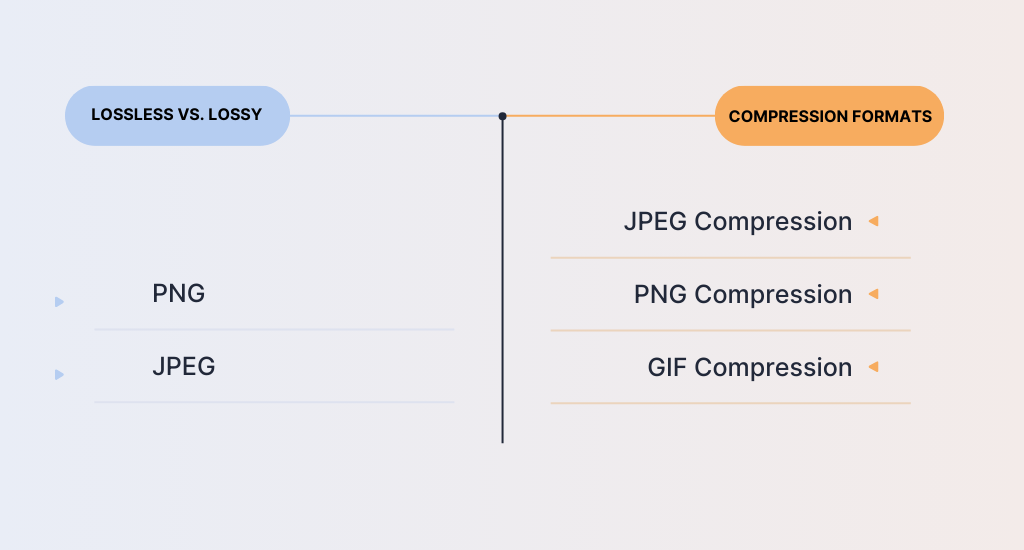
Lossless vs. Lossy Compression
There are two main types of image compression: lossless and lossy.
- Lossless compression keeps every bit of the image data intact. It reduces file size by finding and removing repetitive data without sacrificing quality. This method is ideal for formats like PNGs, which preserve crisp details and perfect for logos, screenshots, and other sharp graphicsshots, etc.
- Lossy compression, used by formats like JPEG, which works by permanently removing some image data. It focuses on reducing less noticeable visual details to achieve much smaller file sizes. This makes it perfect for web photos or blog images, where slight image loss is fine. But the more you compress, the more likely you will see a dip in clarity or color accuracy.
Common Compression Formats
When compressing images, JPEG, PNG, and GIF are the most commonly used formats, each suited for different types of visuals. Let’s explore them –
- JPEG Compression: JPEG is one of the most widely used image formats for photos. It can significantly reduce file size, which is great for websites and social media. Since it uses lossy compression, some image quality is sacrificed in the process. If you need small file sizes and can handle a bit of quality loss, JPEG is a solid choice.
- PNG Compression: PNG is perfect when image quality needs to stay intact. It uses lossless compression, meaning no data is lost during the process. This is great for graphics with text, sharp lines, or transparent backgrounds. While PNG files are larger than JPEGs, they’re the go-to for clean, crisp visuals like logos and UI elements.
- GIF Compression: GIF is best known for simple animations and basic graphics. It supports transparency and uses lossless compression, but it’s limited to 256 colors. That means it’s not the best for photos or color-rich images. Still, for icons, small graphics, or looping animations, GIFs can get the job done.
Why Compress Your WordPress Images?
A slow site not only hurts the user experience, but it also affects your rankings on search engines like Google. Search engines prefer websites that loads quickly and runs smoothly.
You can make image file sizes smaller without making them look bad by simply compressing them. This helps your website load faster, which keeps visitors happy and improves your chances of showing up higher in search results.
It also saves space on your hosting server and uses less data, which is helpful if you have a limit on storage or bandwidth. So, compressing images is a simple way to make your WordPress site faster, lighter, and better for both users and visitors.
How to Optimize and Compress Images in WordPress (3 Easy Methods)
Start by installing a reliable image optimization plugin. It will automatically compress your images and help your site load faster. There are also two other easy ways to compress images in WordPress.
But first, let’s look at the WordPress Image Compression plugin.
Method 1: Use a WordPress Image Compression Plugin
First off, you need to install ThumbPress and ThumbPress Pro on your website. After that, enable the Compress Image feature from ThumbPress > Modules.
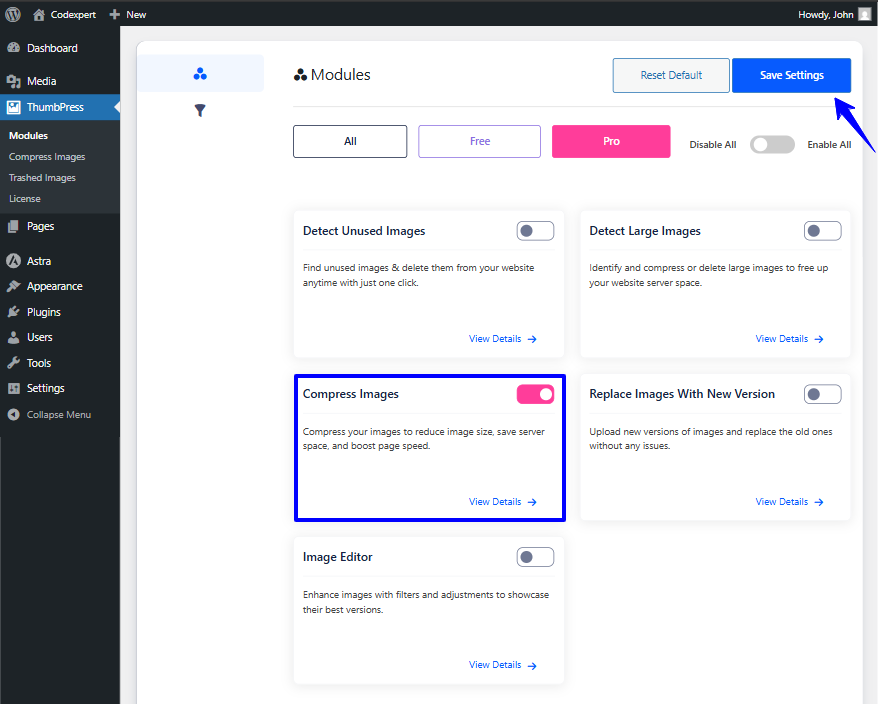
With ThumbPress, you can compress images in three ways:
- In bulk,
- One by one from the media gallery,
- Or automatically when you upload them.
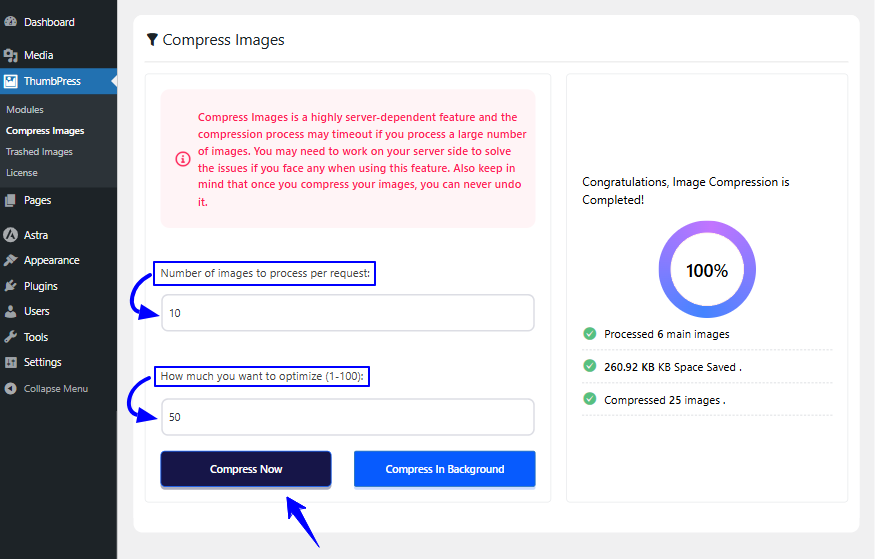
For bulk compression, go to the Compress Images section and choose how many images you want to compress at once. Just enter the number and click the Compress Now button.
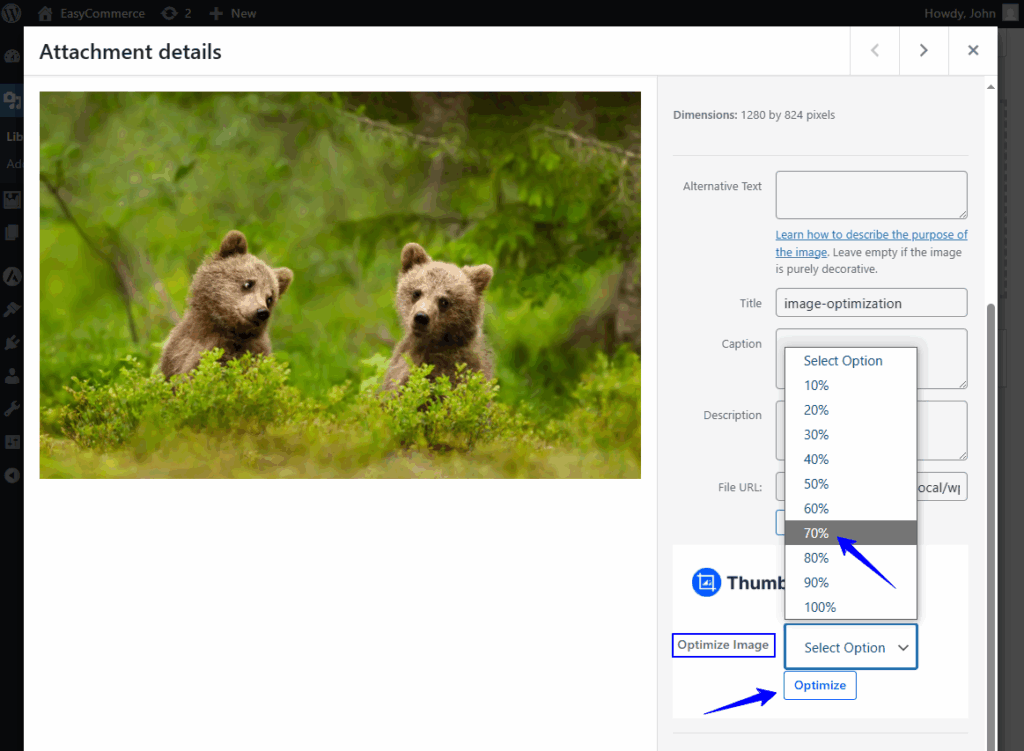
To compress images one at a time, go to your WordPress dashboard, then click Media > Library. Open the image you want to compress, and you’ll see the Optimize Image button below on the right. Click Select, choose the compression percentage, and then click Optimize.
If you want to compress images in WordPress as you upload them, just turn on the option in the settings. Once enabled, all new images will be automatically compressed when you upload them. Don’t forget to click Save Settings after making changes.

Method 2: With an Online Image Compression Tool
If you’re looking for a fast and easy way to compress your WordPress image file sizes without losing quality, online Image compression tools are a great place to start. These web-based tools let you shrink your images without using a software or a plugin.
One thing to keep in mind, though, is that you’ll need to visit the website each time you want to compress a new image. That can get repetitive if you’re adding images regularly. However, many tools offer bulk upload features, which help speed things up.
One of the most beginner-friendly tools is TinyPNG. It’s free to use (with optional premium upgrades), and it supports popular image formats like JPEG, PNG, and WebP.
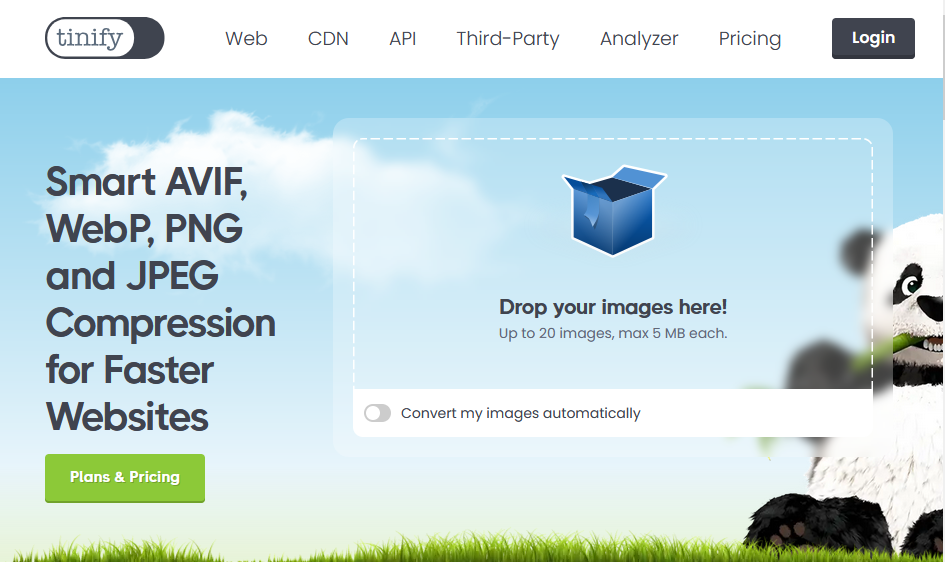
You can upload up to 20 images at a time, and compression starts automatically once your images are dropped onto the page. Within seconds, you can download the optimized versions or save them directly to your cloud storage.
Another handy option is Squoosh. Just like TinyPNG, it lets you compress multiple WordPress images and edit them on their platform.
Method 3: Serve Your Website Images Through a CDN
One of the most effective ways to speed up image loading on your WordPress site is by using a Content Delivery Network (CDN). A CDN stores copies of your website’s images (and other static files) on multiple servers around the world. When someone visits your site, the images are loaded from the server closest to them, which reduces loading time significantly.
This means your images don’t have to travel from your main hosting server every time someone opens a page. Instead, they’re delivered from a nearby location, so the experience becomes faster and smoother for all users, no matter where they are.
Most popular WordPress-friendly CDNs like Cloudflare, BunnyCDN, or Jetpack CDN are easy to set up and often come with free plans or image optimization features built in. There are two ways to set up a CDN to compress images for your WordPress site.
Let’s check how you can set it up for your website.
Option 1: Using Cloudflare CDN
Cloudflare is a widely used CDN that not only speeds up your site but also protects it with added security features. It caches your site’s static content, including images, and delivers it from its global network.

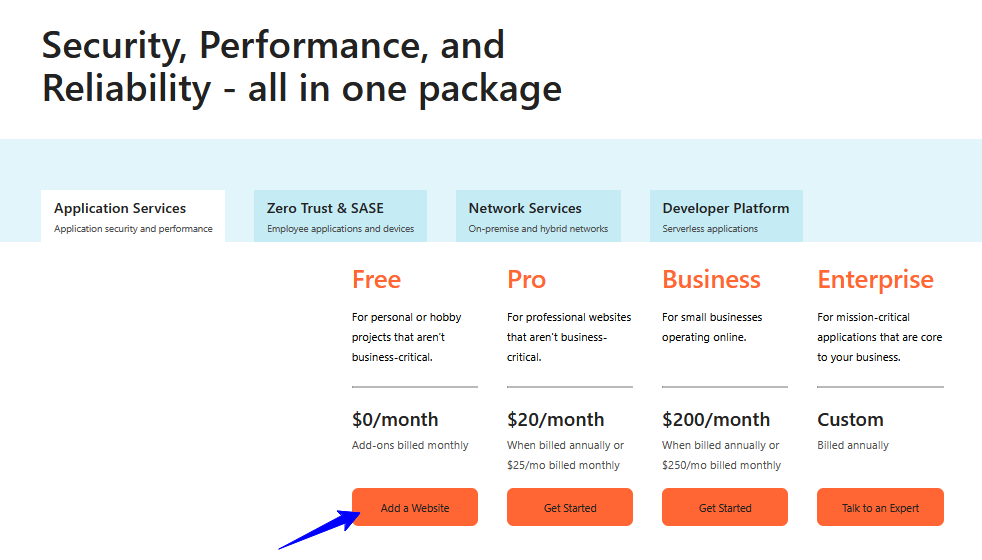
1. Go to Cloudflare and sign up for a free account. After you click Sign Up it will take you to their Pricing Plan page. Choose the free option and click on the Add a Website button.
2. Enter your website URL, and Cloudflare will scan your current DNS records.
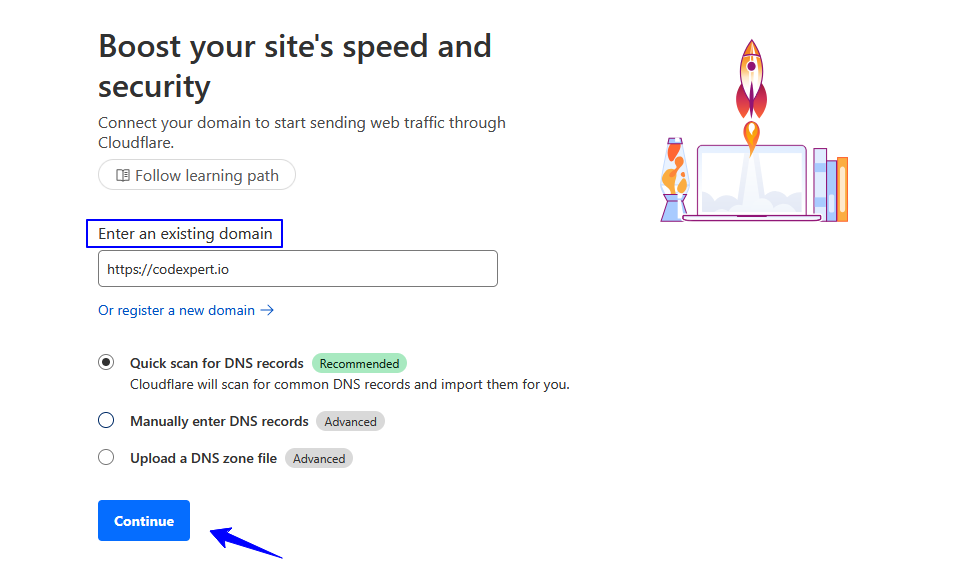
3. Choose the Free plan, or upgrade to a paid plan if you need advanced features. Cloudflare will give you new nameservers.
4. Log in to your domain registrar (like Hostinger, Namecheap, etc.) and replace your current nameservers with Cloudflare’s.
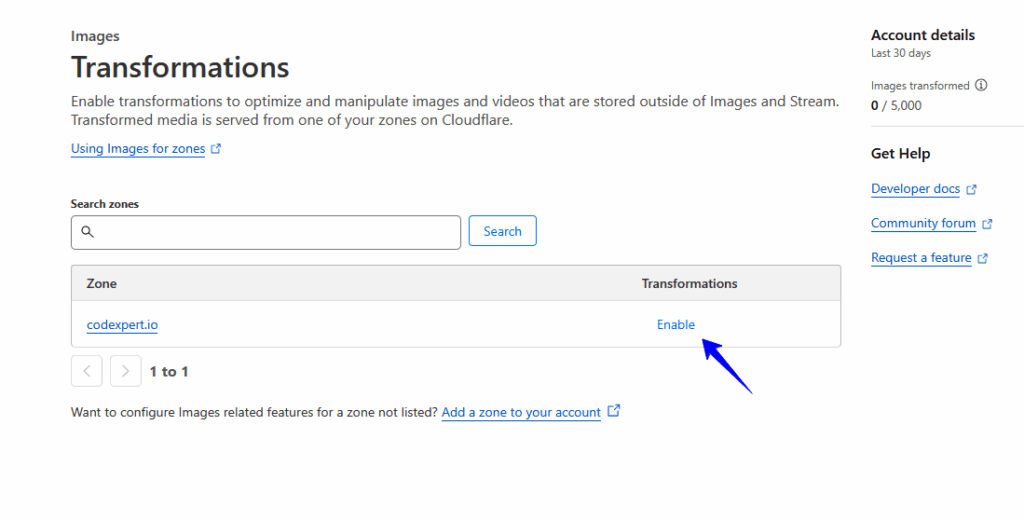
5. When the DNS is configured, go to Images > Transformation to enable your zone. Then it will start optimize and manipulate images and videos of your WordPress site.
Option 2: Using Jetpack Boost Plugin (Free)
Jetpack offers a built-in image CDN through its Jetpack Boost plugin. It’s an easy solution for beginners who want faster image delivery without a complex setup.
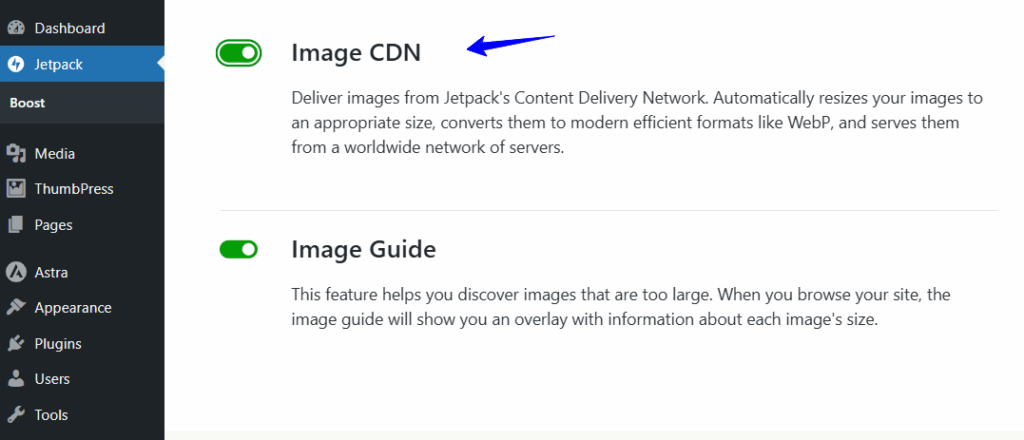
1. Go to Plugins > Add New from your WordPress dashboard. Search for Jetpack Boost by Automattic, then install and activate it.

2. Go to Jetpack > Boost and enable Image CDN. This will automatically serve your images through Jetpack’s global CDN. Once enabled, Jetpack handles everything for you, no extra settings or configuration needed.
Bonus Tips to Optimize Your WordPress Images
Now that you have learned how to compress and optimize your WordPress images, let’s explore a few more ways you can improve your image delivery.
Optimize Your Image Thumbnails
Optimize your image thumbnails by making sure they are properly resized and compressed. Thumbnails appear in many areas across your WordPress site, like blog archives, featured posts, and galleries.
If these small images aren’t optimized, they can increase page load times without even realizing it. Keeping these files lightweight and consistent helps improve both speed and visual layout.
Resize Your Images for Mobile Devices
To ensure a smooth experience for mobile devices, it is necessary to resize your images. Many visitors will access your site from a smartphone or tablet, and large, desktop-sized images can slow things down and mess up formatting.
This matters because more than 62% of all web traffic comes from mobile devices. Serving images that automatically adjust to screen size also ensures your content looks great on any device.
Avoid Embedding Images from External Sources
If possible, avoid embedding images from external sources. Linking to images hosted elsewhere can lead to broken visuals or slow-loading pages if the source is down or lagging. Hosting images locally usually loads quickly and remains accessible.
This is not only a good approach to take, it also gives you better control over your content and performance.
Use the Correct Image File Format
To balance quality and file size, it’s really important for you to use the correct image file while you are uploading to your website. Preferred image size depends on which platform you are hosting your site on. If you are using WordPress, then you should follow the WordPress image size guide.
Choosing the right format can significantly reduce load times without sacrificing how your images look.
Use Lazy Loading to Make Your Website Load Faster
Instead of loading all images on the page at once (even the ones way down in the page), lazy loading only loads images when users scroll down and actually see them. This lets your page save data, load faster, and it’s especially helpful on pages with lots of images.
Wrapping Up
This guide shows you how to take control of your image performance using simple, effective methods like WordPress image compression. From setting up a smart plugin like ThumbPress, to using free tools like TinyPNG, to speeding up delivery through CDNs like Cloudflare or Jetpack, you now have everything you need to keep your images light and your site fast.
Beyond compression, small tweaks like lazy loading, resizing for mobile, and sticking to the right formats make a big difference over time. Start with the method that suits your workflow.
A faster site benefits your visitors, boosts your SEO, and strengthens your online presence.
Frequently Asked Questions (FAQs)
Q. How do I reduce the image size for WordPress?
You can reduce image size in WordPress by using image optimization plugins like ThumbPress. This plugin automatically compresses images when you upload them. You can also resize images before uploading using tools like Photoshop or free online image compressors like TinyPNG.
Q. Why does WordPress reduce image quality?
WordPress automatically compresses JPEG images to retain about 82% quality to help pages load faster. This slight reduction in quality helps improve site speed and saves bandwidth, especially on slower connections.
Q. What is the best image size for WordPress images?
It depends on where you’re using the image. Here are commonly recommended sizes:
- Thumbnail size – 150 x 150 pixels
- Medium size – Maximum 300 x 300 pixels
- Large size – Maximum 1024 x 1024 pixels
- Full size – The original image dimensions
Q. How to regenerate thumbnails in WordPress?
If you’ve changed image sizes or installed a new theme, use a plugin like ThumbPress. After installing it, go to ThumbPress >> Regenerate Thumbnails and run the process. It will recreate all your image sizes to match your current theme’s settings.
Q. Does WordPress compress images automatically?
Yes, WordPress automatically compresses JPEG images to reduce file size and improve performance. The default compression is around 82% quality. However, you can control this with a plugin or a small code snippet if you want to adjust or turn off compression.
Subscribe to Our Newsletter
Get the latest WordPress tutorials, trends, and resources right in your inbox. No Spamming, Unsubscribe Anytime.

Thank you for subscribing to our newsletter!

A seasoned Business Developer & Support Engineer who is deeply passionate about resolving WordPress-related issues and contributing to WordPress. His expertise lies in enhancing user experiences and driving success within the WordPress ecosystem.
Table of Content
- Understanding the Basics of Image Compression
- Lossless vs. Lossy Compression
- Common Compression Formats
- Why Compress Your WordPress Images?
- How to Optimize and Compress Images in WordPress (3 Easy Methods)
- Method 1: Use a WordPress Image Compression Plugin
- Method 2: With an Online Image Compression Tool
- Method 3: Serve Your Website Images Through a CDN
- Bonus Tips to Optimize Your WordPress Images
- Optimize Your Image Thumbnails
- Resize Your Images for Mobile Devices
- Avoid Embedding Images from External Sources
- Use the Correct Image File Format
- Use Lazy Loading to Make Your Website Load Faster
- Wrapping Up
- Frequently Asked Questions (FAQs)
- Q. How do I reduce the image size for WordPress?
- Q. Why does WordPress reduce image quality?
- Q. What is the best image size for WordPress images?
- Q. How to regenerate thumbnails in WordPress?
- Q. Does WordPress compress images automatically?