How to Customize Checkout Page in WooCommerce


Shopping cart abandonment is a major problem for online stores. And more often than not, a clunky checkout page can be the culprit. But how do you streamline the checkout process without damaging the user experience?
In this blog, we’ll show you how to create and customize the checkout page to a user-friendly experience that converts visitors into customers.
Let’s dive in!
Why You Need to Customize Your WooCommerce Checkout?
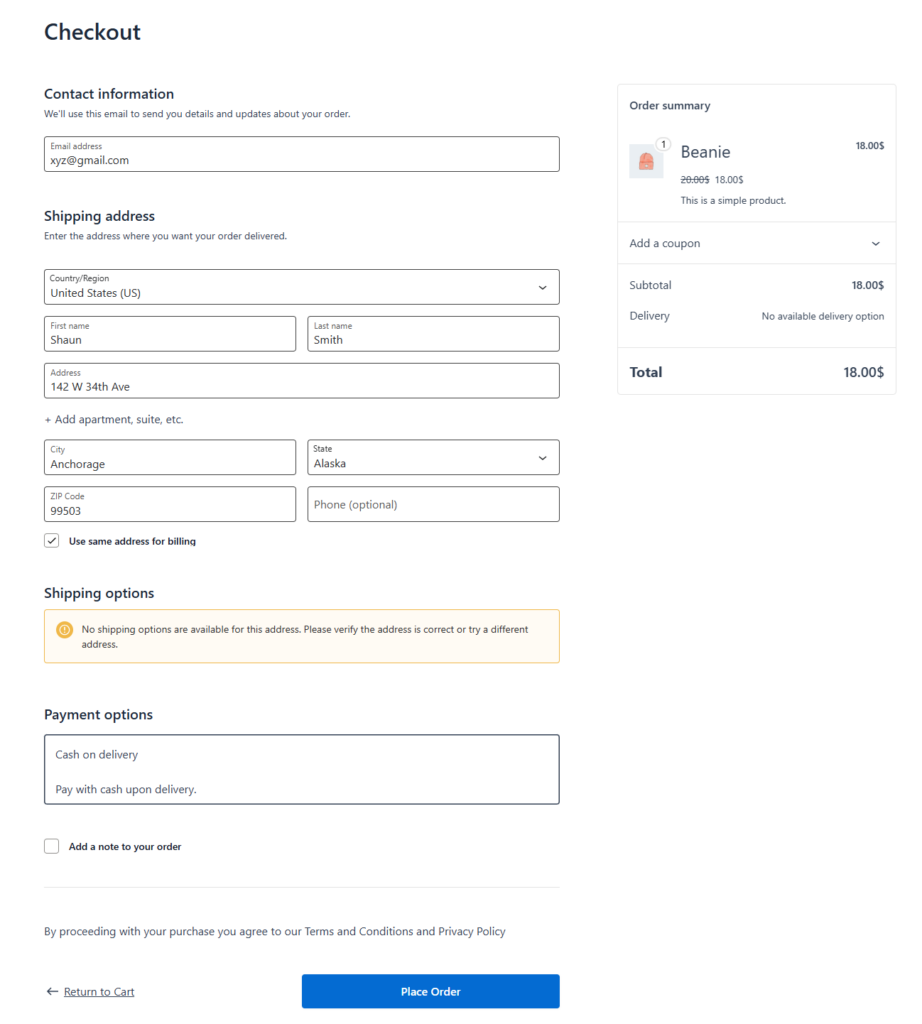
The checkout page is the final step of your customer’s journey, but an unoptimized checkout can lead to abandoned carts and lost sales. To make the most out of your ecommerce store, customizing your WooCommerce checkout is essential. Some other benefits includes:
- Improved User Experience: A streamlined, branded, and user-friendly checkout process encourages more customers to complete their purchase. This increases the chances of converting visitors into customers.
- Higher Conversion Rates: A streamlined, branded, and user-friendly checkout process encourages more customers to complete their purchase, increasing the chances of converting visitors into customers.
- Better Mobile Responsiveness: A significant portion of online shopping occurs via mobile but they are one who faces frequent issue with their checkout page responsiveness. A well customized checkout page ensures your checkout works flawless in mobile device too.
- Enhanced Branding: Checkout page should be made in align with your brand voice. Customizing it is the only way to earn that.
- Flexible Payment Options: Offering customized payment gateways and methods caters to diverse customer preferences, making the process more convenient for a broader audience.
2 Ways to Customize Checkout Page in WooCommerce
Now that you know the potential drawbacks of having a default WooCommerce checkout, let’s take a look at how to customize the checkout page in WooCommerce. Here are the two ways you
- Customize with CoDesigner Widgets
- Use CoDesigner Templates
CoDesigner: A Smarter Way to Customize Your WooCommerce Checkout
Requires No Custom Coding
WooCommerce didn’t keep any straightforward way to customize the default checkout page it provides. One thing you can do is running custom programming codes but its not everyone’s cup of tea. Luckily plugins like the CoDesigner helps you personalize it, without requiring to use a custom code to make changes.
Increases Conversion Potential
The default WooCommerce checkout is somewhat boring and may deter customers from completing an order. The average WooCommerce store loses over 75% of its sales because of such cart abandonment.
CoDesigner helps you to customize your WooCommerce checkout page so that the vistors finds it convenient, user-friendly and eye soothing. These elements has huge impact on increasing the overall conversion potential.
Utilize a Personal Touch
WooCommerce checkout pages with added personal touch gives users the feel of trust to place a perchase. Customization option like a well-crafted Thank You message is a prime opportunity to solidify your brand identity and build lasting relationships with your customers.
However, WooCommerce’s default Thank You page falls short in this regard, offering limited options for customization. CoDesigner offers immense flexibility to fill this void and help you retain your customers with a personalized WooCommerce checkout page.
Customize with CoDesigner Widgets
Here’s how you can create a custom-made checkout page with CoDesigner widgets –
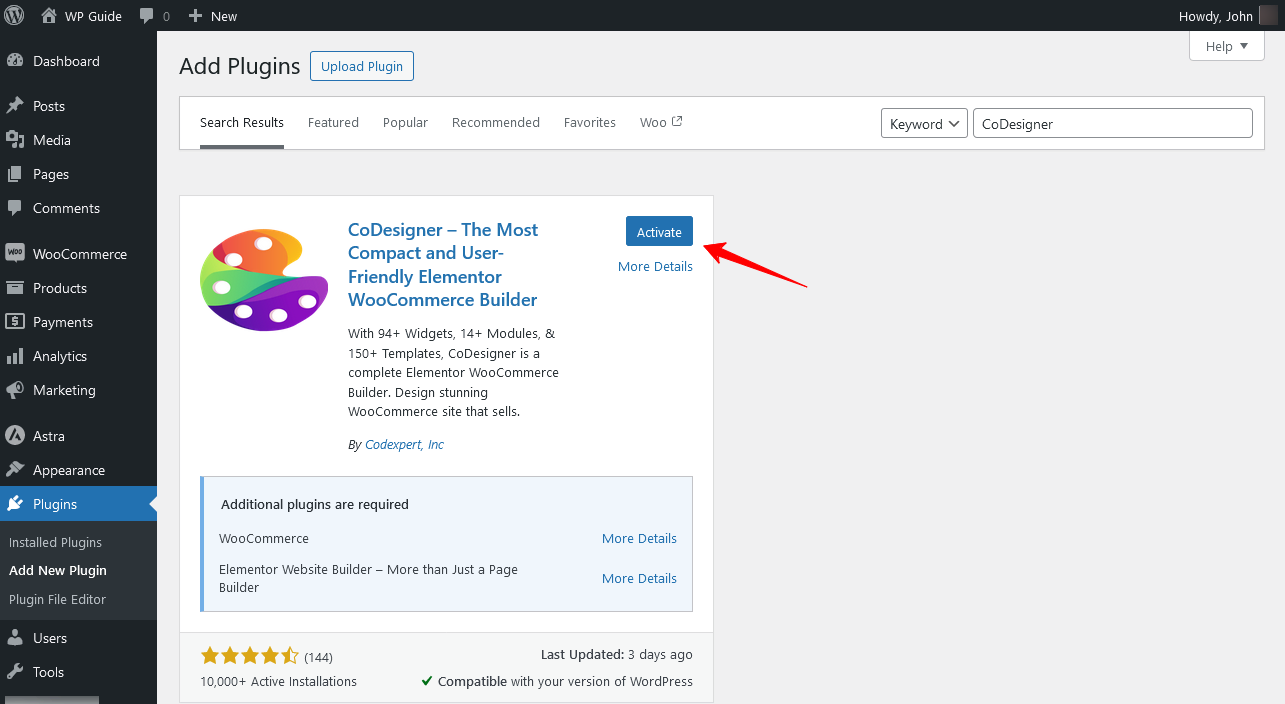
Step 1: Install the Necessary Plugins
To do this, navigate Dashboard > Plugins > Add New Plugin, and search for CoDesigner. Install and Activate the CoDesigner plugin on your website. Checkout customization is a Pro feature of CoDesigner. To design beautiful checkout pages you have to grab the CoDesigner premium package.
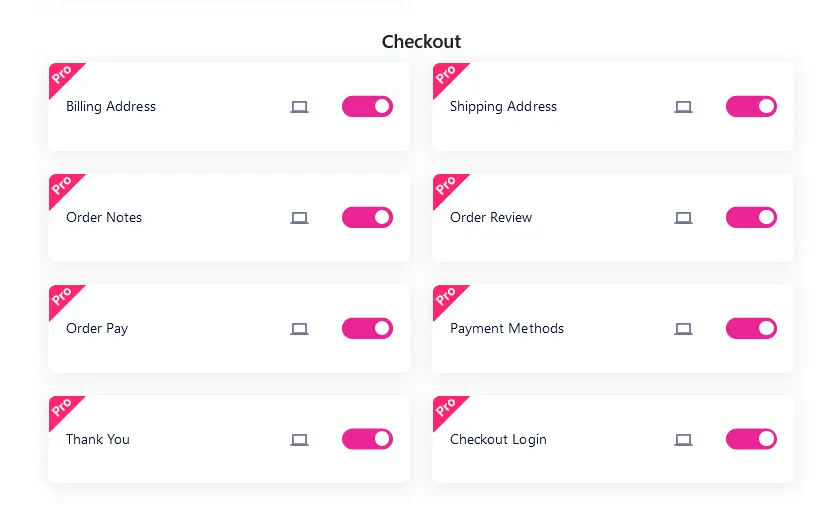
Step 2: Enable Checkout Widgets
Make sure you have all the CoDesigner checkout widgets enabled. Go to Dashboard > CoDesigner > Widgets, enable all the widgets for checkout, and hit Save Changes.
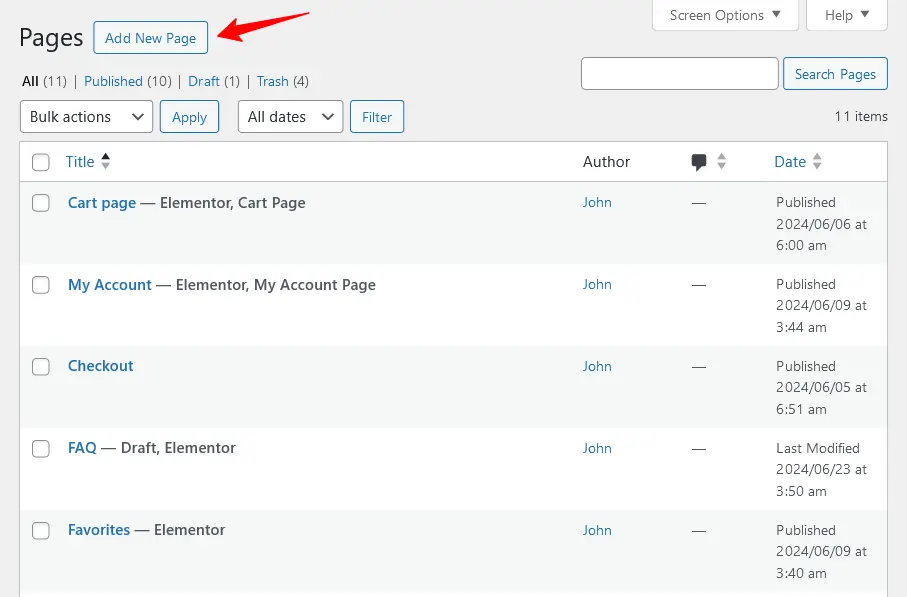
Step 3: Create a New Page
To create a new page, go to Dashboard > Pages > Add New Page. Now edit that page with Elementor.
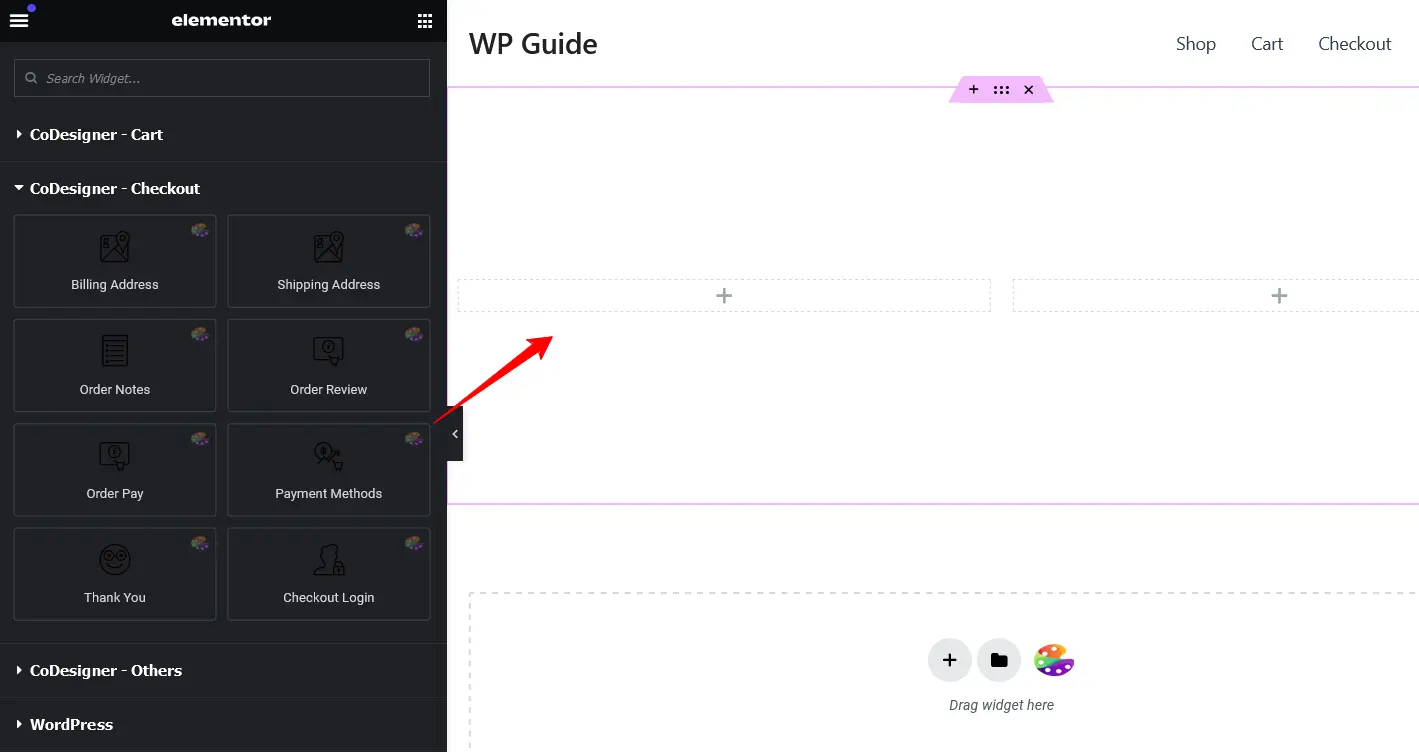
Step 4: Add Checkout Widgets
Look for the CoDesigner widgets in the Elementor search bar. Find the checkout widget you want to add and drag them to the desired section.
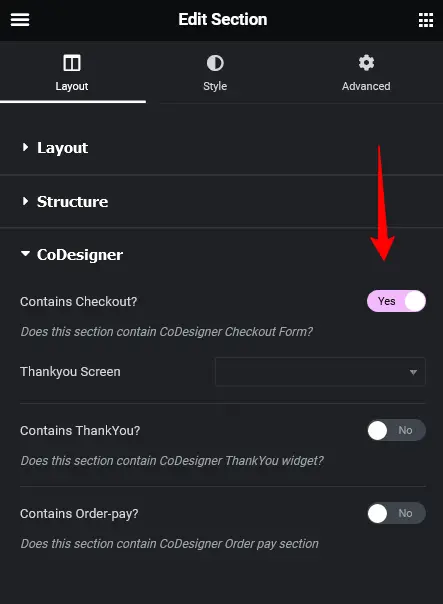
Step 5: Enable Checkout Settings
Once you’ve finished customizing, select the entire Elementor section and enable the ‘Contain Checkout?’ button from the Layout section.
Step 6: Save Changes
If you’re happy with the final results, click on the Publish button to save changes.
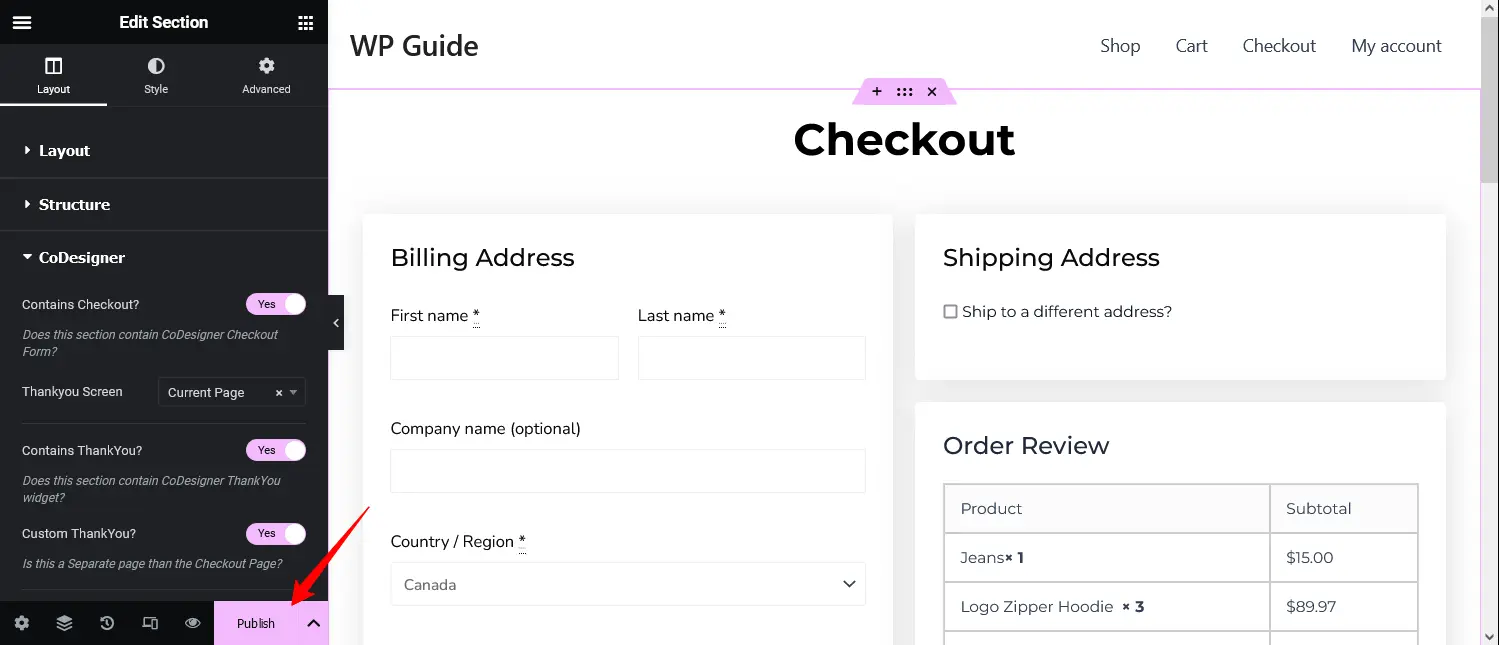
Publish the Checkout Page
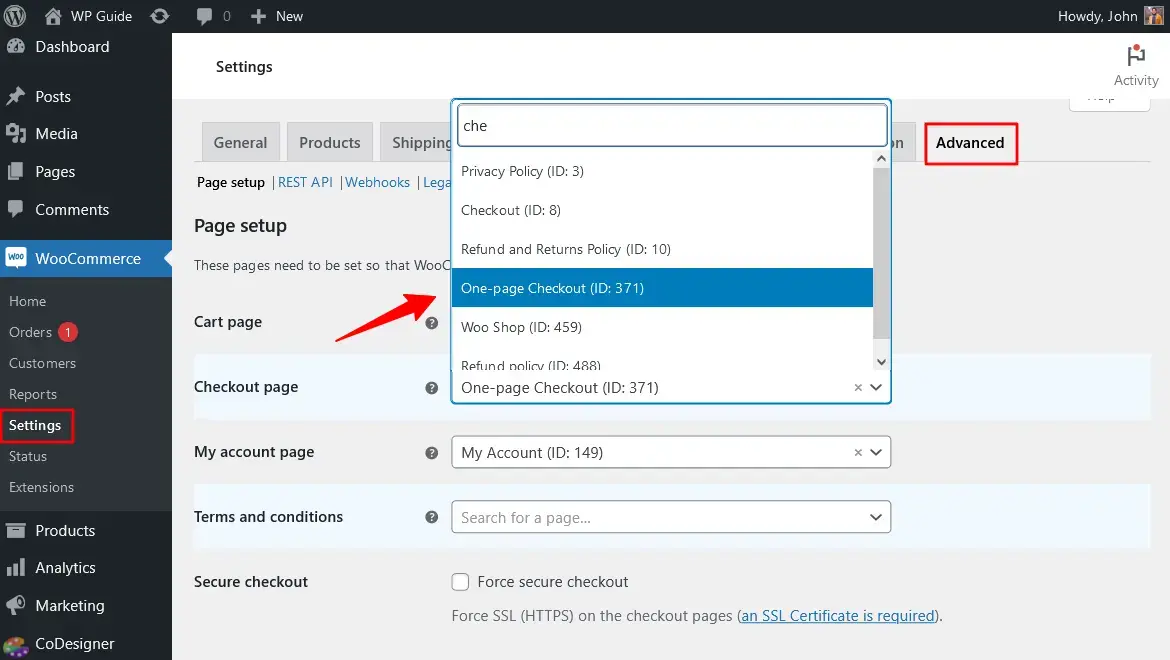
Step 7: Set New Checkout to Default
You need to replace the default checkout page with the new checkout you have just created. To do this, go to WooCommerce > Settings > Advanced and replace the default in the checkout section.
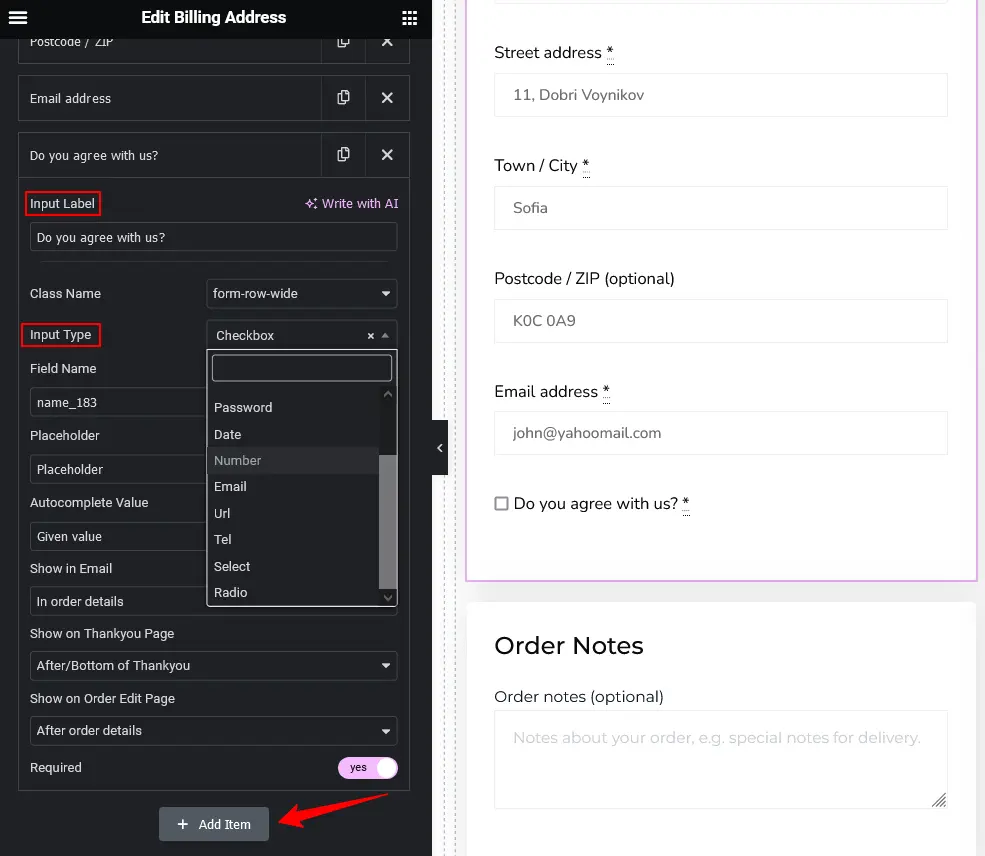
Add Custom Fields
With the WooCommerce checkout field editor, you can easily create and add custom fields on your WooCommerce page. CoDesigner can help you create new fields and remove the existing ones. You don’t require any prior coding knowledge for this.
To add custom checkout fields, open the new checkout template with the Elementor Editor and add different types of custom fields to your checkout page, including radio, text, passwords, dates, and more.
Use CoDesigner Templates
CoDesigner checkout builder makes customizing your checkout even easier. Here’s how you can implement them –
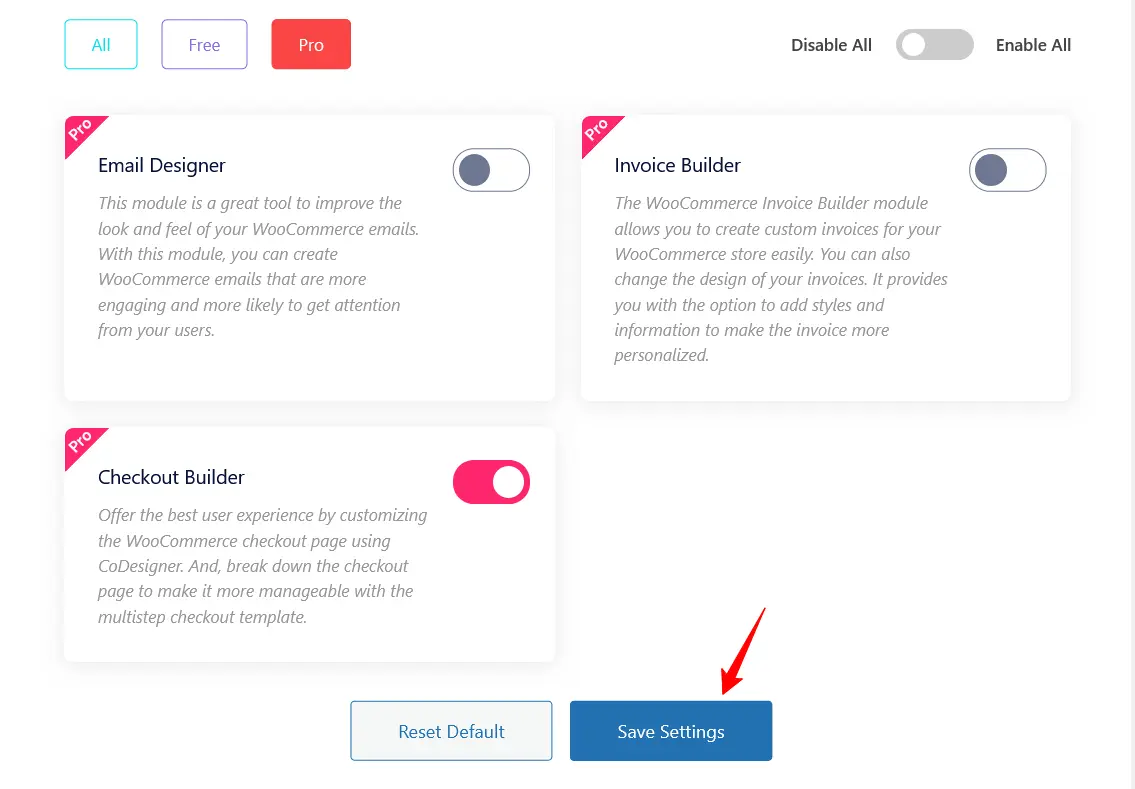
Step 1: Enable Checkout Builder Module
Navigate to Dashboard > CoDesigner > Modules and enable the Checkout Builder Modules, and click on Save Settings.
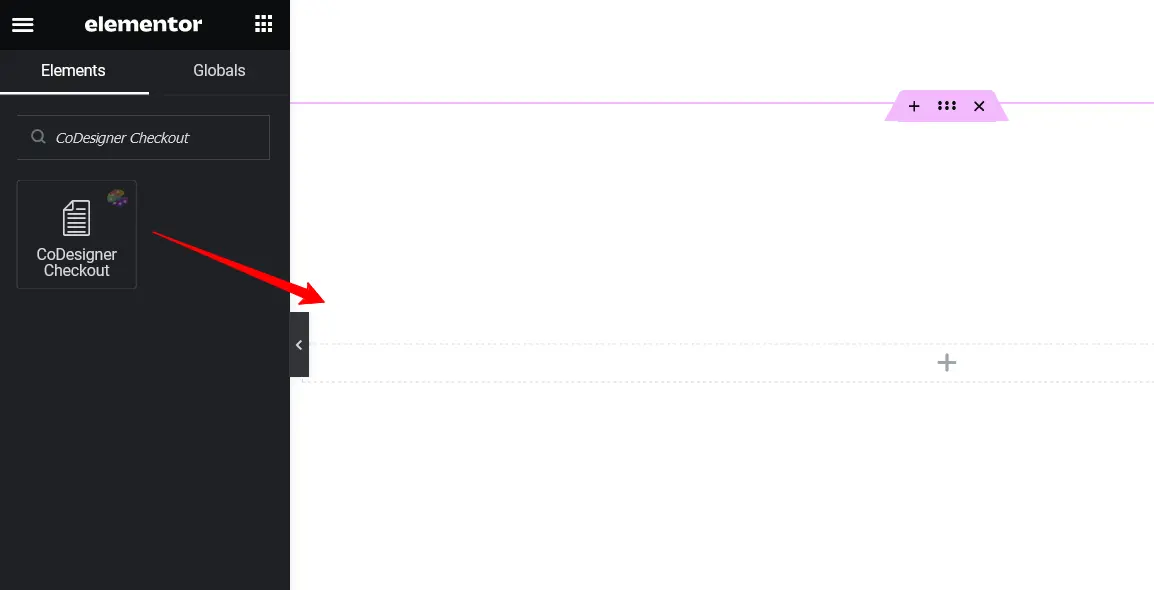
Step 2: Add CoDesigner Checkout Template
Open the existing checkout page with the Edit with Elementor button. In the Elementor search bar, search for CoDesigner Checkout and drag it to the new section.
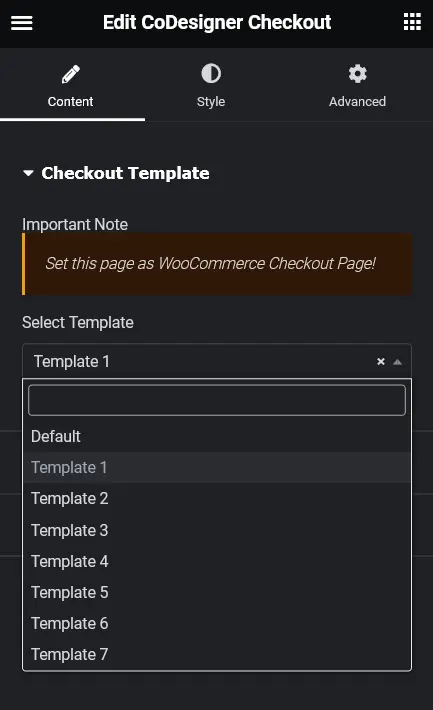
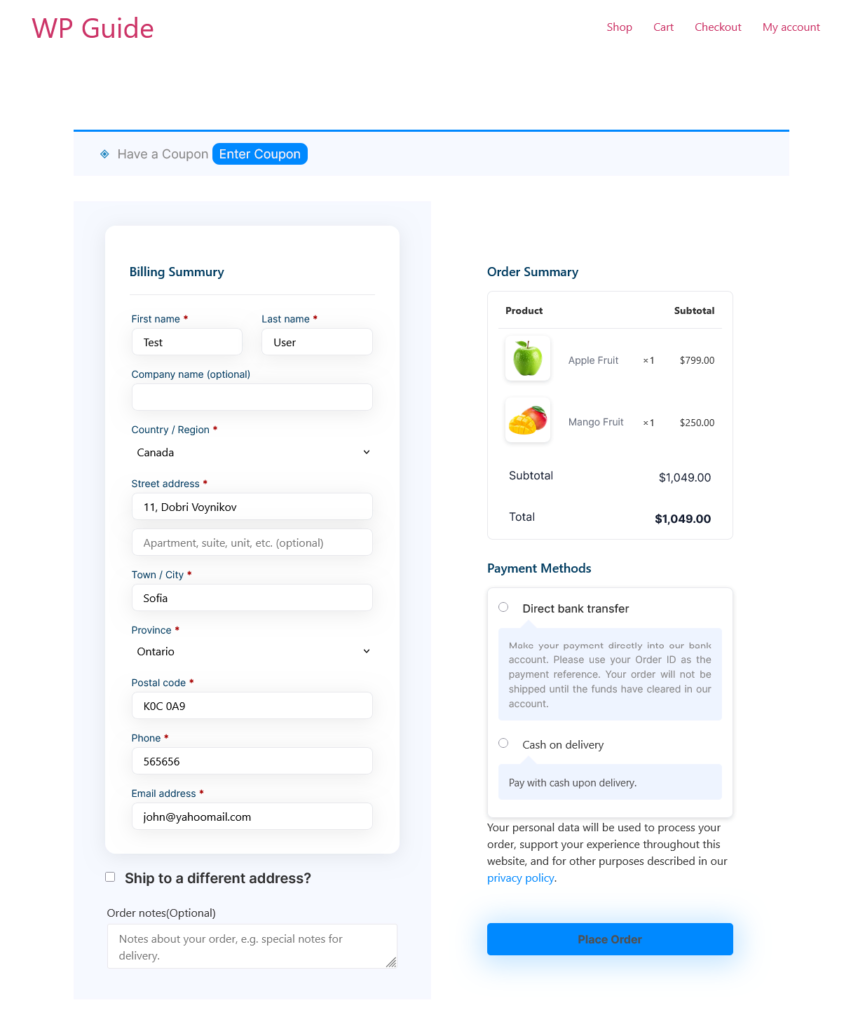
Step 3: Choose a CoDesigner Template
You’ll find various templates available, including Shopify, Multi-Step, One-Page Checkout, and more. Go through the options, and select your desired template.
Step 4: Save and Set as Default
Once your WooCommerce checkout customizations are complete, click on the Publish button to save changes. Set it as a default WooCommerce checkout page from WooCommerce > Settings > Advanced.

And done! Now your checkout page is customized and ready to convert your visitors to customers!
Best Ways to Boost Your Checkout Page Conversions
Now that you’ve equipped yourself with the tools to customize your WooCommerce checkout page, let’s go a step further. Here are some additional methods you can employ to truly lock in your visitors and turn them into loyal customers –
- Offer Multiple Payment Options: Don’t limit your customers! Offer a variety of payment methods, especially if you cater to an international audience.
- Clear & Concise Checkout: Keep it simple! Remove unnecessary elements and ensure all information is clear for a smooth user experience.
- Coupon Friendly: Make it easy for customers to redeem coupons during checkout.
- Account Creation: Offer an account creation option to allow customers to track past orders and build loyalty.
Wrapping Up
By now, you’re equipped with the knowledge and tools to transform your WooCommerce checkout page. Remember, there’s no one-size-fits-all approach. Remember to regularly monitor customer behavior, gather feedback, and use that data to continuously refine your checkout experience.
Employ A/B testing and experiment with the strategies outlined in this tutorial to find the perfect balance for your store. So go forth, customize, and watch your sales soar!
Frequently Asked Questions (FAQs)
Q. How do I customize the checkout page without plugins?
To customize your WooCommerce checkout page without plugins, you’ll need to edit checkout template files. Access your WordPress theme by copying the WooCommerce template file from the theme folder and making the modifications there.
Q. How do I change the default WooCommerce checkout page?
Navigate to WooCommerce Settings > Advanced and replace the default WooCommerce checkout page with your custom checkout page. After that, click on the Save button.
Q. How to customize the WooCommerce cart and checkout page?
- Install CoDesigner and CoDesigner Pro within your dashboard.
- Enable necessary widgets from CoDesigner.
- Create individual pages for the cart and checkout page.
- Drag and drop the widgets to particular pages and customize them.
- Save the changes.
- Set them in WooCommerce settings.
Q. How do I create a one-page WooCommerce checkout?
- Install CoDesigner and CoDesigner Pro.
- Activate the CoDesigner Checkout Builder module.
- Create a new checkout page.
- Drag and drop the widget in Elementor.
- Choose a one-page template from the editor.
- After saving the customization, set this as WooCommerce default checkout.
You can also check out our blog here to create a one-page checkout for your WooCommerce.
Subscribe to Our Newsletter
Get the latest WordPress tutorials, trends, and resources right in your inbox. No Spamming, Unsubscribe Anytime.

Thank you for subscribing to our newsletter!

Growth Marketer with expertise in SEO, content marketing, product-led growth, and community-driven acquisition. Experienced in scaling WordPress products through organic search, strategic content, Reddit marketing, and user-focused growth initiatives. Passionate about turning customer insights into sustainable growth, stronger brand visibility, and measurable business results.
Table of Content
- Why You Need to Customize Your WooCommerce Checkout?
- 2 Ways to Customize Checkout Page in WooCommerce
- CoDesigner: A Smarter Way to Customize Your WooCommerce Checkout
- Requires No Custom Coding
- Increases Conversion Potential
- Utilize a Personal Touch
- Customize with CoDesigner Widgets
- Step 1: Install the Necessary Plugins
- Step 2: Enable Checkout Widgets
- Step 3: Create a New Page
- Step 4: Add Checkout Widgets
- Step 5: Enable Checkout Settings
- Step 6: Save Changes
- Step 7: Set New Checkout to Default
- Add Custom Fields
- Use CoDesigner Templates
- Step 1: Enable Checkout Builder Module
- Step 2: Add CoDesigner Checkout Template
- Step 3: Choose a CoDesigner Template
- Step 4: Save and Set as Default
- Best Ways to Boost Your Checkout Page Conversions
- Wrapping Up
- Frequently Asked Questions (FAQs)
- Q. How do I customize the checkout page without plugins?
- Q. How do I change the default WooCommerce checkout page?
- Q. How to customize the WooCommerce cart and checkout page?
- Q. How do I create a one-page WooCommerce checkout?