How to Customize Your Woocommerce Shop Page – A Complete Guide (in 2026)


When it comes to creating an online shop, the WooCommerce shop page is the heart of your business. Yet, many store owners just stick with the default layout. This basic design can make your shop feel pretty generic, not showcasing your unique brand and missing out on chances to engage and convert customers. With over 4.6 million WooCommerce shops out there, it is crucial to stand out more than ever. Unfortunately, customizing your WooCommerce shop page can feel daunting and time-consuming, which leads a lot of people to just ignore it.
Imagine a customer landing on your store’s shop page and finding it hard to navigate, uninspiring, and not aligned with your brand. They will quickly leave and might never return. A lackluster design can cost you sales and damage your brand’s image. When your shop page is not optimized for a smooth, engaging experience, you are missing out on potential conversions and revenue.
The good news? You don’t have to be content with a basic, default WooCommerce shop page. By using Elementor and CoDesigner, you can easily customize your WooCommerce shop to showcase your products in a way that reflects your brand and improves the customer experience.
In this blog post, we will walk you through the process of transforming your shop page into a visually appealing, user-friendly, and conversion focused space. Let’s get started!
What is a Shop Page in WooCommerce?
The Shop Page in WooCommerce is the main storefront where all your products are displayed. It serves as the central hub where customers can browse, filter, and purchase items from your store. When you install the WooCommerce plugin on your website, it automatically creates a Shop page. However, the default layout is quite basic and may not fully align with your brand or provide the best shopping experience.
Why Customizing Shop Page in WooCommerce
As we have already mentioned WooCommerce shop page is the heart of your website and holds the most value out of all the web pages. Because 47% of the website users check the product page before going to other pages; although you have a default shop page design in WooCommerce customization is always recommended and at some point, it’s a must.
Whenever customers appear in your shop, they want to find the desired product as soon as possible and navigate better as per their choices. With the default shop page structure navigation is restricted, plus it is not made for your website. So ultimately this design does not help you with the conversion rate at all.
Customizing the Shop page in WooCommerce gives you the flexibility to make your shop stand out and relate with the customer. According to Zipdo, 36.8% of the customers are influenced to make a purchase and come back because of personal product recommendations.
Apart from that, here are some benefits of customizing your WooCommerce Shop page –
- Increased conversion rate
- Relate to user requirement
- Provide excellent user experience
- Make your shop exceptional and personalized
- Great SEO optimization and appear more on search results
Guide to Customizing Shop Page in WooCommerce
Here’s a step-by-step instructions on how to easily customize your shop page in WooCommerce –
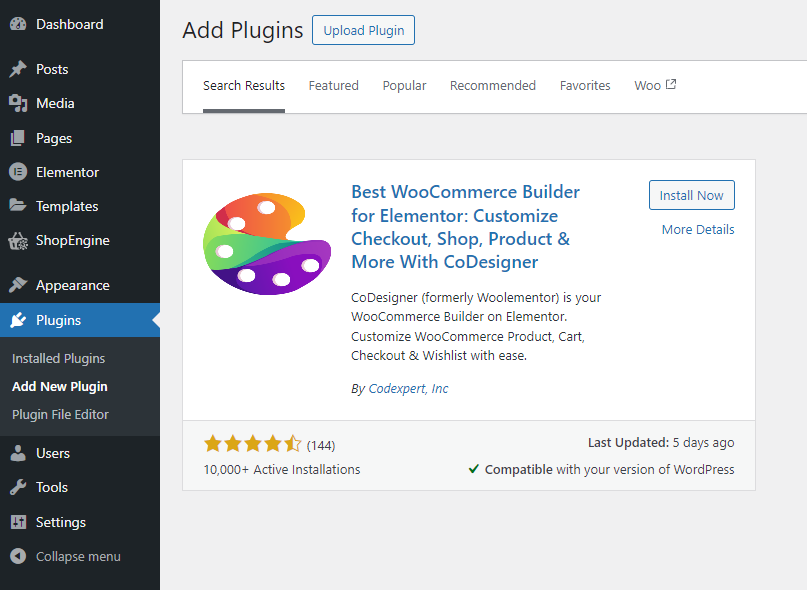
Step 1: Install Plugin
To start the process of customization, install all the necessary plugins. For shop page customization you must have Elementor and CoDesigner installed on your dashboard.
To install Plugin; navigate to Plugins > Add New Plugin > Search name of the plugin > Install Now
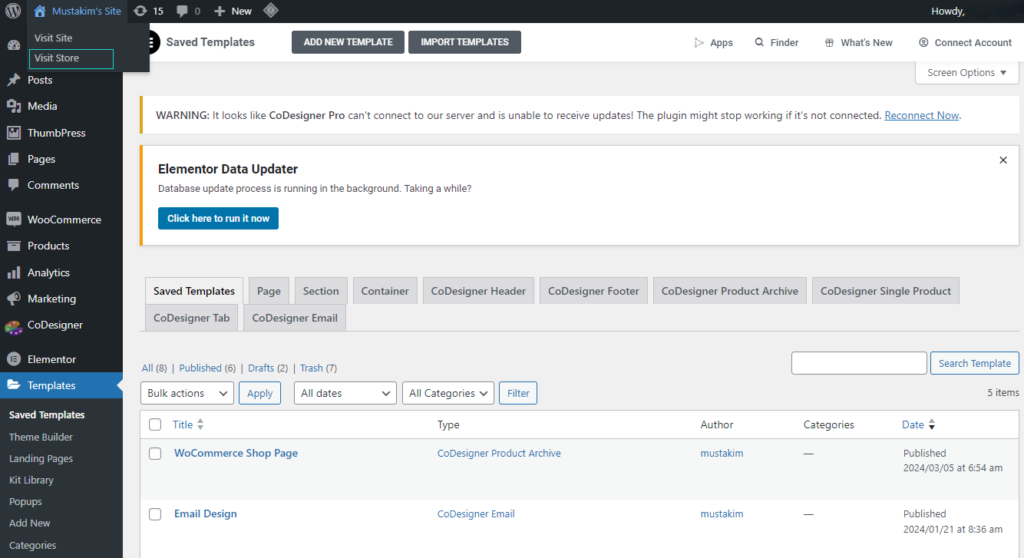
Step 2: Create a Shop Page Template
Once you have installed Elementor and CoDesigner, you are ready to customize your Shop page.
Now create a page and assign it to WooCommerce. To create a Shop page, head over to the template section. Click on ‘Add New’.
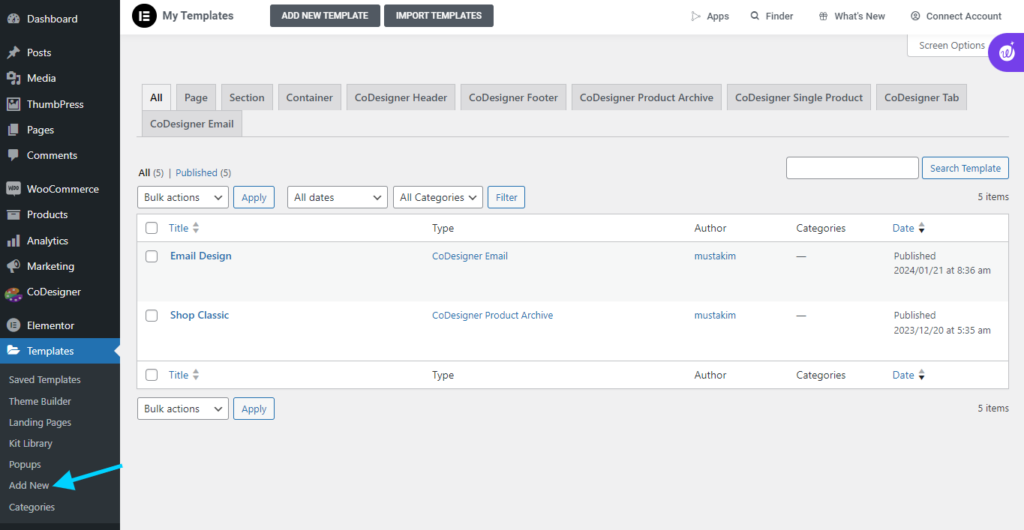
You will be greeted with a popup page, create a CoDesigner Product Archive and name it accordingly.
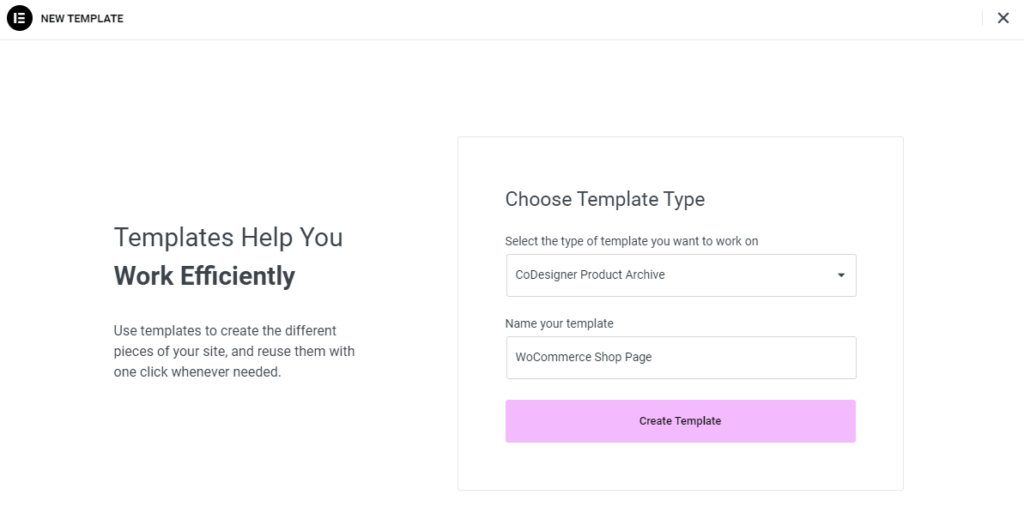
Hit the ‘Create Templates‘ button after you’re done.
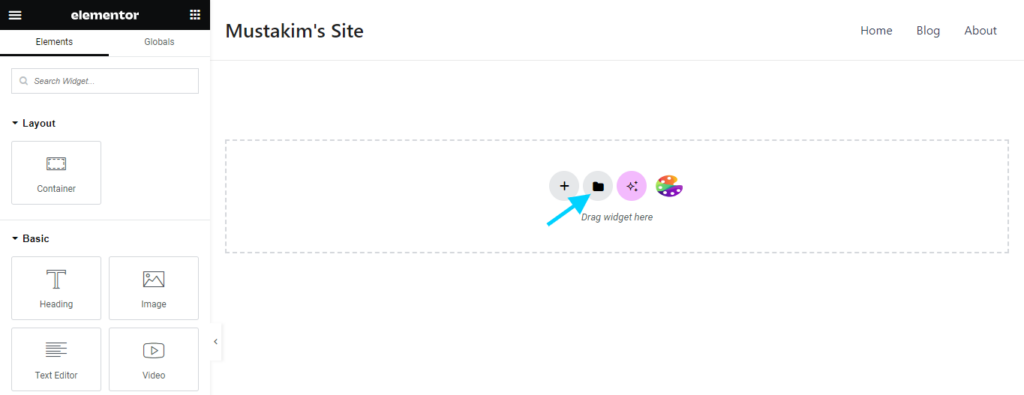
After that, you need to create a page from ‘Pages’. Go To Pages > Add New Page > Assign a Title > Save Draft
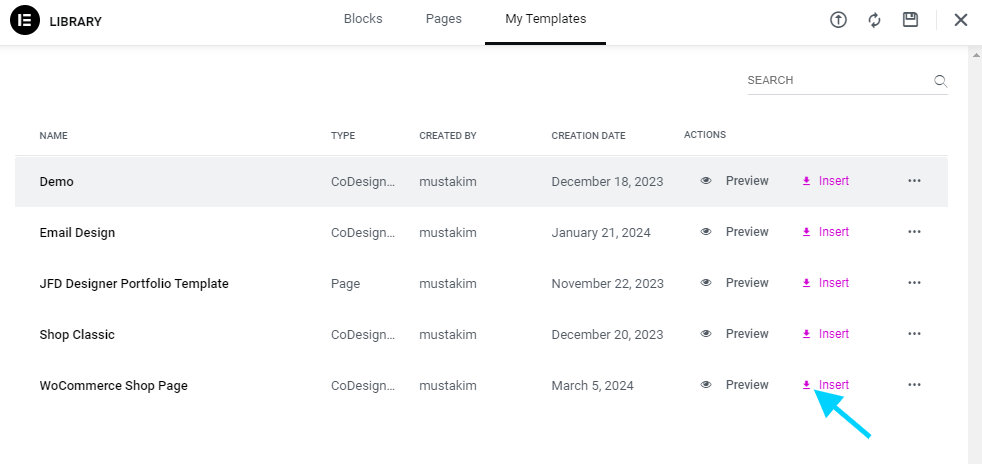
Start editing by clicking Edit with Elementor. Click on the ‘Add Template’ section and import the pre-created CoDesigner Product Archive template.
Locate the template and click the ‘Insert’ button.
Step 3: Assign the Page in Woocommerce
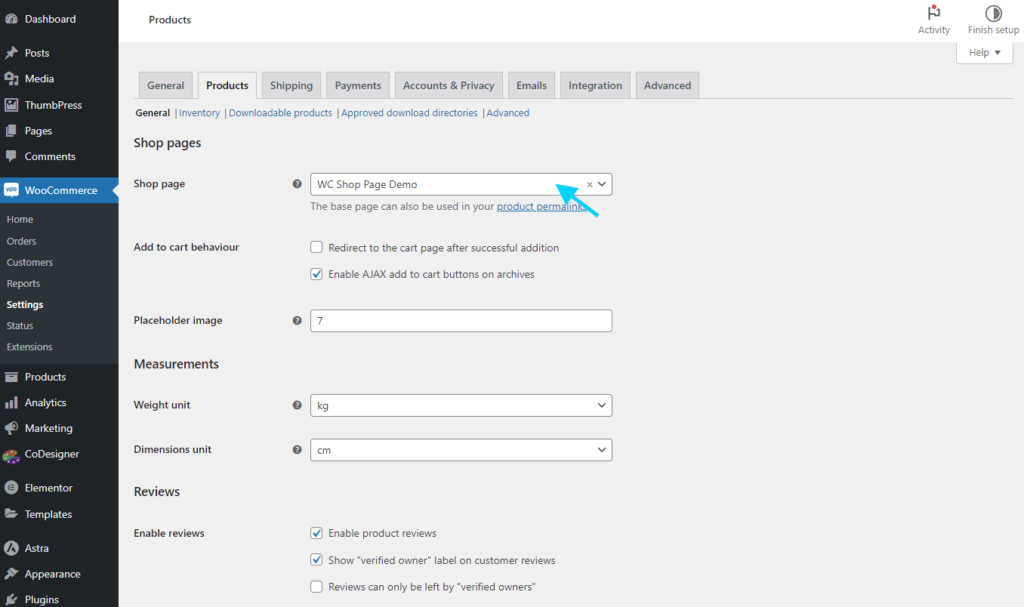
After creating the page, assign it to WooCommerce. To do that, head over to the WooCommerce settings page and assign the pre-created page as your product page in WooCommerce.
Go to the WooCommerce settings page and head over to the product section. Search for the pre-created page template and select it as a WooCommerce shop page and click on ‘Save Changes’.
Step 4: Customize Your Shop Page
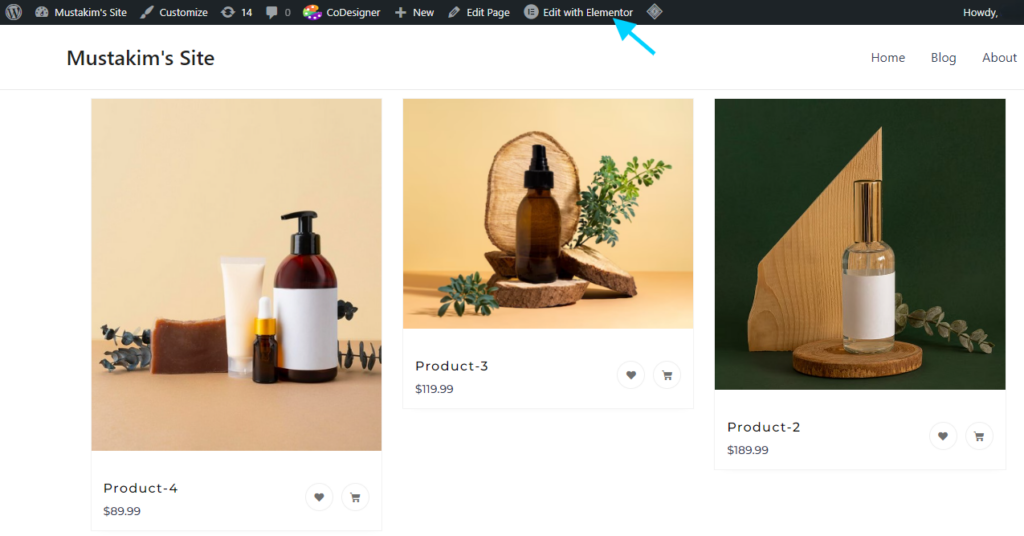
Go to the dashboard and click on the home icon to visit your store.
From here click on the ‘Edit With Elementor’ button to start editing.
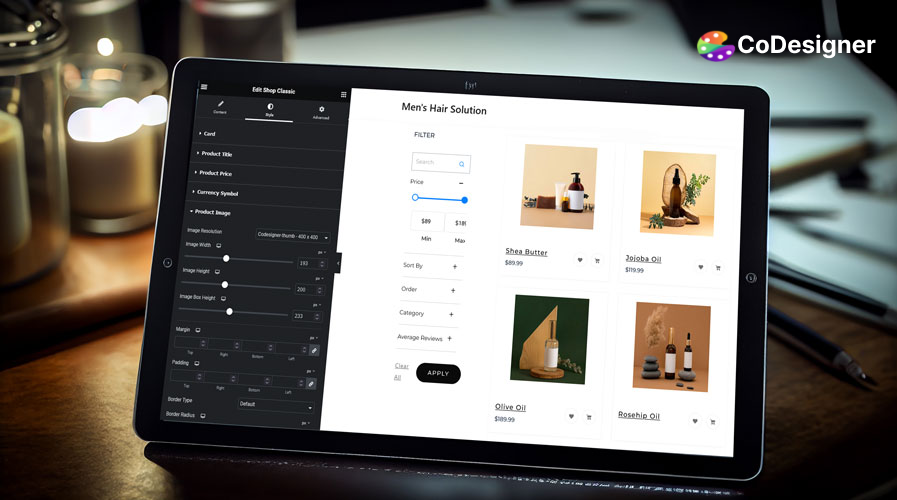
After that, edit shop pages with CoDesigner. Search for the Shop widget in the search bar and all the related widgets and modules will show up. With these, you can try different layouts of products with just one click.
To include any product style just click the style name and drag it to the desired section.
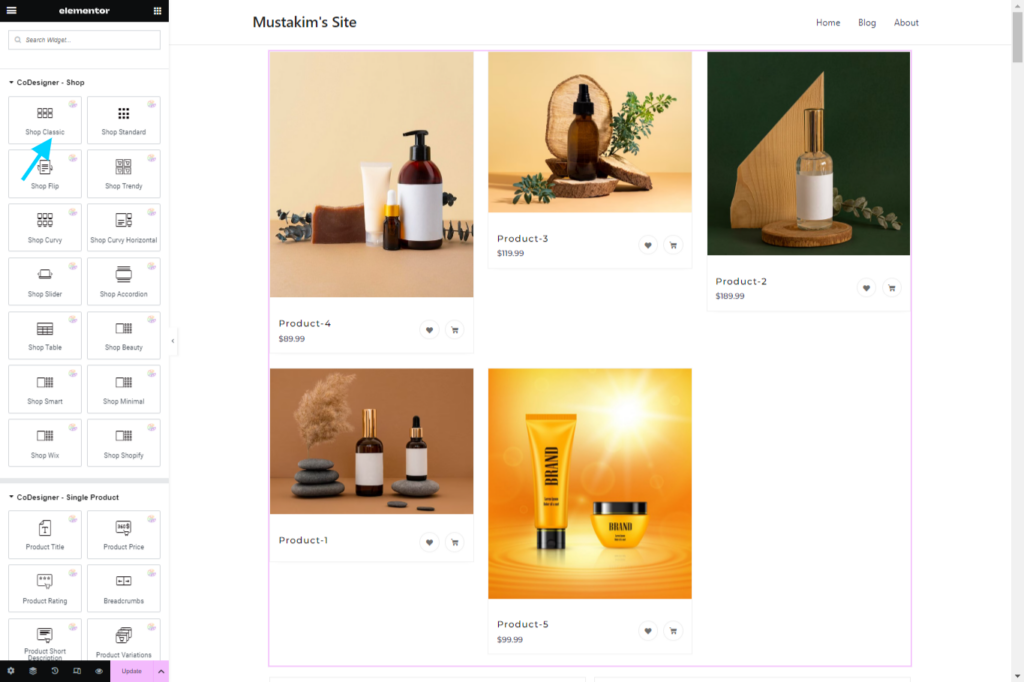
When you select Shop Classic widget, this structure will appear in canvas. CoDesigner also has other styles for shops that can be applied to showcase your products.
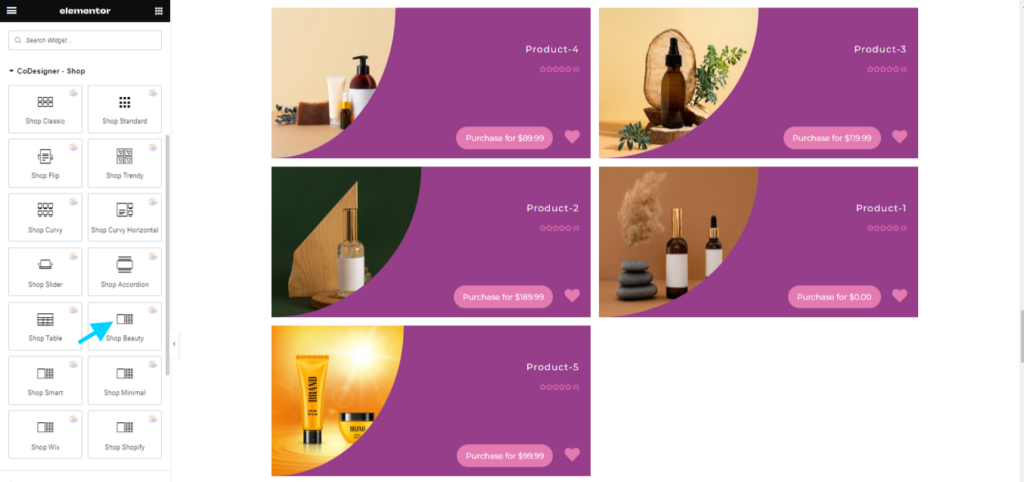
This is the style you will see of the products when using Shop Beauty.
Apart from changing the styles, you can customize all the other details of the shop page by clicking the ‘Edit’ button, which will redirect you to the editor page.
With CoDesigner, you can customize content, style, and other advanced elements of your Shop page.
In the content option, you can see several customization options to make your shop convenient and user-friendly.
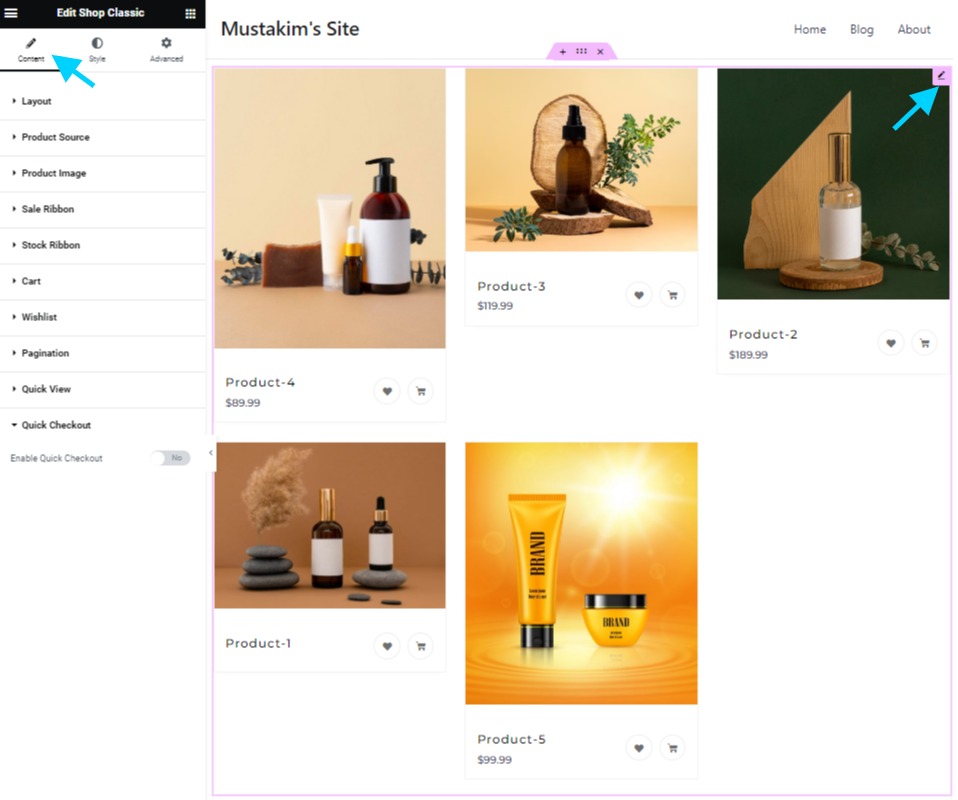
Content Editor Options
Here are some options you will find in the Elementor Editor page to help you customize your shop page –
- Layout: Change the Layout of the product appearance. You can add or reduce columns and change the alignments.
- Product Source: Change the product source, add a custom query, and how many products you want to add per page can also be edited.
- Product Image: Customize product images and choose, if you want to, show or hide the images. From here you can also determine how you want the picture to appear on click.
- Ribbon: Attract customers to your product show a ribbon with a sale percentage or any other attractive offers. You can also add a ribbon when it comes to stock or stock out actions.
- Cart: Show or hide the cart page from the product image with the cart option.
- Wishlist: Engage your customers by providing a Wishlist. Your customers can keep the products they like in an organized list for future purchasing.
- Quick View and Checkout: Entice customers with a quick view option that lets them take a quick look at your product and purchase without registering on your site.
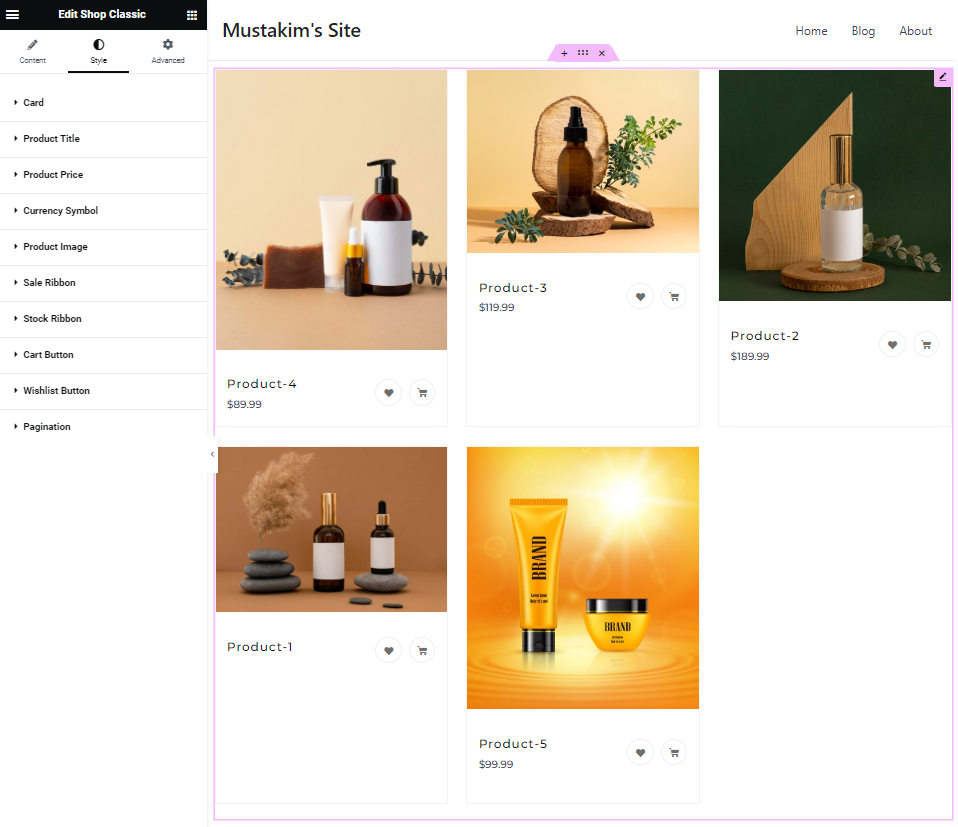
In the style section, you have all the options to make your shop’s appearance even more stylish and appealing to visitors. From there you change the appearance of everything from Cards, Product Titles, Product Prices, Currency Symbols, Product Images, Wishlist buttons, and more!
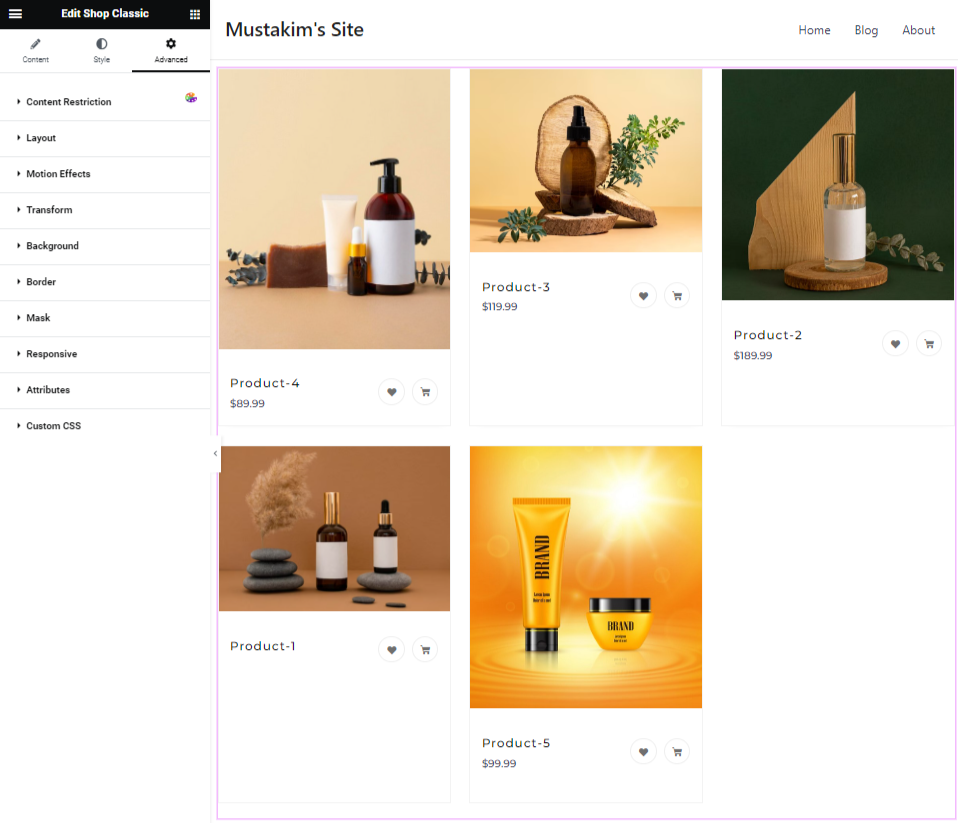
When it comes to the advanced tab, you can find incredible customizing options like; motion effects, transform, background, mask, and responsive qualities.
Customize your shop page to your liking and add all the components you need to make the shop page user-friendly and conversion-optimized! When all the customizations are done, simply hit the ‘Update’ button to apply changes to your Shop page in WooCommerce.
Final Thoughts
The WooCommerce Shop page plays a crucial role in your online store, directly impacting customer experience and sales. A well-structured, visually appealing, and easy to navigate shop page enhances product discovery and increase conversions. With the right customization approach, your WooCommerce store can not only look professional but also perform efficiently in a competitive eCommerce landscape.
While the default WooCommerce layout offers basic functionality, customization is key to making your store stand out. This is why a compact customization tool like CoDesigner is necessary.
With its vast resources, CoDesigner offers limitless design option to help your WooCommerce store stand out. Put your worries about shop page customization to rest and create an amazing shop page with CoDesigner Pro.
Frequently Asked Questions (FAQ)
Customizing your shop page enhances user experience, improves navigation, increases conversions, and helps your store stand out among millions of WooCommerce shops.
No! With CoDesigner and Elementor, you can fully customize your shop page using a simple drag-and-drop interface.
Yes! CoDesigner works seamlessly with most WooCommerce-compatible themes, ensuring a smooth customization experience.
Yes! With CoDesigner, you can create and save multiple shop page templates and switch between them as needed.
The Free version includes basic customization options, while the Pro version unlocks advanced features like multiple layouts, premium widgets, advanced styling, and more customization flexibility.
Try CoDesigner Pro today and build a WooCommerce shop that truly stands out!
Subscribe to Our Newsletter
Get the latest WordPress tutorials, trends, and resources right in your inbox. No Spamming, Unsubscribe Anytime.

Thank you for subscribing to our newsletter!

An experienced writer who's really into WordPress. With a knack for making blogs easy to understand, I am passionate about delivering engaging content. Whether it's simplifying tech talk or sharing insights, I enjoy all of it.
Table of Content
- What is a Shop Page in WooCommerce?
- Why Customizing Shop Page in WooCommerce
- Guide to Customizing Shop Page in WooCommerce
- Step 1: Install Plugin
- Step 2: Create a Shop Page Template
- Step 3: Assign the Page in Woocommerce
- Step 4: Customize Your Shop Page
- Content Editor Options
- Final Thoughts
- Frequently Asked Questions (FAQ)