Customize WooCommerce Custom Shop Page – A Complete Guide
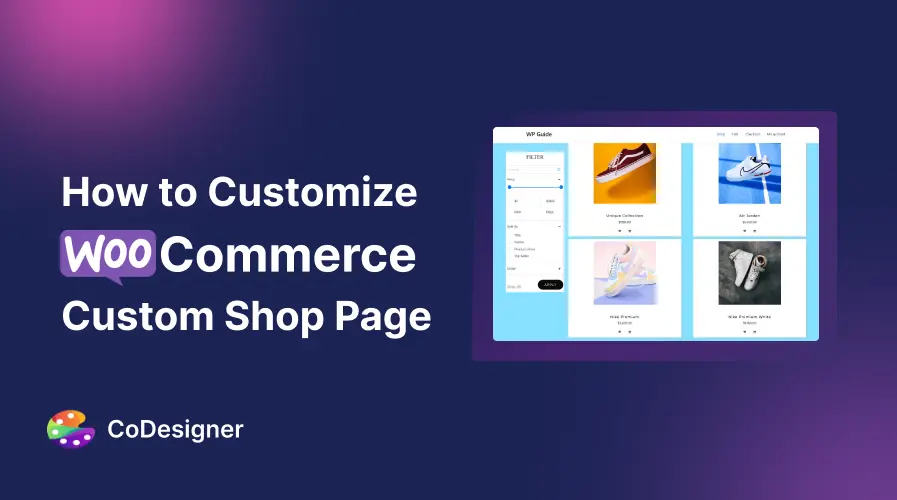
Want to create a shop page that truly wows your customers? Your WooCommerce shop page is often the first impression visitors get of your store. It’s time to make it count. In this guide, we’ll explore five simple methods to transform your shop page into a stunning showcase for your products.
Learn how a customized shop page can elevate your brand and boost sales as we dive into practical tips and actionable steps. Let’s get started!
Why Should You Build a Custom WooCommerce Shop Page?
A custom WooCommerce shop page is more than just visuals. It’s a powerful tool that can significantly impact your online store’s success. Here’s why it matters –
Unique Branding
A custom shop page is your storefront’s digital personality. A personalized shop page ensures that your online store reflects your brand identity, including colors, fonts, and overall designs. Stand out from competitors with a unique and engaging shop page design that captures your brand’s personality and values.
Enhanced Product Visibility
A custom WooCommerce shop page is your opportunity to showcase your products in the most compelling way. incorporate dynamic elements like featured products, live sales notifications, enticing sale ribbons, and highlights for new arrivals to instantly grab customer attention and drive sales.
Improved User Experience
A custom shop page allows you to design an intuitive navigation system that aligns perfectly with your customers’ shopping habits. Create a layout that showcases your products in the most appealing way to effortlessly guide customers to find what they’re looking for.
Optimize for Better Conversion
A well-designed, custom shop page can simplify purchasing, reduce cart abandonment, and boost your sales and conversions. There is no better alternative to build a custom shop page and outrank your competitors.
5 Ways to Customize Your WooCommerce Shop Page
Creating a custom WooCommerce shop page is quite a simple process. If you are just starting out and looking for an easier set up, switching to a platform like EasyCommerce can save you the trouble of dealing with all the steps showing here.
But if you are sticking with WooCommerce for now, just make sure the plugin is installed and set up properly before you dive in.
Here are five simple ways to customize your WooCommerce shop page –
Method 1: Customize the Shop Page with WordPress Editor
With the classic WordPress editor, you can create a new page for your WooCommerce product listings. The editor offers blocks that let you easily add and customize product elements on your page.
Step 1: Add Blocks to the Shop Page
Add the All Products block to display WooCommerce products on your new shop page.
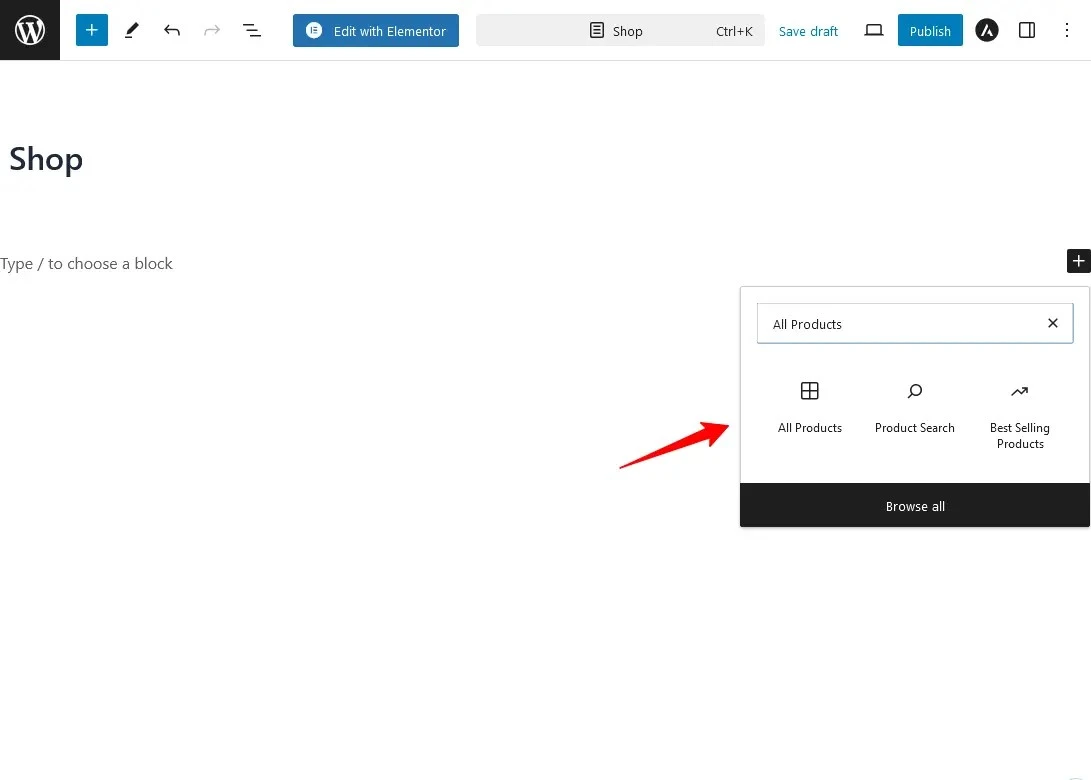
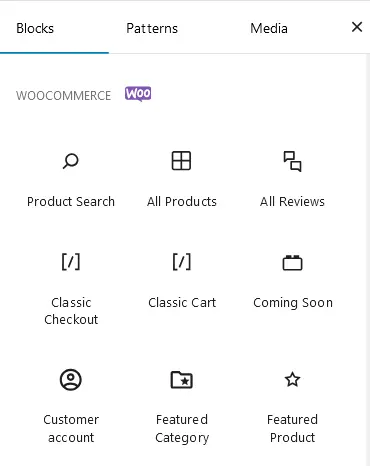
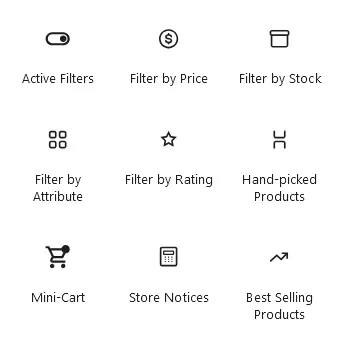
You can adjust the rows and columns to suit your design preferences. There are also multiple options you can add to your shop page like Filters, Product Collections, Product Categories, Cart, Checkout, and much more.
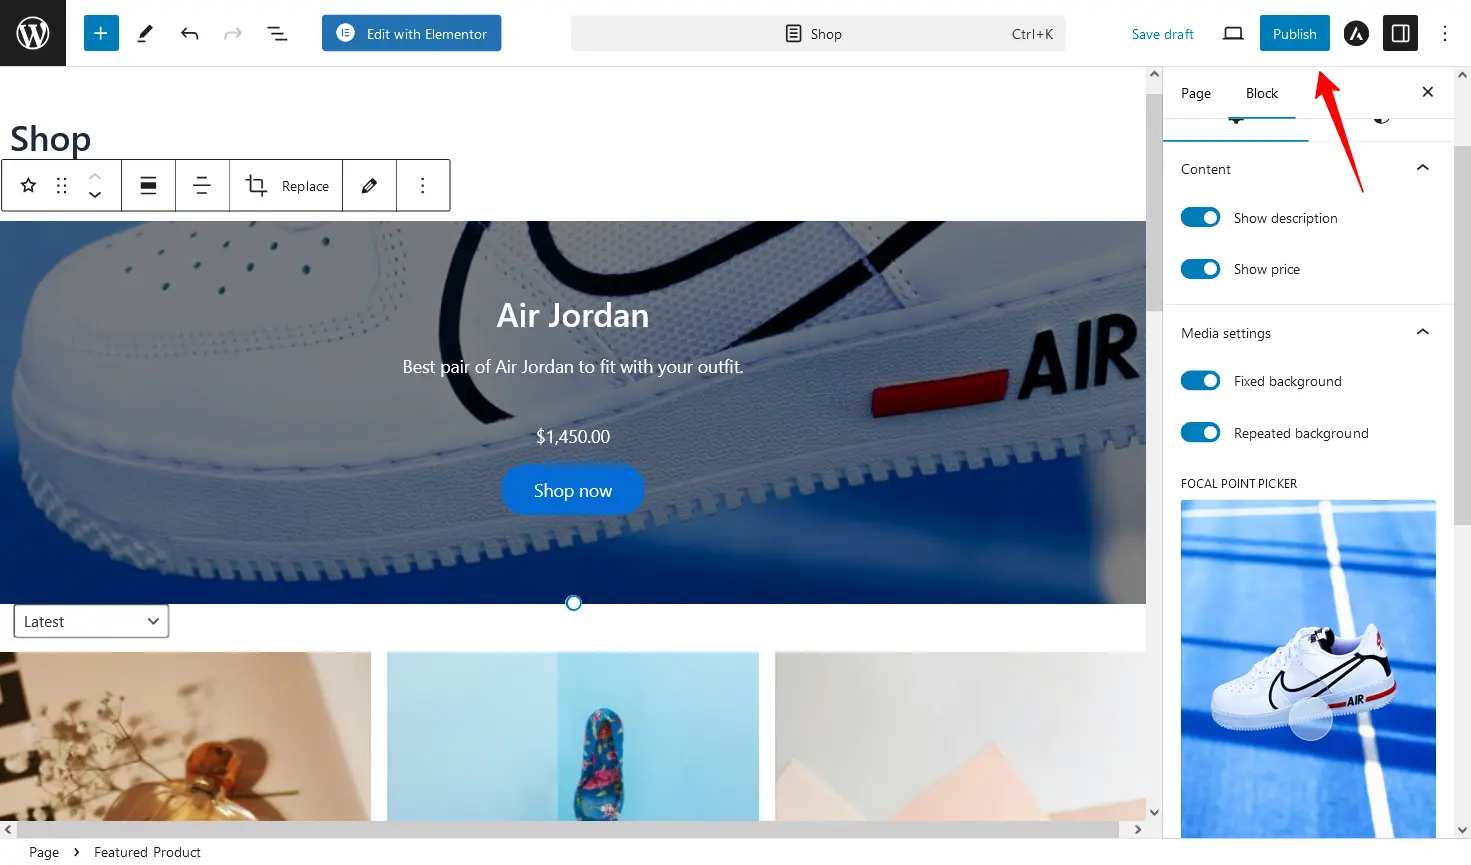
Step 2: Customize and Publish
Once you’re done with the customization, publish your newly designed WooCommerce shop page on your store. To display this as your default shop page from WooCommerce > Settings > Advanced.
Method 2: Edit WooCommerce Shop Page Using an Addon
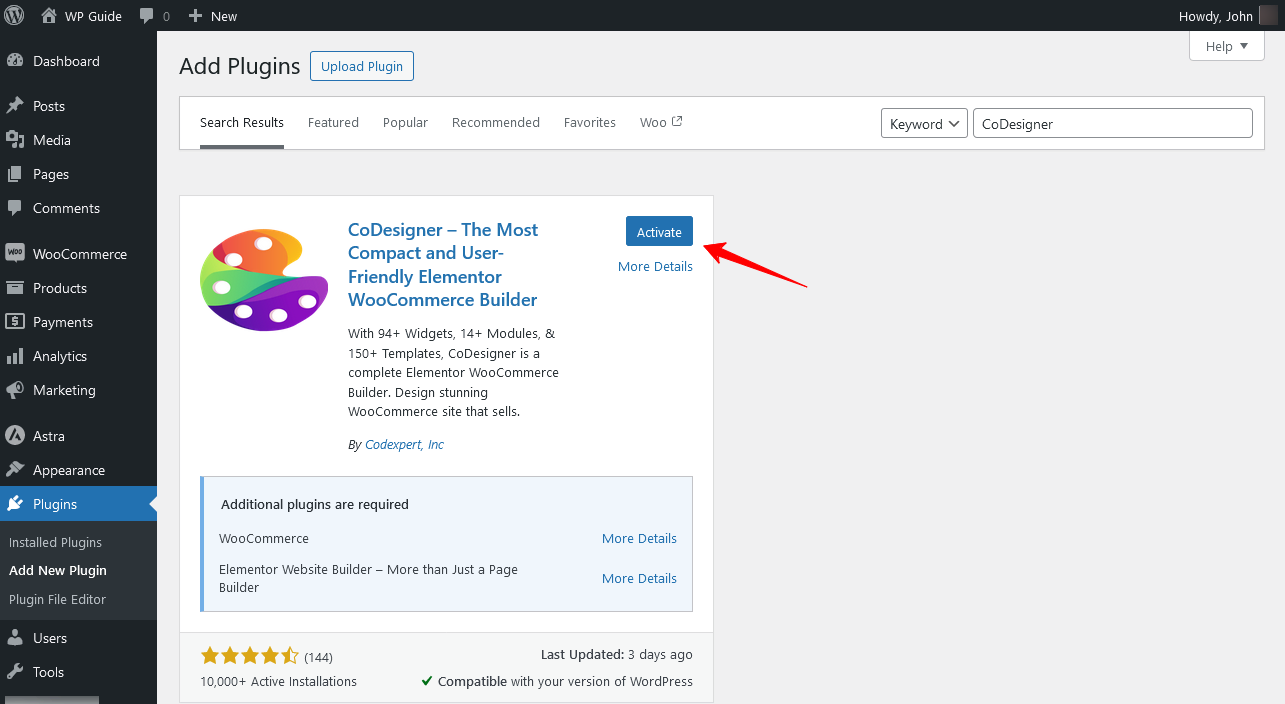
Step 1: Install CoDesigner
First, install the CoDesigner plugin from your store’s dashboard and activate it.
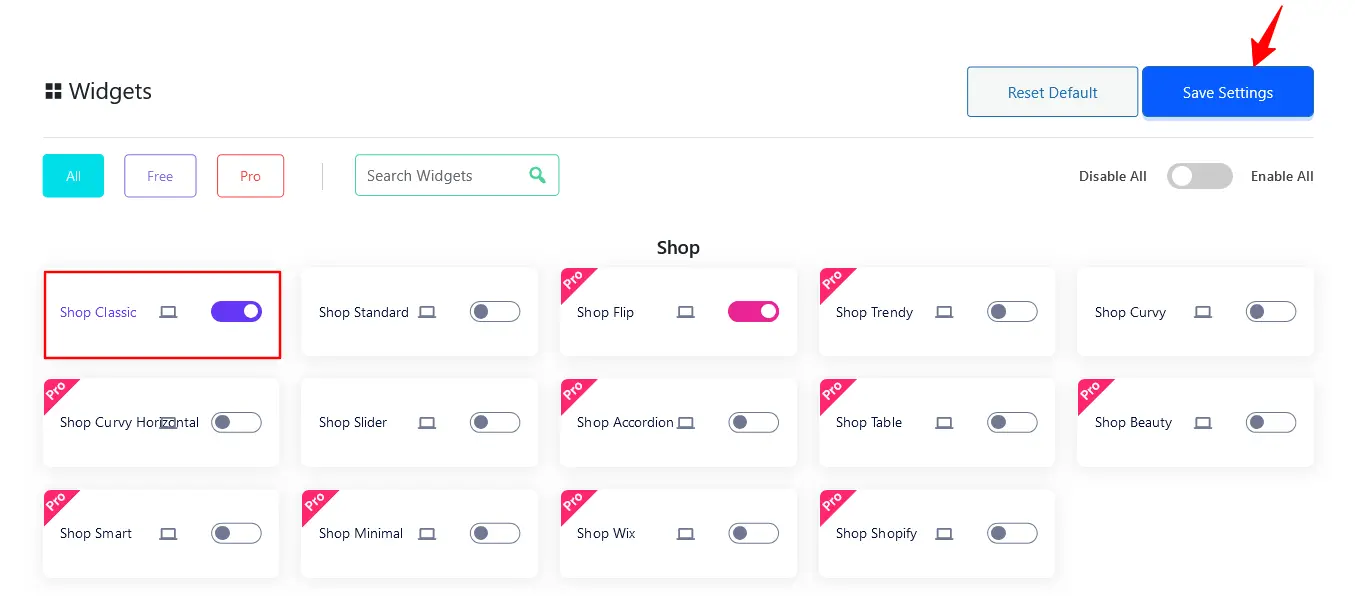
Step 2: Enable Shop Widgets
Now navigate to CoDesigner > Widgets and enable your preferred shop widgets and click the Save Settings button.
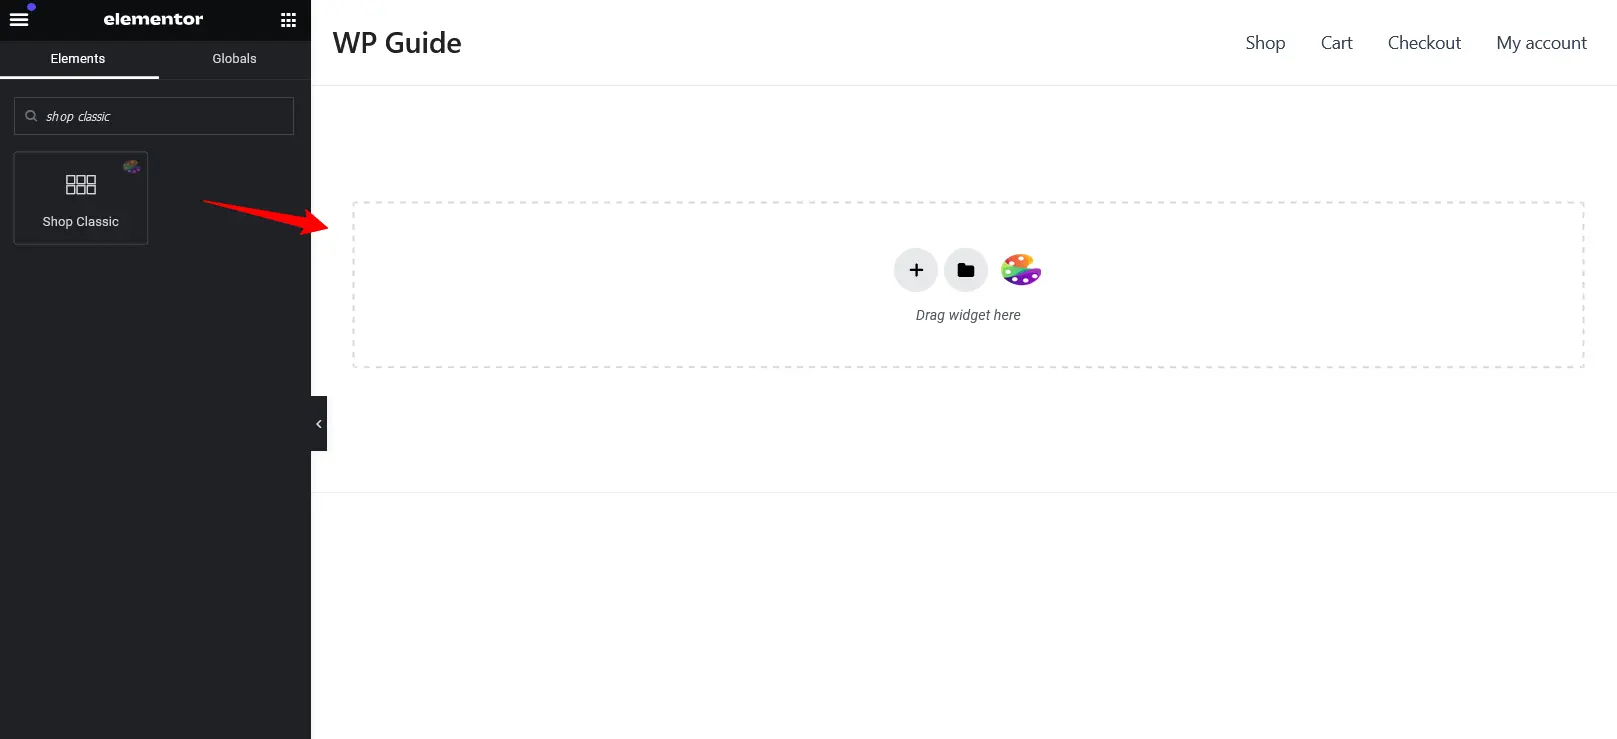
Step 3: Customize the Shop Page
Open your new shop page in Elementor and drag your desired shop widget into the blank section.
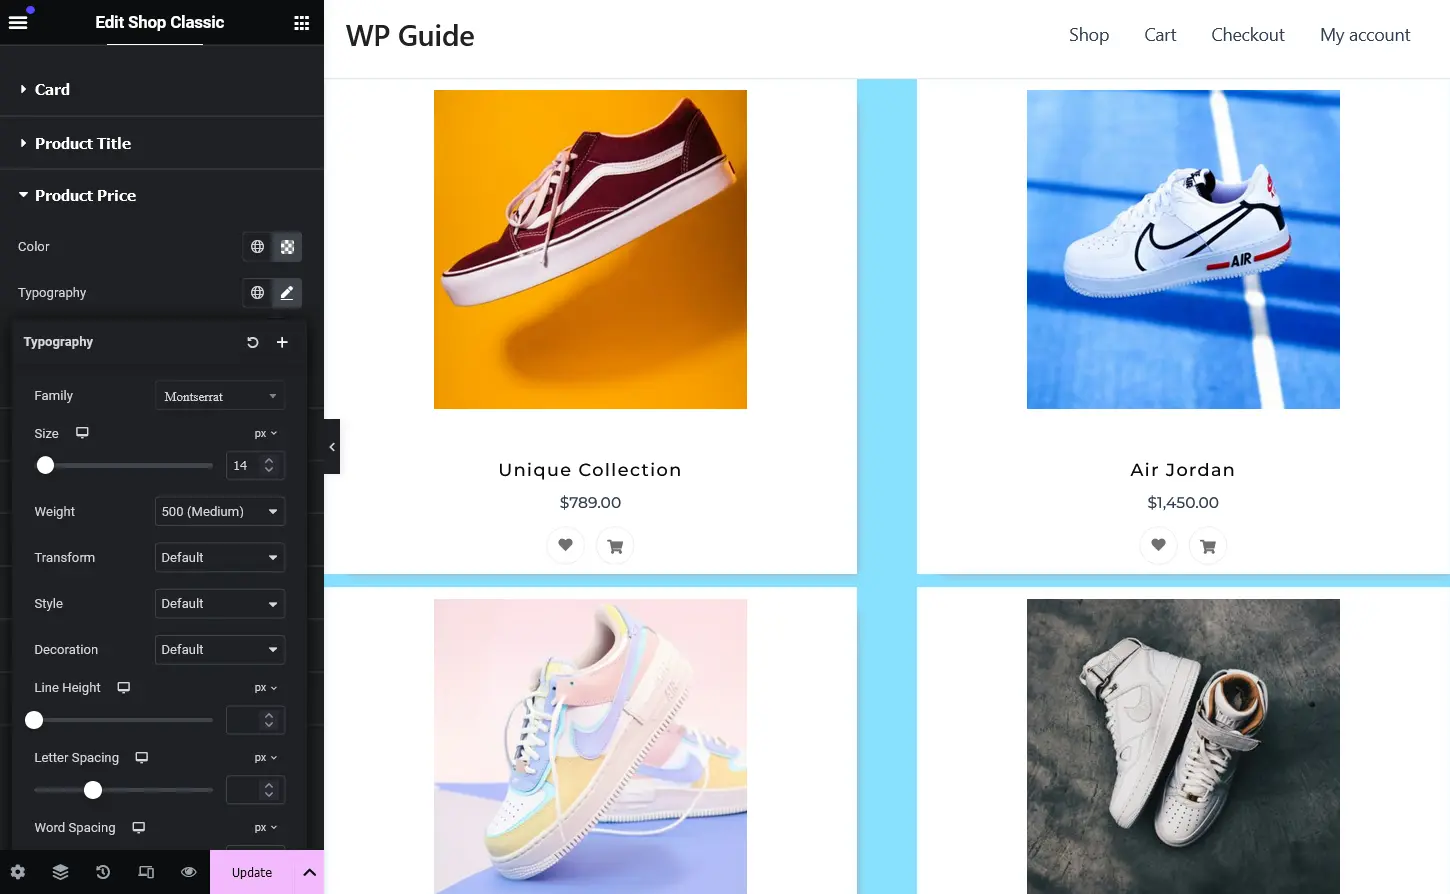
The CoDesigner addon lets you customize each section of your WooCommerce shop page, including title, background, typography, padding, and more.
Step 4: Publish and Preview Changes
When you’re done with the customizations, click the Publish button to save changes. Your custom shop page is ready now so make sure to preview your WooCommerce custom shop page and check if any further changes are needed.
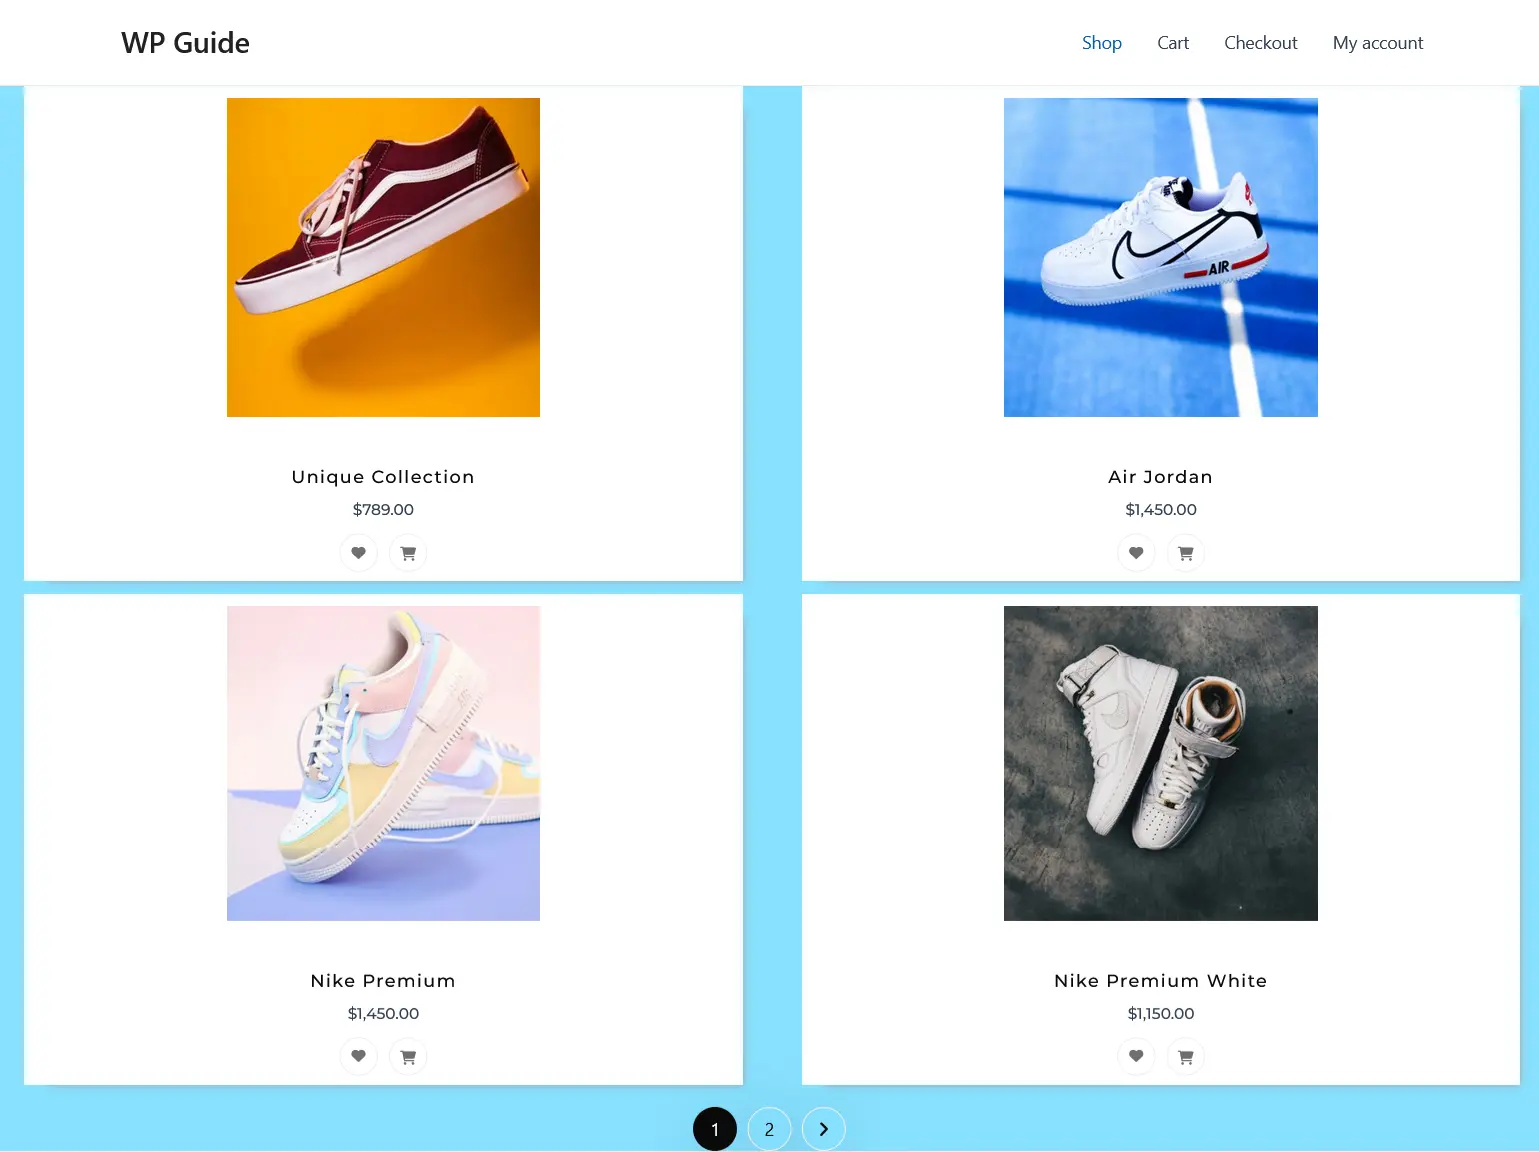
Step 5: Set as WooCommerce Default Shop
Finally, go to WooCommerce >> Settings >> Products and replace the default page with your newly designed shop page.
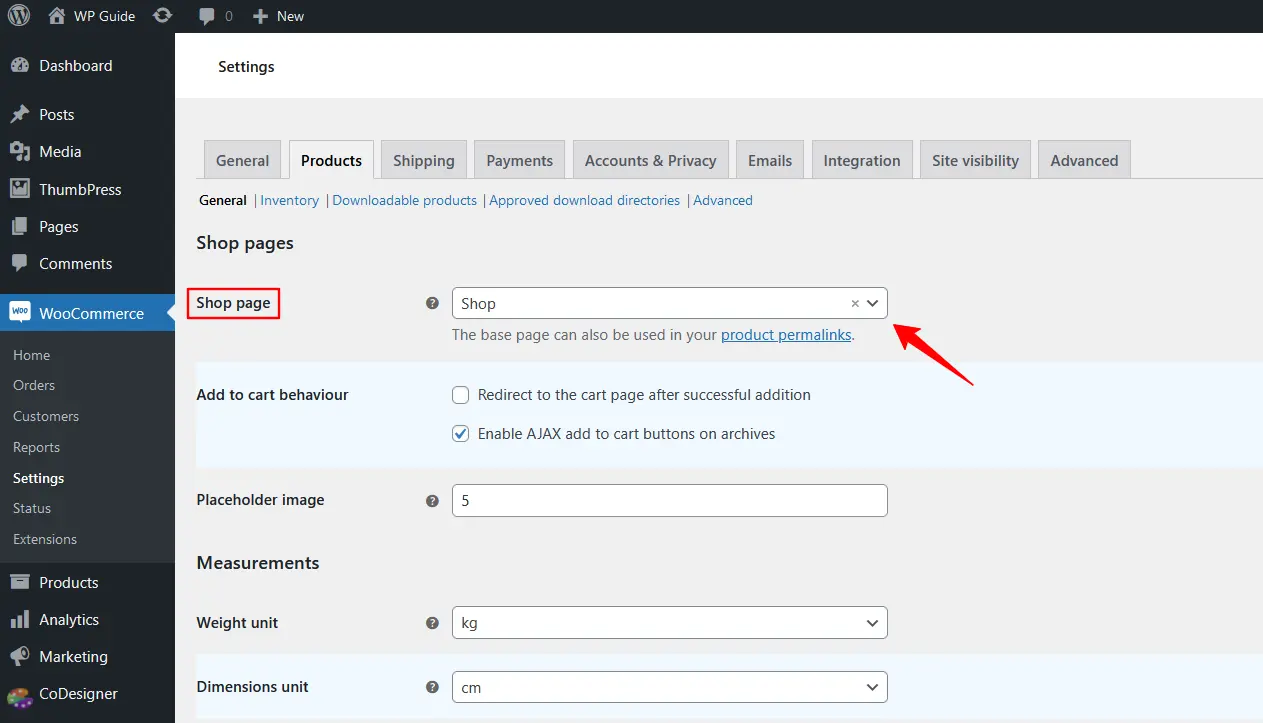
Method 3: Create a Custom WooCommerce Shop Page with a Template
Step 1: Install CoDesigner and CoDesigner Pro
Install the CoDesigner plugin from your site by navigating to Plugins >> Add New. As the CoDesigner templates are premium, you need the CoDesigner Pro version to unlock these features. If you already have the file, upload it to your site and activate the license.
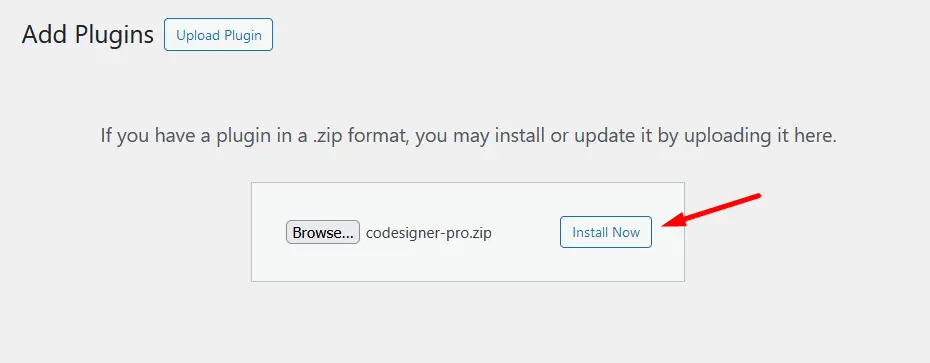
Step 2: Create a Shop Template
Navigate to Templates >> Add New and provide a name to the template. But before that, you need to select CoDesigner Product Archive and click on Create Template.
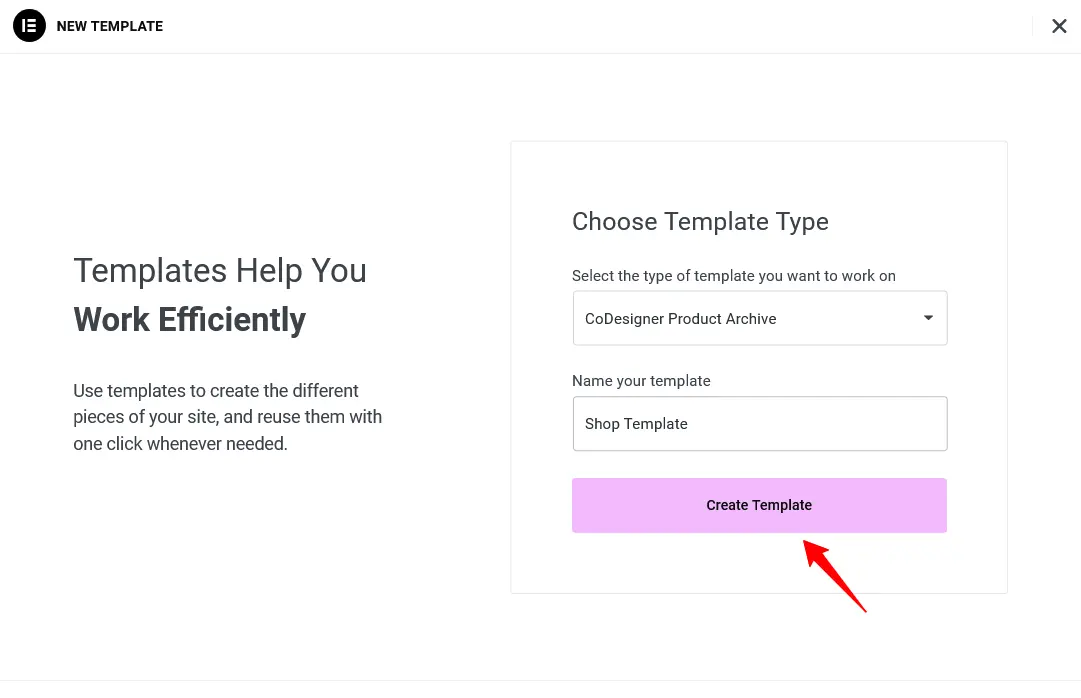
Step 3: Design a WooCommerce Custom Shop Template
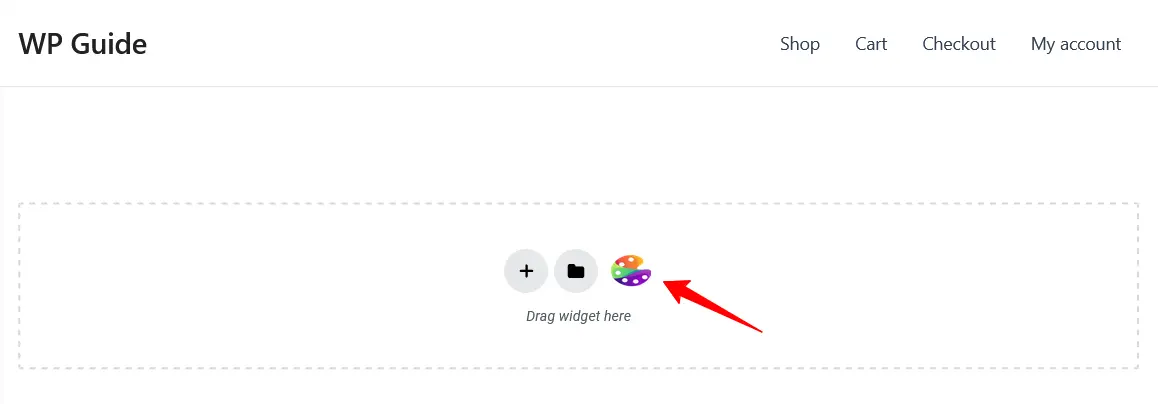
This will redirect you to the Elementor Editor page, where you’ll find the CoDesigner icon in the Elementor section. Click on that icon.
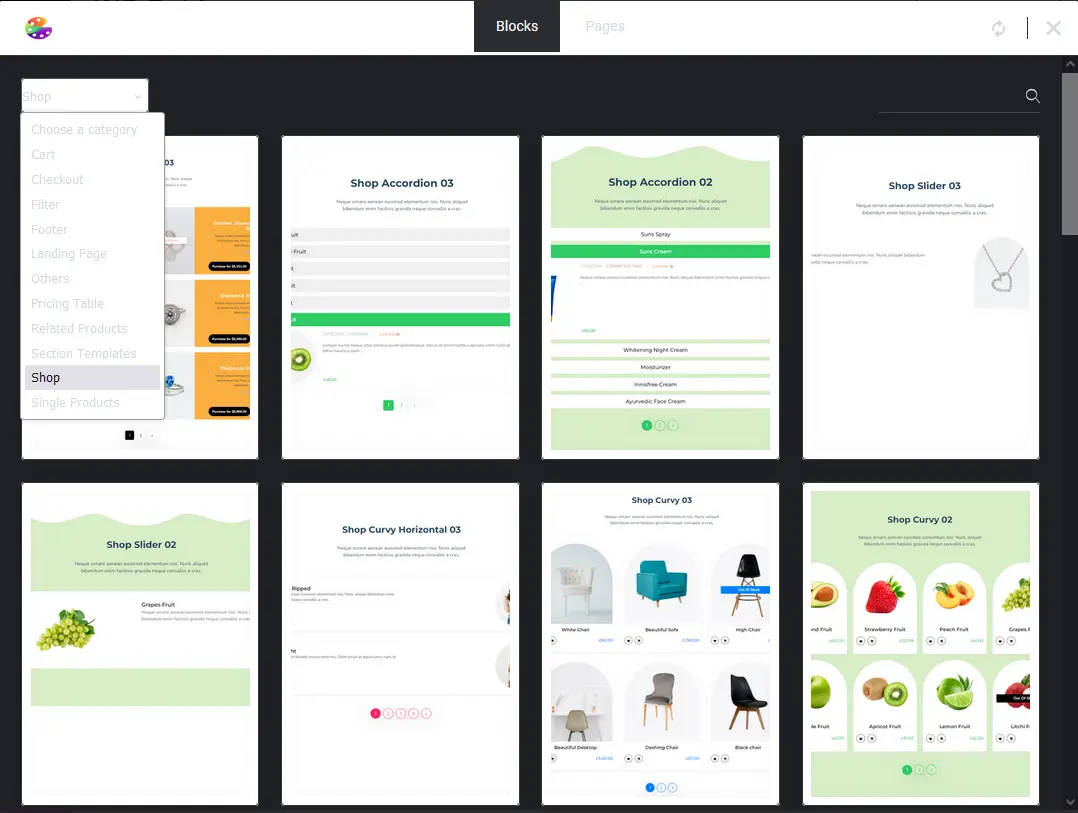
After clicking on the icon, a popup will appear. You need to select the Shop template from here. Go through the list of designs to find the one that best suits your style.
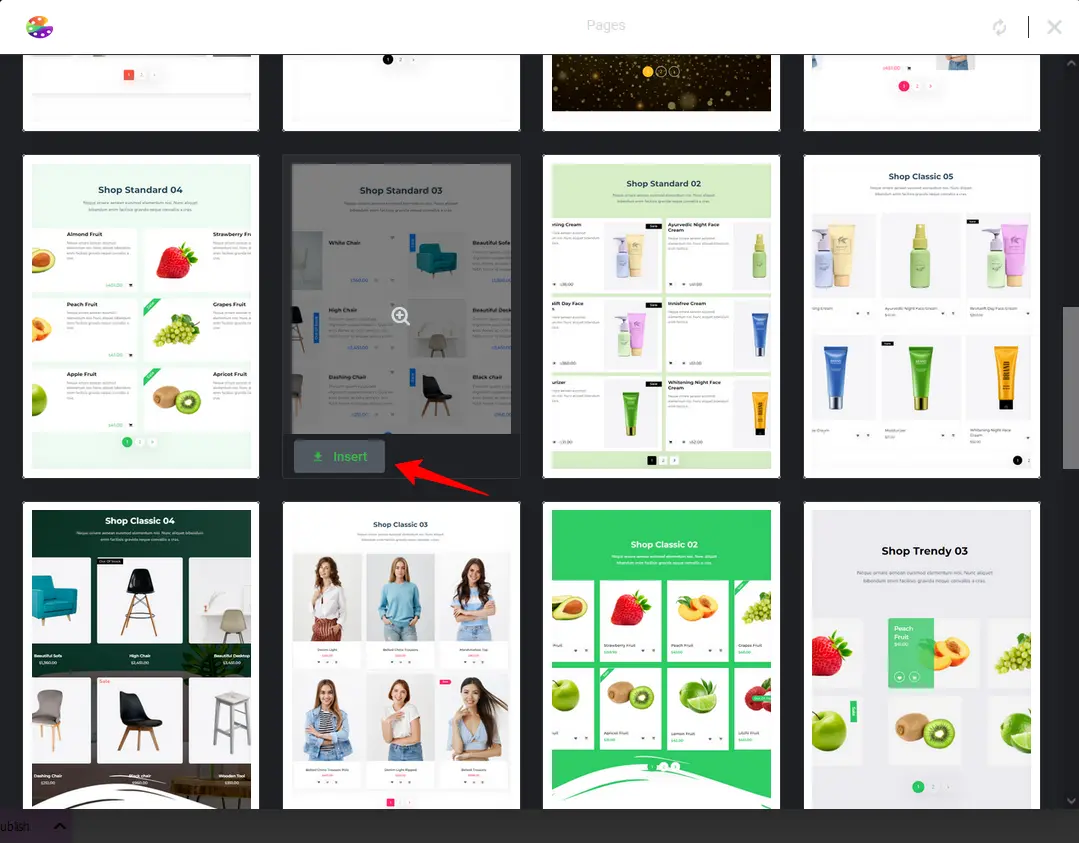
Hover over your desired Shop template and click on the Insert button. Once inserted, you can start the customizing journey.
Step 4: Assign New Template to Shop Page
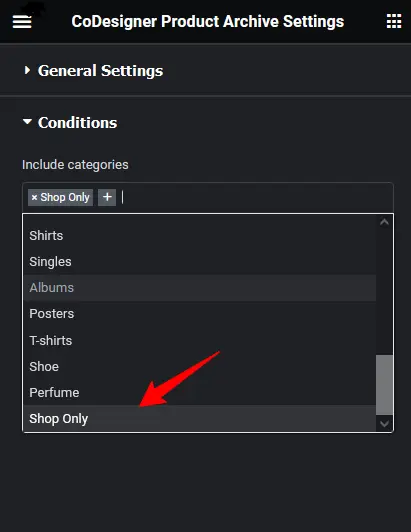
Once you’re done with your customizations, click on the Settings icon from the Elementor bar on the left. You will find an option to assign your Shop template.
Step 5: Publish and Set as Default
When the conditions are set, click the Publish button and set it as your default, similar to steps shown in the previous methods.
Method 4: Customize Your Themes
This is one of the most effective ways to personalize a WooCommerce shop page. Many WordPress themes offer built-in options for customizing the shop page, which helps you do further customizations like –
- Changing Layout: You can alter the number of columns in product displays, and sidebar configurations or modify the overall layout to better suit your products.
- Font and Color Customization: Match the colors and fonts with your brand identity to ensure a consistent and recognizable visual experience for your customers.
- Modifying Header and Footer: Tailoring header areas to design exceptional elements such as your brand logos, different navigation links, or occasional offers.
Method 5: Customizing WooCommerce Shop Template File
You can override the WooCommerce template file and create a custom one. WooCommerce follows a template hierarchy, so you can do the customization from there. In terms of the Shop page, you can create a template file named product-archive.php within your WooCommerce folder in your theme.
You’ll find the base structure for template files from the official WooCommerce Code Reference. Here are the templates for the product-archive.php, which lets you display the shop page, directly on your WooCommerce site.
Just copy and paste the relevant template file into your child’s theme folder –
- Open product-archive.php file using a text or code editor. Make your desired changes and save it.
- When the modification is done, upload it to your wp-content/themes directory. Now, go to Appearance > Themes and activate the child theme.
- If you want to make the changes from your dashboard, navigate to Appearance > Theme File Editor. From the files on the right side, select the file you want to edit.
- Make the changes directly from the editor. Ensure that you’ve backups in case of any mishaps or accidents.
Start Customizing WooCommerce Custom Shop Page Today!
Creating and customizing a WooCommerce Shop page is an important step to starting your online business. From making an impactful first impression to creating a user-friendly shopping experience.
Building a custom WooCommerce shop page is a valuable investment that can significantly enhance your store’s performance and overall user experience. The customization journey is simple, and you must remember that the key to a successful online store is a stunning WooCommerce custom shop page!
Frequently Asked Questions (FAQs)
Q. Can I customize the shop page in WooCommerce?
- Install and activate CoDesigner on your site.
- Enable the shop widgets.
- Create a new shop page and open it with Elementor.
- Drag your desired shop widget into the Elementor section.
- Customize each part of your WooCommerce Shop page.
- Finally set it as the default Shop page.
Q. Why can’t I edit my shop page in WooCommerce?
WooCommerce sets the Shop page as an archive. You can create a template using CoDesigner Pro and customize the shop page easily.
Q. How do I set up a WooCommerce shop page?
Navigate to WooCommerce Settings > Advanced > Products. Set your Shop page as the default WooCommerce shop page.
Q. Can I edit my WooCommerce shop page with Elementor?
- Install WooCommerce, CoDesigner, and Elementor on your site.
- Create a new page and open it with Elementor.
- Drag the Shop widget into the Elementor section.
- After customization, save the changes.
- Finally, set it as a default WooCommerce shop page.
Subscribe to Our Newsletter
Get the latest WordPress tutorials, trends, and resources right in your inbox. No Spamming, Unsubscribe Anytime.

Thank you for subscribing to our newsletter!
Table of Content
- Why Should You Build a Custom WooCommerce Shop Page?
- Unique Branding
- Enhanced Product Visibility
- Improved User Experience
- Optimize for Better Conversion
- 5 Ways to Customize Your WooCommerce Shop Page
- Method 1: Customize the Shop Page with WordPress Editor
- Method 2: Edit WooCommerce Shop Page Using an Addon
- Method 3: Create a Custom WooCommerce Shop Page with a Template
- Method 4: Customize Your Themes
- Method 5: Customizing WooCommerce Shop Template File
- Start Customizing WooCommerce Custom Shop Page Today!
- Frequently Asked Questions (FAQs)


