Create & Customize WooCommerce Single Product Page


If you already have a customized WooCommerce store with Elementor, getting CoDesigner should be next on your list. This essential Elementor WooCommerce addon lets you create and edit every element of your Single Product page template in minutes.
With CoDesigner, you can better present your products, with detailed descriptions and suggestions for related products, while improving your SEO. This blog will help you create and customize a WooCommerce Single Product page template using CoDesigner. Let’s dive right in!
Create WooCommerce Single Product Page in 6 Simple Steps
There are several dozen single product pages in every WooCommerce shop, and customizing each can take hours if not, days. This is why, we have outlined how to create and customize your WooCommerce single product page template with CoDesigner’s library of widgets and modules.
Follow the steps outlined below to create your template in just minutes –
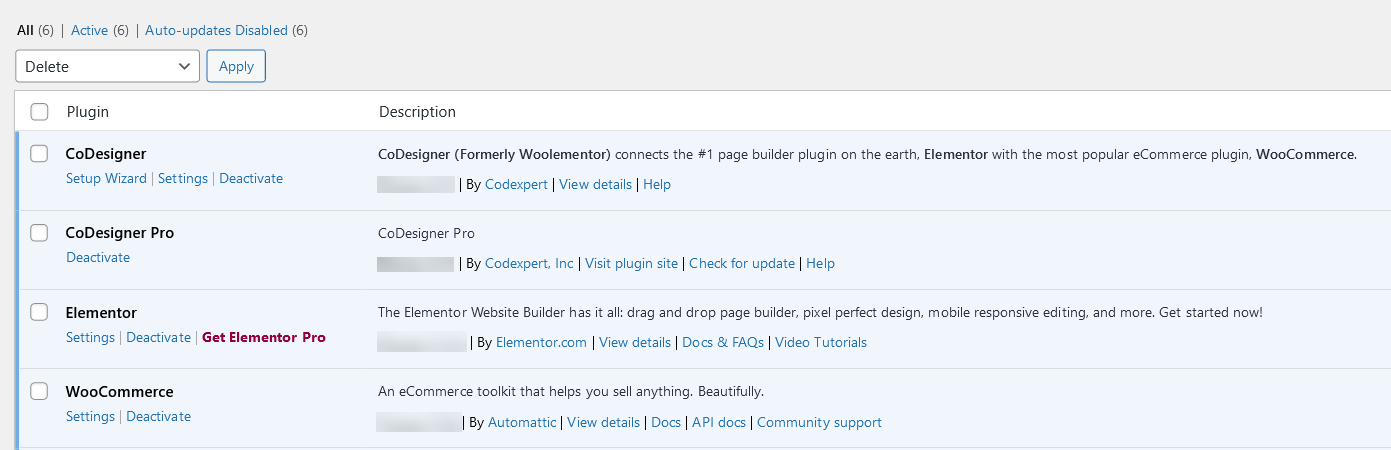
Step 1: Install Necessary Plugins
Start by ensuring the following plugins are installed on your WordPress website.
Step 2: Activate CoDesigner Pro with a Valid License
You will need to activate CoDesigner Pro to access the option to create templates. For detailed instructions on how to activate the premium addon, follow the steps in the documentation here.

Step 3: Enable CoDesigner Widgets
Before you start creating your template, you need to enable your desired widgets from the CoDesigner dashboard. Use these steps to navigate to the single-products section –
WordPress Dashboard > CoDesigner section > Widgets > Search for Single Product
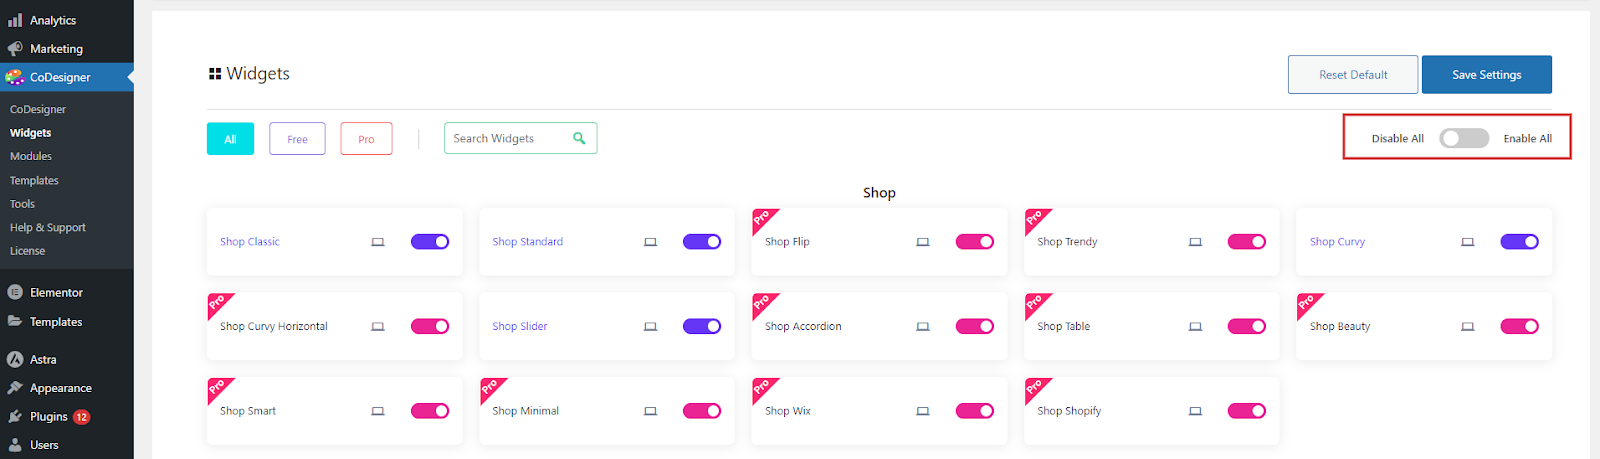
Turn on your preferred single-product widgets, and make sure to save the settings.
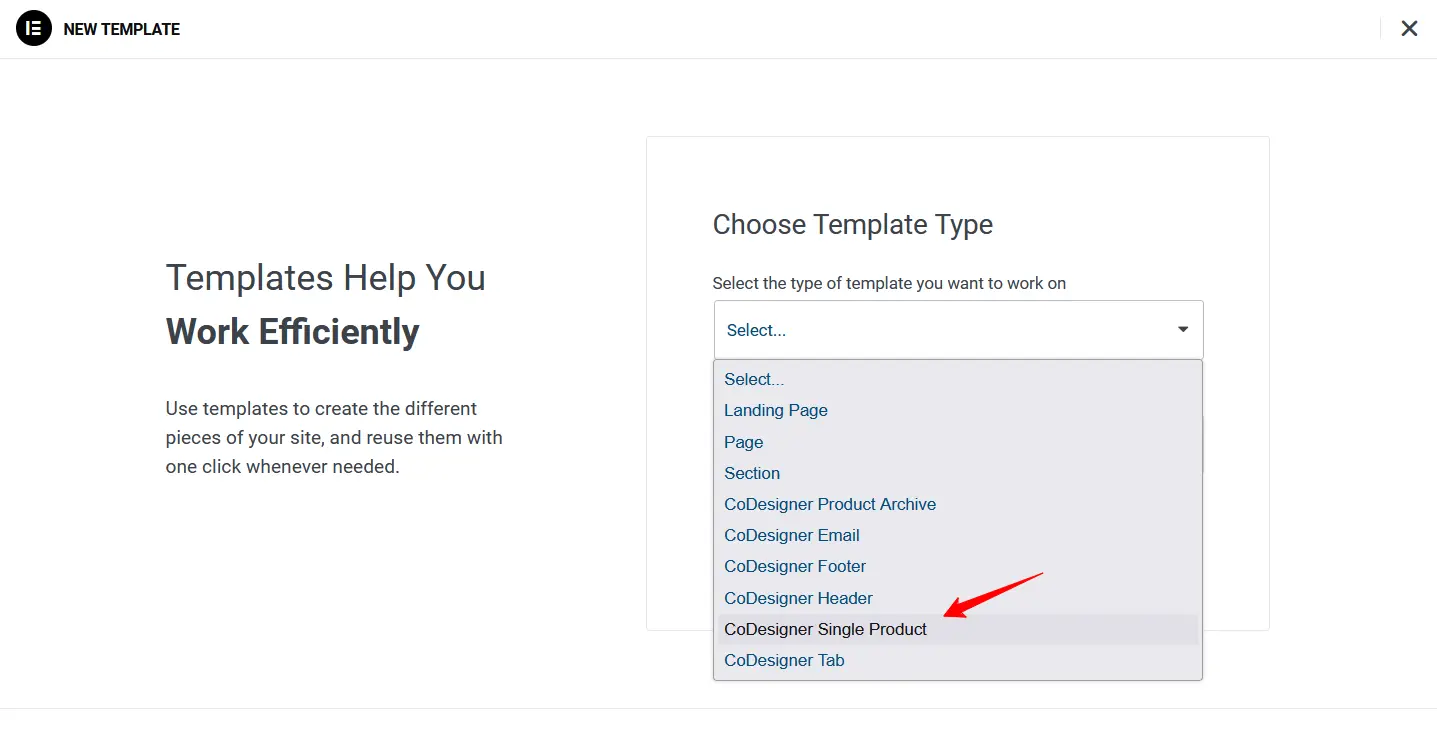
Step 4: Create a New Template
Click the Template Menu on the WordPress dashboard and then Add New. A popup will show up where you will need to select ‘WCD Single Product’ from the dropdown and name your template.
Step 5: Customize the New Template
After clicking the ‘Create Template’ button, you will be redirected to the Elementor template editor screen. Here you can add the single-product widgets using drag-and-drop one by one and design them however you like.
Step 6: Set Conditions for Your Template
After adding and designing the single product template, you need to set the conditions for it. Do this by simply clicking on the settings icon at the bottom left corner of the Elementor editor. If you select ‘All’ in the conditions, the new template design will be visible on all the WooCommerce single product pages.
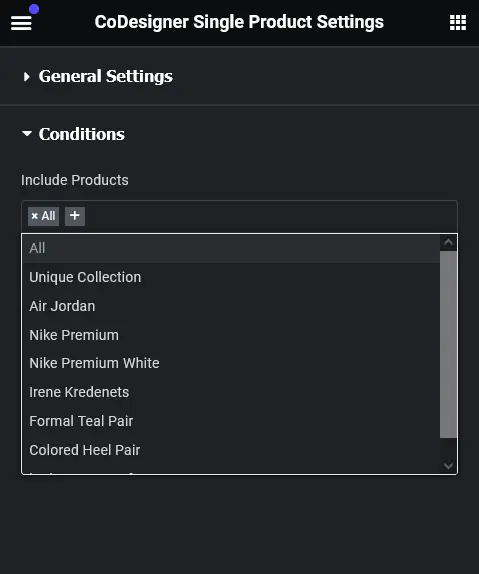
You can also set the template for any specific product. Once you’re done making all the changes, your single product template is ready to be published. You can click Update to check the preview, and Publish to apply all the changes to your site.
Wrapping Up
Creating multiple single-product pages can quickly become tedious for any online store owner since WooCommerce has no set template for this purpose. With CoDesigner’s extensive library of premium widgets and modules, you can customize the WooCommerce single product page with Elementor in minutes and use this template to display multiple products separately throughout your site.
With CoDesigner Pro‘s WooCommerce single product page customizer, you can create and personalize a single-page product template and streamline your online shop effortlessly today!
Frequently Asked Questions (FAQs)
Q. How do I create a custom WooCommerce single product page template?
Create a custom WooCommerce single product page following the steps below:
Step 1: Install the CoDesigner and CoDesigner Pro on your site and activate them.
Step 2: Navigate to Template and Create a new Template.
Step 3: Provide the template a name and select CoDesigner Single Product.
Step 4: After that click on Create Template button. From template, select CoDesigner icon.
Step 5: From the CoDesigner Template, select your desired Single Product Template.
Step 6: After customization, set condition for your custom WooCommerce single product page.
Step 7: Finally, Save the Template.
Q. How to customize WooCommerce single product page?
You can customize your WooCommerce single product page, with the CoDesigner and CoDesigner Pro Elementor add-on. Download this feature rich plugin on your site and start customizing your single product page.
Q. Can I build single product page in minutes?
Yes, aboslutly.
Step 1: Install CoDesigner and CoDesigner Pro on your WordPress site.
Step 2: Create a template and open it with Elementor.
Step 3: On that page, click on the CoDesigner icon where you’ll discover a popup.
Step 4: From this popup, select Single Products.
Step 5: You’ll find pre-made templates ready to use for your website.
Subscribe to Our Newsletter
Get the latest WordPress tutorials, trends, and resources right in your inbox. No Spamming, Unsubscribe Anytime.

Thank you for subscribing to our newsletter!

Table of Content
- Create WooCommerce Single Product Page in 6 Simple Steps
- Step 1: Install Necessary Plugins
- Step 2: Activate CoDesigner Pro with a Valid License
- Step 3: Enable CoDesigner Widgets
- Step 4: Create a New Template
- Step 5: Customize the New Template
- Step 6: Set Conditions for Your Template
- Wrapping Up
- Frequently Asked Questions (FAQs)
- Q. How do I create a custom WooCommerce single product page template?
- Q. How to customize WooCommerce single product page?
- Q. Can I build single product page in minutes?