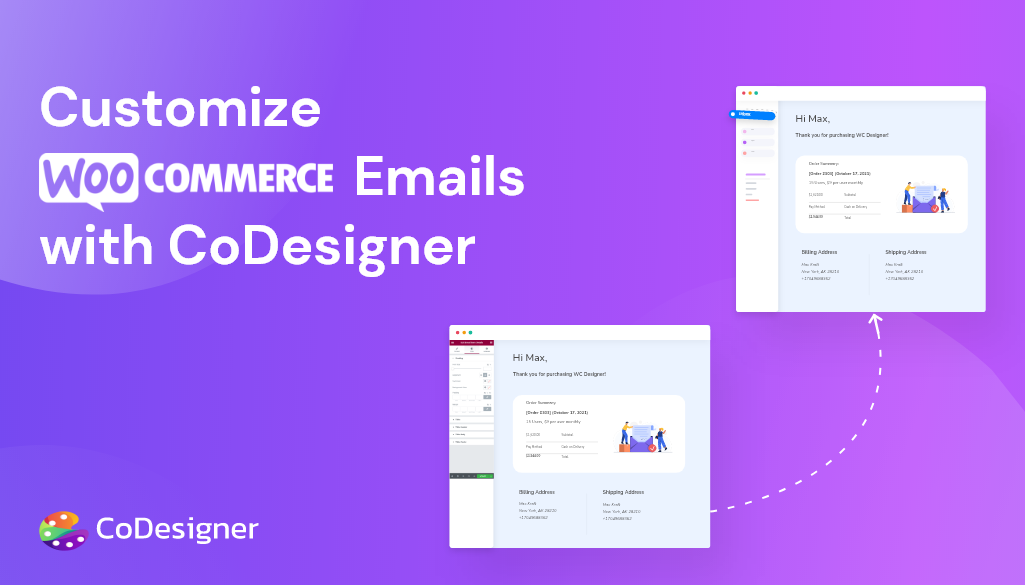
Customize WooCommerce Emails With Elementor – A Step-by-Step Guide


Let’s face it, default WooCommerce emails were never made to inspire. While they can deliver essential order information, they don’t have the personality and polish that can help your brand stand out. Emails that look generic usually feels impersonal, which can hurt your brand’s image over time.
What if we told you that you could customize these emails to display your brand and order information exactly how you want them to look? Sounds too complicated? Well it’s easier than you think!
This blog will show you how to create and customize WooCommerce emails with Elementor and CoDesigner to develop a professional brand image, and build a loyal customer base. Get ready to create a stronger brand identity, one email at a time!
Why Customize WooCommerce Emails?
With the help of WooCommerce email customizer Elementor, you can send out customer emails that can help you build a professional-looking brand image and provide better conversion opportunities at the same time.
Let’s look at the benefits of customizing your WooCommerce emails with Elementor –
Boost Brand Identity & Recognition
Generic emails might be functional, but they do little to reflect your brand’s personality. When a customer received a basic email, it shows that your business doesn’t care about its image; which in turn takes away some of the confidence they have in your brand.
Adding your logo, brand colors, website matching fonts, and an audience-specific tone of voice helps create a familiar and memorable experience for your customers.
Drive Sales & Engagement
Plain texts are easy to ignore. Just think, how often have you deleted brand emails thinking they’re spam or just not worth your time. You can quickly grab attention by including eye-catching visuals, clear calls-to-action, and personalized messages that speaks directly to your customers.
The effort will be well-worth it, as it results in higher engagement and more repeat business.
Build Trust & Professionalism
First impressions matter, and your emails are often the first point of contact after a purchase. A polished email reassures your customers that their order is in good hands and reinforces your credibility as a brand.
Customized emails show that you care about the details, which can go a long way in building long-term relationships with your customers.
Stand Out in a Crowded Inbox
Your customers’ inboxes are flooded with emails every day. If yours look like everyone else’s, they’re likely to get lost in the noise. With the right design and messaging, you can create emails that gets opened, noticed and remembered.
How to Customize WooCommerce Emails with Elementor
Now that you know why you should have custom WooCommerce emails, let’s look at how you can easily do this. Follow the steps below to customize your WooCommerce emails with Elementor in just minutes –
Step 1: Install Necessary Plugins
Before you can start designing your custom emails, make sure you have the following plugins installed on your WordPress.
Once you have all of these plugins activated, you can start creating WooCommerce email templates with the CoDesigner WooCommerce email customizer.
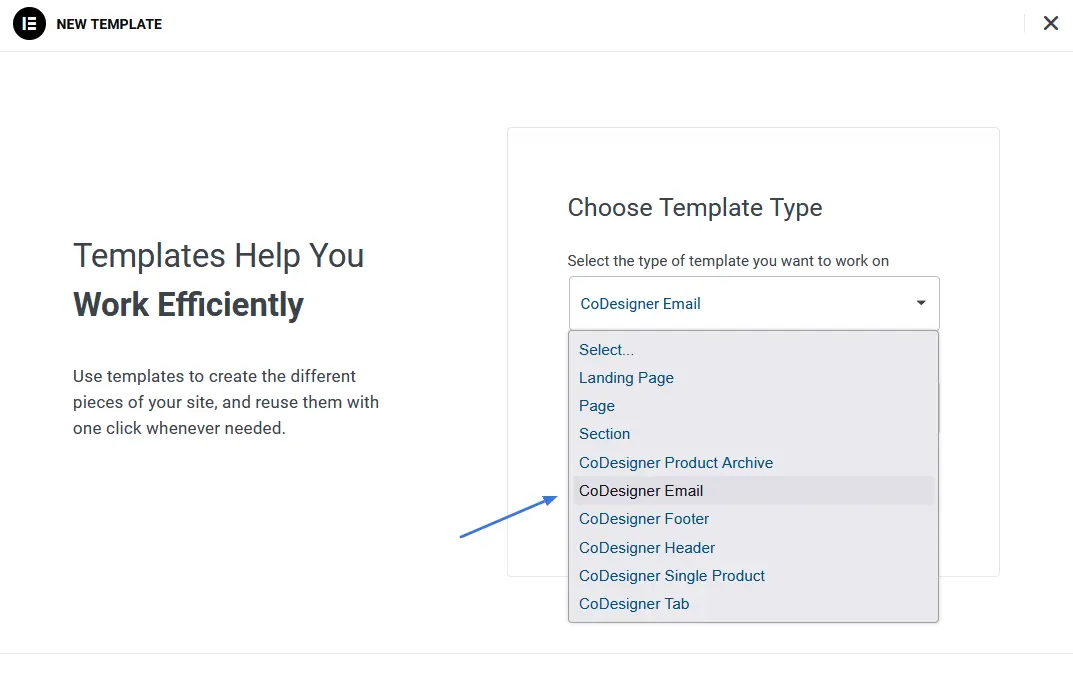
Step 2: Create a New WCD Email Template
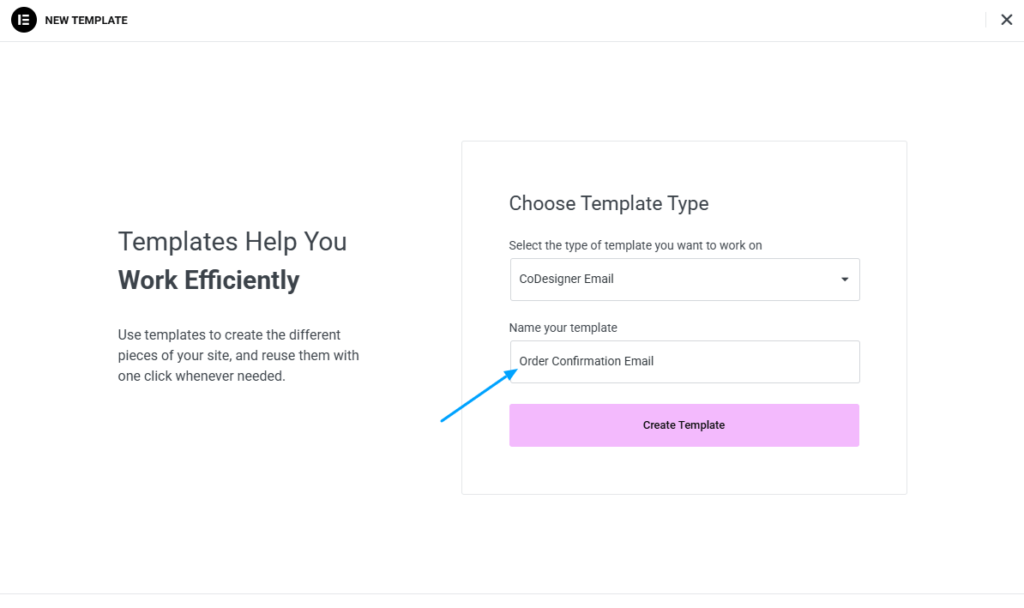
Navigate to the Templates tab from the dashboard and click on ‘Add New Template‘. A pop-up will appear and you will need to select ‘CoDesigner Email’ from the dropdown options.
Give a name to the email template and click the ‘Create Template’ button. Once you’re redirected to the Elementor Editor page, you can start customizing the new template.
Step 3: Design the Email Template
In the Elementor Editor page, search for ‘email‘ in the search bar in the Elements section to find the Codesigner WooCommerce email customizer widgets. Here are the seven stunning CoDesigner email widgets, and how you can add and edit them to your templates –

- Email Header: Drag and drop the email header widget in the first section of the email template. Change the text, and alignment, and select your preferred HTML tag from the content tab.
- Email Footer: Drag and drop the email footer widget in the second section of the email template. You can edit the content similar to the email header widget.
- Email Description: Add the email description in the Description section, and change the alignment to your preference.
- Email Billing Address: Add an inner section under the email description and insert the email billing address widget in the right column. From the Content tab, you can change the title, and HTML tag, set alignment, and show or hide the title from the billing address.
- Email Shipping Address: Add the shipping address below the billing address. You can edit the content similar to the billing address widget.
- Email Item Details: You can add the order details next to the address, as shown in the screenshot below. From the Contents tab, you can show or hide the table title and enable CoDesigner Hooks.
Step 4: Edit Email Template Style
When you customize WooCommerce emails with Elementor, you will be given the option to edit the style and advance options for each section.
Here’s how to customize the style of customer and order notes with WooCommerce email customizer Elementor –
- Email Customer Note: Add a personalized customer note just below the email item details section. You can change the font size/color, background, padding, and margin – directly from the Style tab.
Note: You can change the style and advance settings similarly for all the CoDesigner widgets. Personalize the design to make your emails stand out.
- Email Order Note: Add an order note just above the order item details section. You can change the style of this widget, similar to the customer note.
Note: You can send a test email from the Settings in the sidebar to check out the changes before finalizing your template.
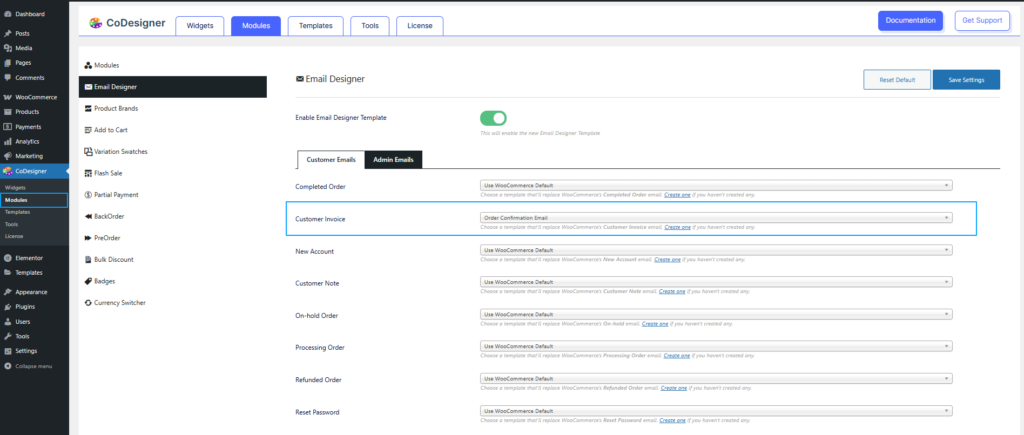
Step 5: Set the Email Template as Default
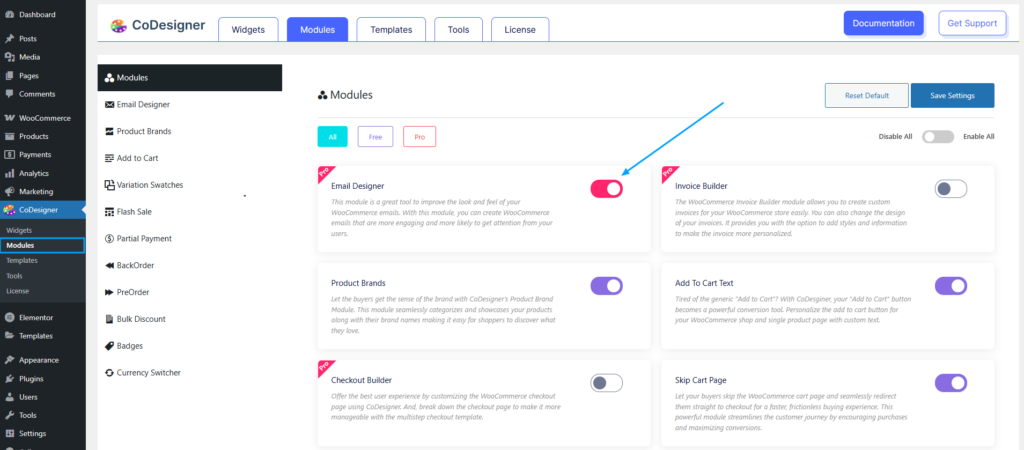
To replace the default WooCommerce email template with your new customized one, navigate to Dashboard > CoDesigner > Modules > Email Designer.
Here you can find dedicated tabs for Customer Emails and Admin Emails. Set your custom email to the specific action from the dropdown options.
You can also use the Email Designer feature to use the ready-made template by CoDesigner. To do this, navigate to CoDesigner > Modules and enable Email Designer and click Save Settings.
Now go to Templates > Add New and follow Step 2 in the above guide to create a WCD email template. From the Elementor editor, look for CoDesigner Email from the Elements section and click or drag-and-drop it to edit.
Select the email type to get the select the template for the type. Similar to the widgets, you can customize the style, content, and other advanced features of the template.
Once you’re happy with the email template, click Publish to save it. Follow Step 5 in the above guide to set the template for the specific action/notification.
Here’s a step-by-step video tutorial on how to design a completely new email template using CoDesigner –
Create Customized WooCommerce Emails that Convert!
CoDesigner and Elementor are a match made in heaven when it comes to creating WooCommerce emails that are on-brand. CoDesigner gives you access to a wide range of design options that you can use to create stunning emails with an easy drag-and-drop interface. With the right plugins, you can turn mundane transactional emails into opportunities to connect, engage, and impress.
So, don’t miss out on the opportunity to draw in more customers. Customize your WooCommerce emails with Elementor and CoDesigner and build lasting relationships, one email at a time!
Frequently Asked Questions (FAQs)
1. Do I need Elementor to use CoDesigner?
Yes. CoDesigner is an addon specifically designed to work with Elementor for enhanced WooCommerce customization.
2. Which Elementor plugin is best for WooCommerce?
CoDesigner is a strong contender for the best Elementor plugin for WooCommerce. It offers extensive customization options for your WooCommerce store, including emails.
3. How do I add a custom field to my WooCommerce email?
You can modify your WooCommerce default email templates from Dashboard > Templates > Saved Templates. Find the template you want to edit and click on Edit with Elementor. You can add a custom field from the Elementor editor.
4. How do I set custom email templates to default?
Navigate to Dashboard > CoDesigner > Modules > Email Designer and set the custom template to replace the default WooCommerce template.
Subscribe to Our Newsletter
Get the latest WordPress tutorials, trends, and resources right in your inbox. No Spamming, Unsubscribe Anytime.

Thank you for subscribing to our newsletter!

I'm a seasoned creative content writer with 4+ years of experience in crafting well-researched blogs, web copies, & social media posts in and outside of WordPress. I also enjoy reading fiction, experimenting with different art mediums, and playing with my cats in my spare time.
8 thoughts on “Customize WooCommerce Emails With Elementor – A Step-by-Step Guide”
Leave a Comment
Table of Content
- Why Customize WooCommerce Emails?
- Boost Brand Identity & Recognition
- Drive Sales & Engagement
- Build Trust & Professionalism
- Stand Out in a Crowded Inbox
- How to Customize WooCommerce Emails with Elementor
- Step 1: Install Necessary Plugins
- Step 2: Create a New WCD Email Template
- Step 3: Design the Email Template
- Step 4: Edit Email Template Style
- Step 5: Set the Email Template as Default
- Create Customized WooCommerce Emails that Convert!
- Frequently Asked Questions (FAQs)
- 1. Do I need Elementor to use CoDesigner?


Do I have to upgrade to the pro to get this feature?
Yes, you have to.
Does this plugin also work on Woocommerce Germanised?
Hi Christopher!
CoDesigner is compatible with most of the WooCommerce based plugins out there. The email designer widgets by CoDesigner are compatible with WooCommerce Germenised too.
Also, you can try the free version of CoDesinger with many interesting widgets from this link https://wordpress.org/plugins/woolementor/
Hello, are there short codes or tags available to use?
For example.
{Shippemt_cost}
{Product_bought}
{Product_qty}
{Product_image}
So that it’s not the basic woocommerce table?
Ps. On mobile the site menu is messed up! It is in the middle of my screen 🙂
Hi Myedgy!
Thanks for reaching out to us.
Actually, You don’t need shortcodes or tags to add those fields. You can easily add new fields. Please follow this tutorial- https://youtu.be/Kjqs_2mgECU
You can also use the Placeholders to show the data.
See attachments: https://nimb.ws/W1hfSj
Are you using the CoDesigner “Menu widget” on the site?
Please raise a ticket explaining the issue – https://help.codexpert.io/new-ticket/
Thank you!
hello
How to use password reset email short code uRl
Where is the list of shortcodes?
Hi @ Yasser!
Thanks for your comment.
One of our support representatives replied to you on the messenger.
Please co-operate with him. He will help you with this.
Thank you!