Add WooCommerce Elementor Product Filter – A Step by Step Guide


When it comes to streamlining the buying journey, a well-placed product filter is really crucial. Customers feel compelled to make repeated purchases if they can find exactly what they need with a few simple clicks.
However, designing your product filter depends on your audience’s preferences, your product attributes, and their pricing. Once you narrow down these criteria, crafting a perfectly optimized product filter depends on the WordPress plugins you are using.
While the Elementor product filters can quickly get the basics done, customizing it to your brand includes a few extra steps. This guide will give you a step-by-step on how to create and customize the WooCommerce product filter for Elementor, according to your website demands.
Add WooCommerce Elementor Horizontal Product Filter
You can add and edit a horizontal section with WooCommerce product filter plugins for Elementor. Use CoDesigner to get detailed design options for product filters. Here’s a step-by-step on how to add and design a horizontal product filter for Elementor using CoDesigner –
Step 1: Add Filter Horizontal
Go to your WordPress dashboard, locate your shop page, and click on “Edit with Elementor”.

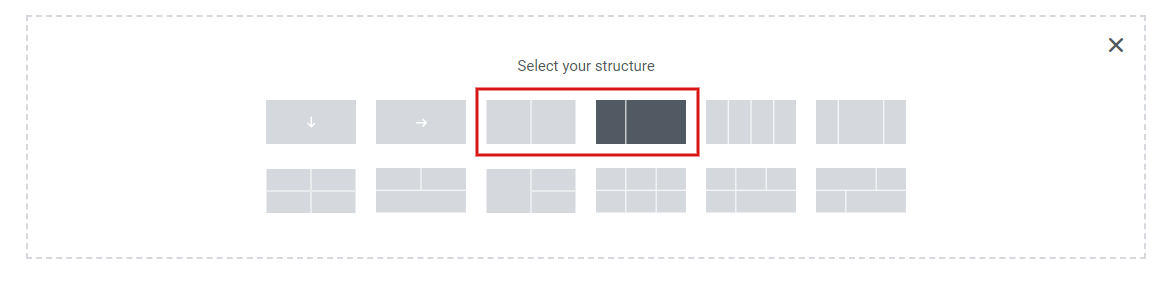
Once on the editing page, create a container and select a structure for that section. Click on the plus (+) button to add a new structure.
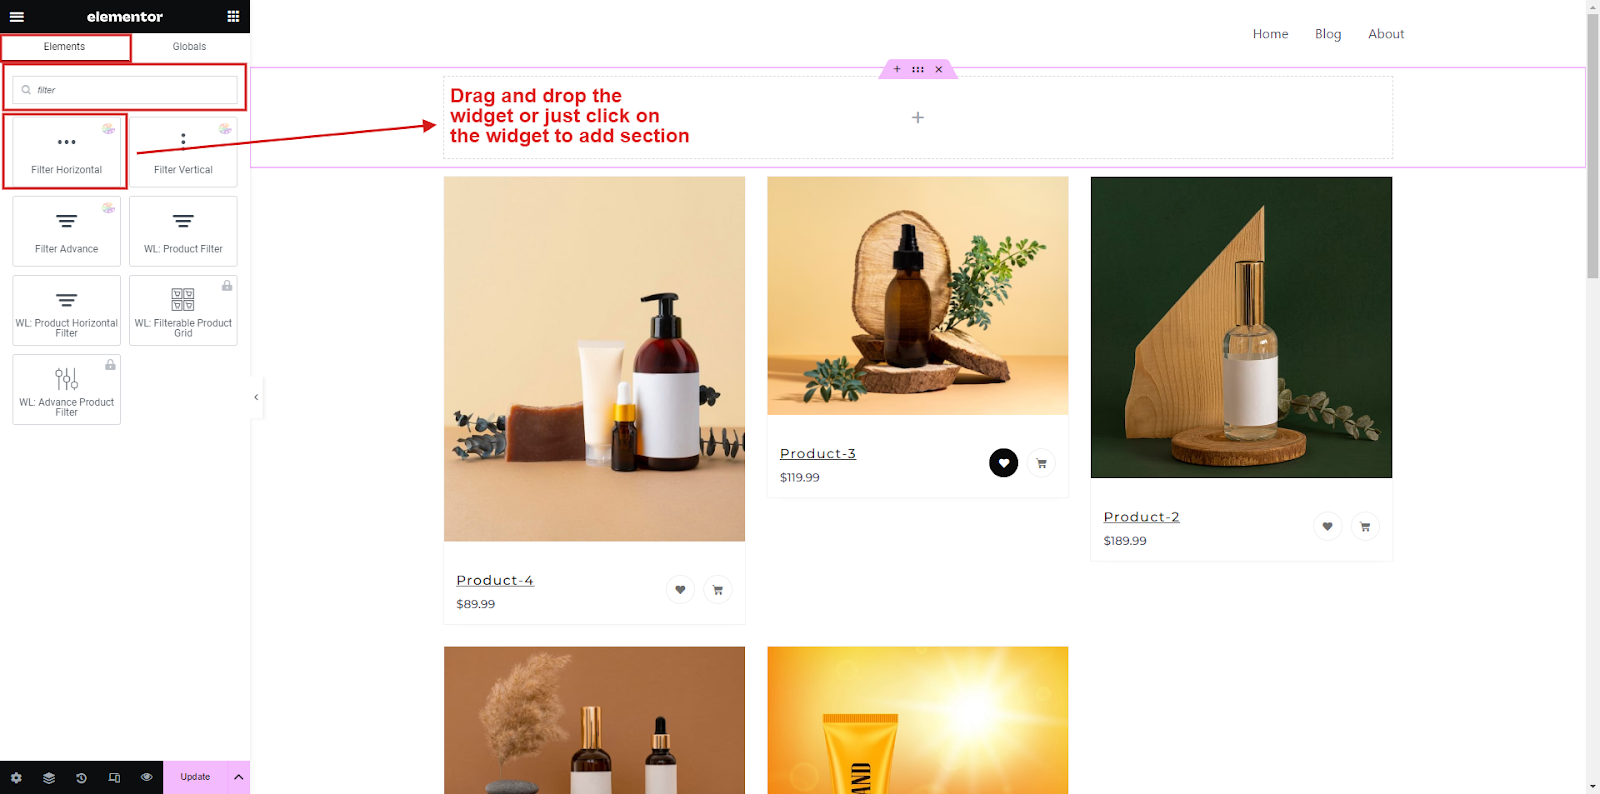
Find your CoDesigner filters by searching for widgets in the “elements” section on the Elementor editor. Add the “Filter Horizontal” of CoDesigner.
Step 2: Edit Content
With CoDesigner, you’re given all the necessary sections to edit your filters. In the content section, you can add new features, customize each title, and include a price range.

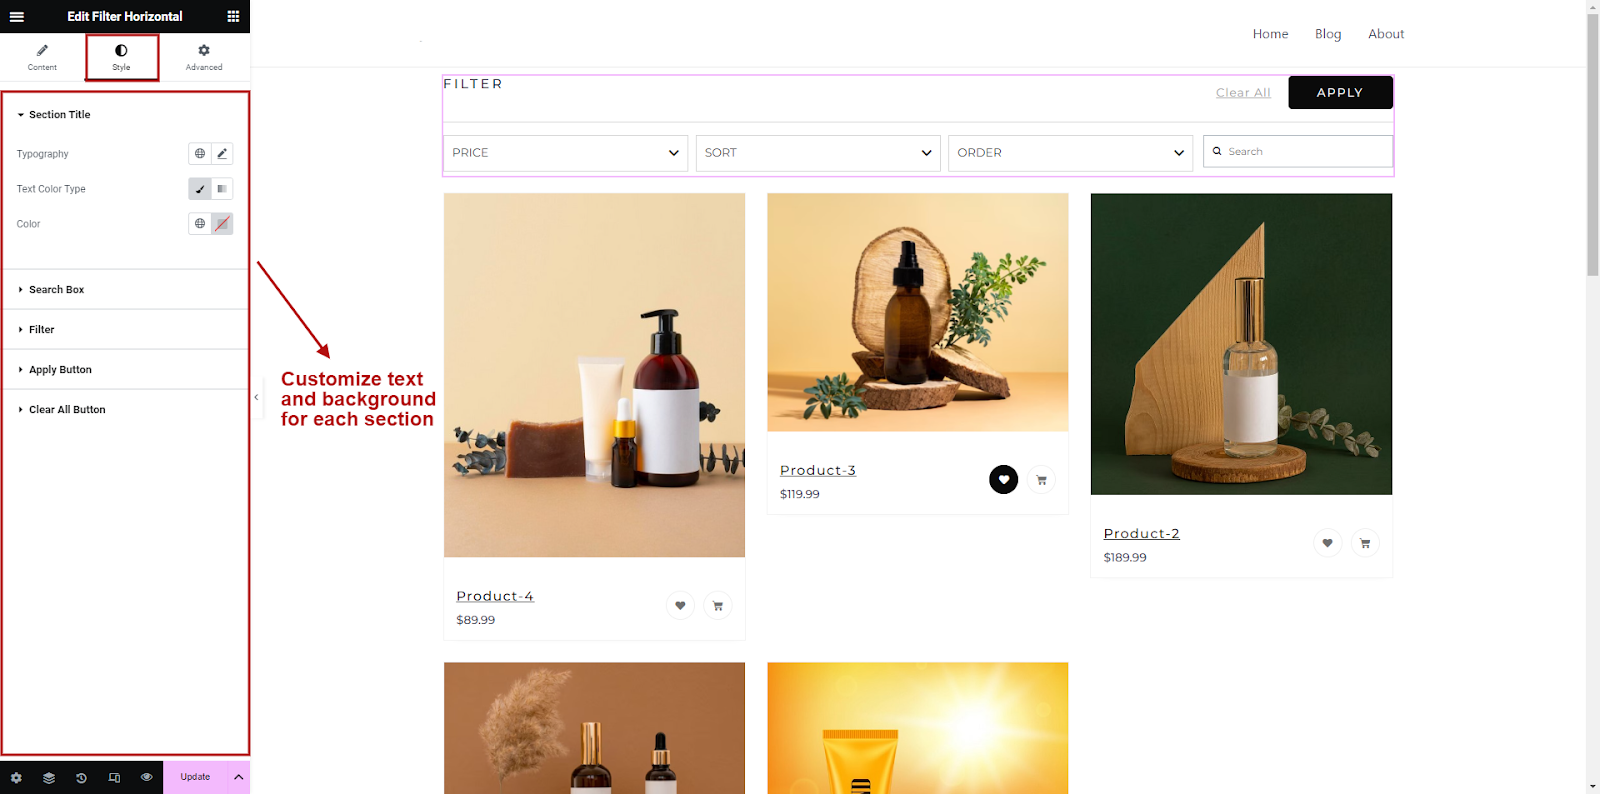
Step 3: Edit Style
Editing filter style is much more convenient and comprehensive with CoDesigner. You can design the typography, color, icon, and border to match your brand.
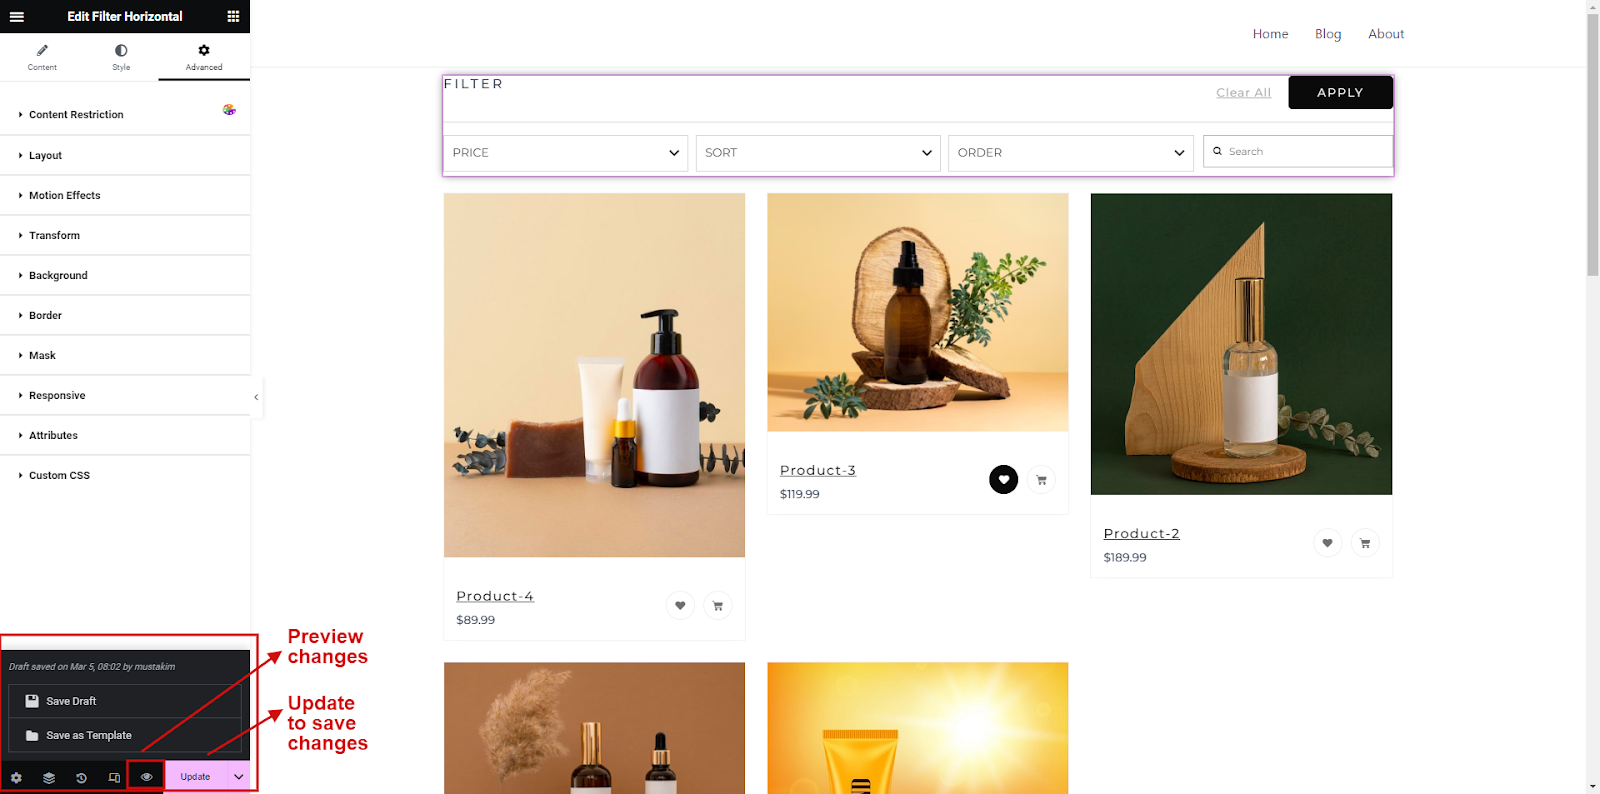
Step 4: Advanced Options
Go to the advanced section to add effects and attributes to personalize your filters further.

You can add motion effects, border changes, mobile/tablet/desktop responsiveness, and much more.
Step 5: Update and Save
Click “update” to check the preview and if you’re happy with the results then simply save to apply those changes.
Add Elementor Vertical Product Filter WooCommerce
While the default vertical product filter option for Elementor might get the job done, CoDesigner offers complete design control over all the elements for your filters.
Here’s how to add and design a WooCommerce vertical product filter for Elementor –
Step 1: Add Filter Vertical
Head to your WordPress dashboard and find your Shop Page. Choose “Edit with Elementor” to start editing. In the Elementor editor, make a new container by selecting a structure for it.
Press the plus (+) icon to pick a structure, and make sure to include a structure with two columns.
Look for CoDesigner filters in the “elements” area of the Elementor editor. Add a shop on your preferred column, and drag the “Filter Vertical” widget from CoDesigner to the other one for easy editing.

Step 2: Add Content and Style
Similar to horizontal filters, you can add new filters, and edit current ones via the content and style sections. CoDesigner gives you a pre-set list of filter content for you to edit.
But unlike Filter Horizontal, Filter Verticle comes with an “Auto Filter” mode, which lets the customer find filtered products without clicking “Apply”.
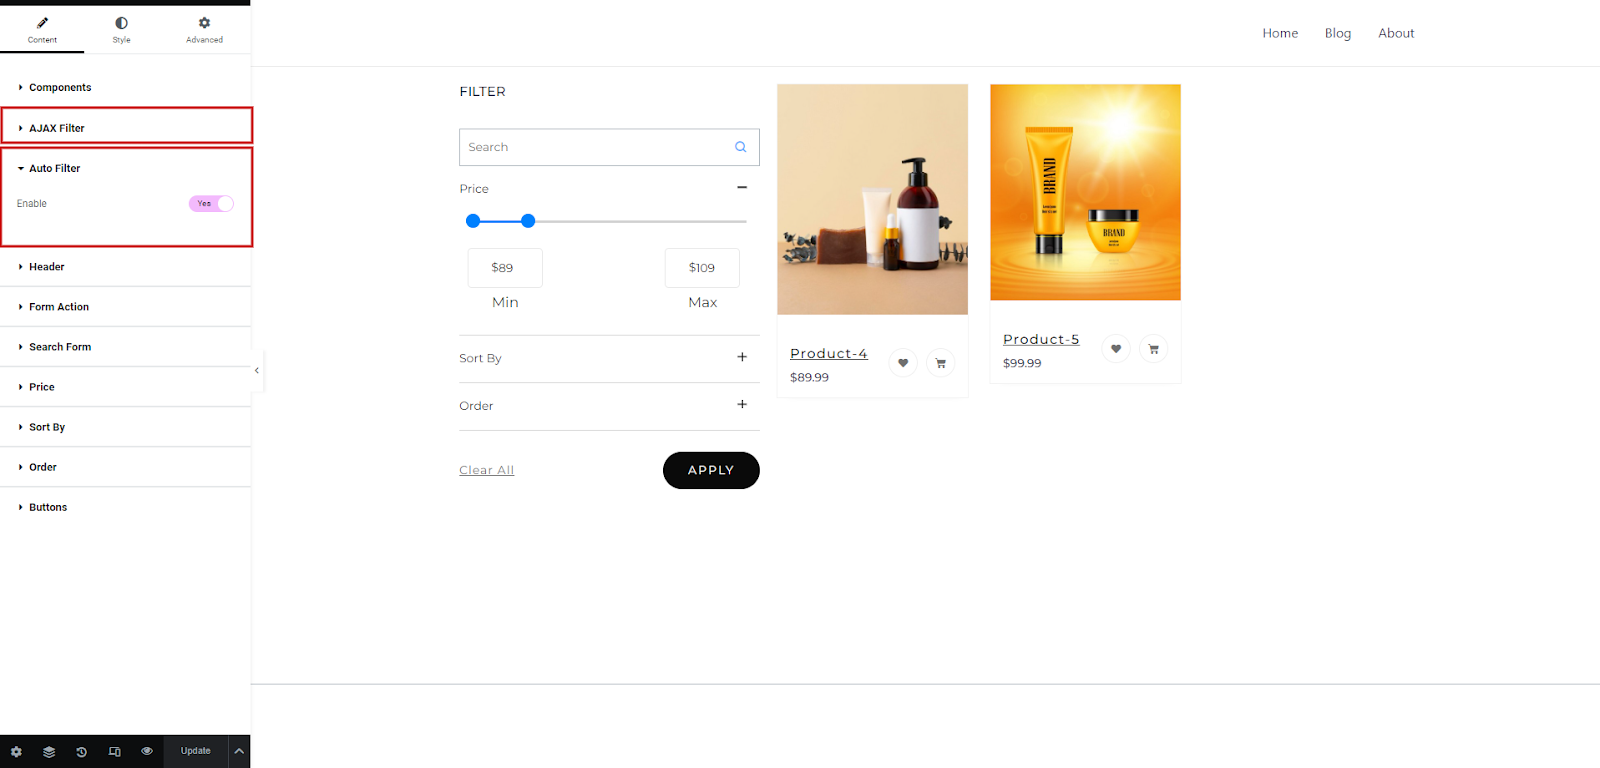
Note: This option can be further enhanced with the AJAX filter, which shows customers filtered products without reloading the page.
Step 3: Advanced Options
As you did in the horizontal filter, you can add advanced effects and attributes to personalize your filter further here too. You can edit both mobile and desktop versions via the advanced section.
Step 4: Update and Save
You can check the preview for your filter design by clicking on “Update”, and once you’re happy with your output, save the changes to apply to your site.
CoDesigner’s Advanced Product Filter for Elementor
You can apply the same method to set up the advanced product filter as the vertical product filter. While the steps may be the same, there are a few added features that can improve the buying experience.
These features include product reviews, which lets you select products based on their average star rating, and a custom taxonomy list which generates a list of subtopics that belong to a specific group.

If you have the CoDesigner plugin set up, you can easily find these features by following the steps outlined above.
Wrapping Up
A well-placed and nicely designed product filter can improve the buying journey significantly. When customers quickly find the items they need alongside other related products, they’ll feel encouraged to browse your shop for longer and make repeated purchases.
Get CoDesigner Pro to easily create and carefully craft your ideal product filter for your WooCommerce website in minutes!
Subscribe to Our Newsletter
Get the latest WordPress tutorials, trends, and resources right in your inbox. No Spamming, Unsubscribe Anytime.

Thank you for subscribing to our newsletter!

I'm a seasoned creative content writer with 4+ years of experience in crafting well-researched blogs, web copies, & social media posts in and outside of WordPress. I also enjoy reading fiction, experimenting with different art mediums, and playing with my cats in my spare time.
Table of Content
- Add WooCommerce Elementor Horizontal Product Filter
- Step 1: Add Filter Horizontal
- Step 2: Edit Content
- Step 3: Edit Style
- Step 4: Advanced Options
- Step 5: Update and Save
- Add Elementor Vertical Product Filter WooCommerce
- Step 1: Add Filter Vertical
- Step 2: Add Content and Style
- Step 3: Advanced Options
- Step 4: Update and Save
- CoDesigner’s Advanced Product Filter for Elementor
- Wrapping Up