How To Restrict Elementor Widgets, Columns & Sections Based on Unlimited Conditions


Content restricting is a great way to reward your loyal readers, get more customers with exclusive content, and monetize it. In this post, we’ll discuss how to restrict content to your Elementor website.
Restrict Elementor Widgets offers an integration with the popular page builder Elementor which gives you the option to hide your Elementor widgets or sections based on different conditions. It works beautifully with any widget from any plugin.
First things first, we need to download and install the Restrict Elementor Widgets plugin. For doing this, go to Plugins> Add New
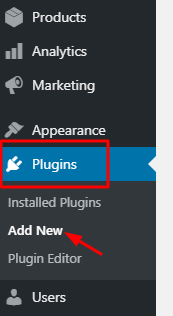
Search for Restrict Elementor Widgets and then install and activate the plugin.

Show Or Hide Widgets Based On Different Conditions
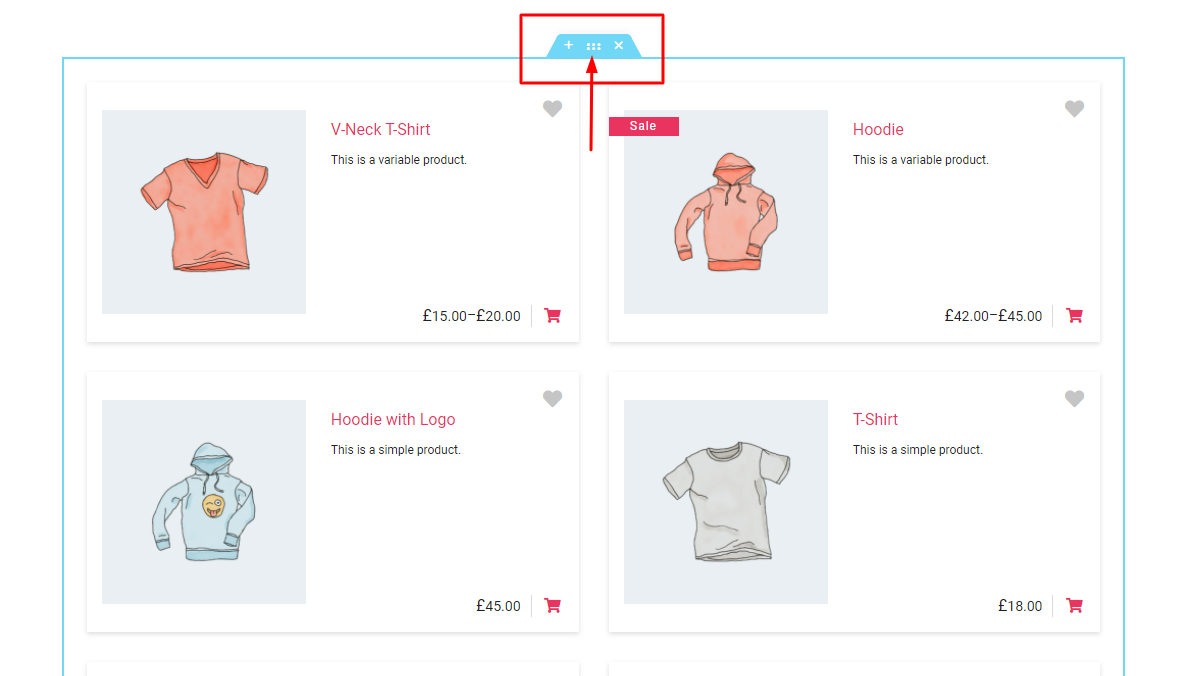
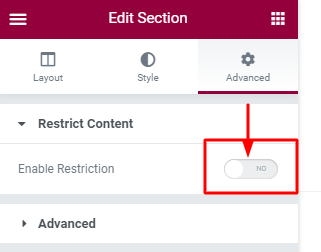
The Restrict Content option for Elementor can be found under the Advanced tab after we select a widget or section. For this, You have to Select a Section/Column
Then from Left Sidebar Select Advanced Tab
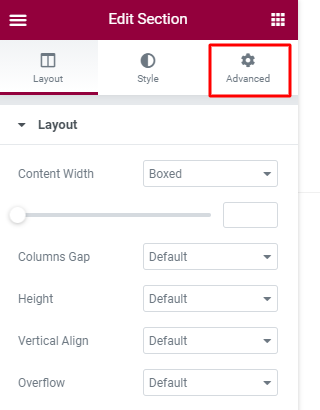
After that, you have to Enable Restrict Content Option
Restrict Elementor Widgets for Logged-in Users
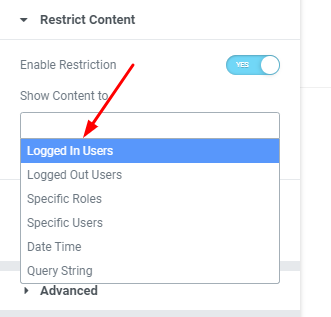
A widget, column, or section can be shown to the logged-in users only. Any visitors who are not logged in, cannot see this. At First, you have to Enable Restrict Content Option then Click on Show Content to Drop Down Field. Then Select Logged In Users.
Restrict Elementor Widgets for Logged-out Users
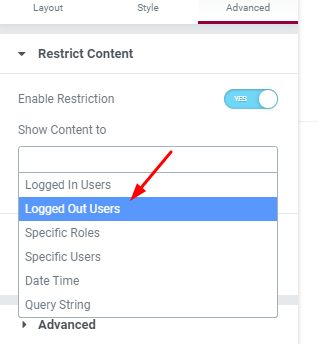
A widget, column or section can be hidden from the logged-in users and visible to those who are not logged in. Just click on the Show Content to Dropdown field and Select Logged Out Users.
Restrict Elementor Widgets for Specific Roles
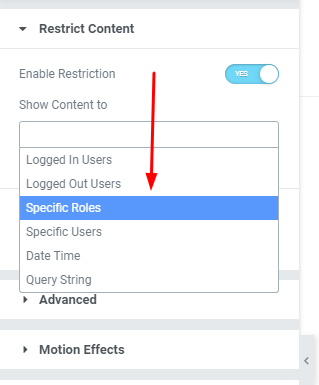
You can create content that you want to showcase to specific user roles. Other users won’t see this. First of all, Click on the Show Content to then Select Specific Users
Then a new dropdown menu will appear named Select User Role. After Clicking on the Dropdown menu you can select the User Role to whom you want to show the content.

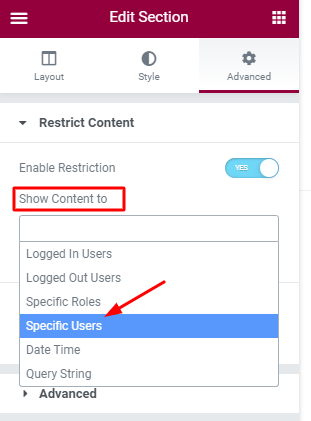
Restrict Elementor Widgets for Users With Specific IDs
Some user ID’s can be specified as well. You just need to input some comma-separated user ID’s who can see the content. First, Click on the Show Content To option then select Specific Users
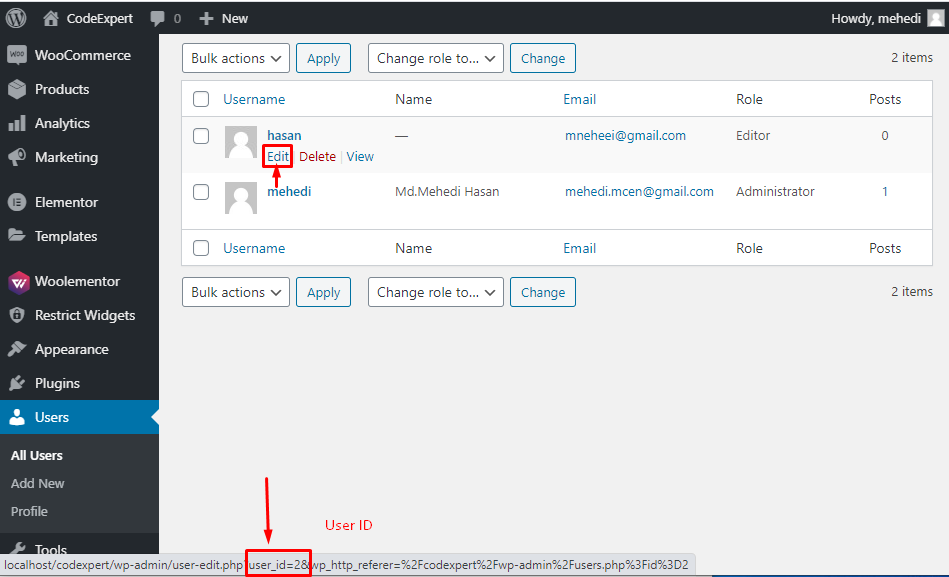
You will get a new dropdown named User IDs. You have to give user IDs here which will be separated by a comma. You can find your user IDs in your Dashboard. For getting a user ID go to Users > All users. After that drag your mouse to the Edit option of a user. Then you will get a URL at the bottom of the page.
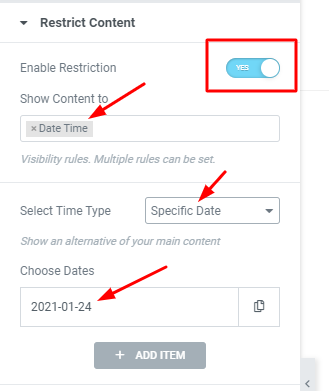
Restrict Elementor Widgets for a Given Date and Time Period
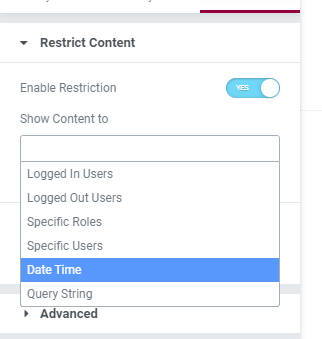
Want to display a widget in the morning? Or maybe on Sunday and Wednesday only or on the first day of the month? You can do this. Select the Date Time option from the Show Content To Dropdown menu.
Then a new dropdown menu will show named Select Time Type. From this, You can select your desired Date option.

You can Enable Select Show at Specific Time option to show your content at a specific time.
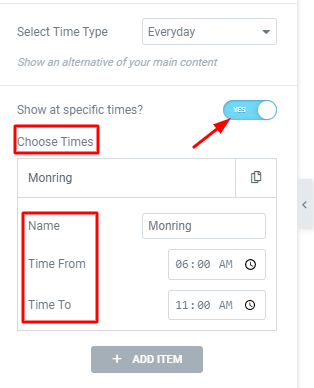
Moreover, you can specify a Date or Day to Show your content on a specific Date or Day. If we select the Specific Date option a new option named Choose Dates will be shown where you can set your desired Date.
You can also select a Specific Day for showing your content on a specific day. If you select it a new dropdown menu will appear named Select Days. You can select your specific day from here.

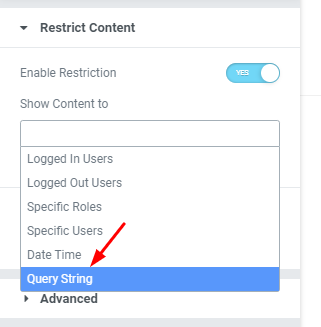
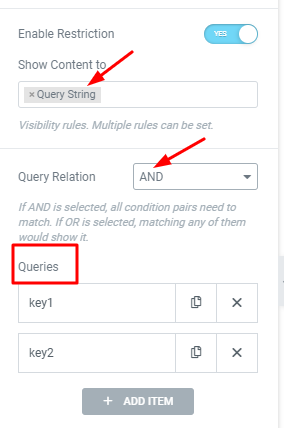
Restrict Elementor Widgets Based on the Query Strings Added to the URL
Sometimes you may need to show some content to the visitors who come from an affiliate. How would you do this? Use this plugin and get the problem resolved. Click on the Query String
After Clicking on it a new drop-down menu will appear named Query Relation. In the query relation dropdown, you will get two options: And, Or. If AND is selected, all condition pairs need to match. If OR is selected, matching any of them would show it.
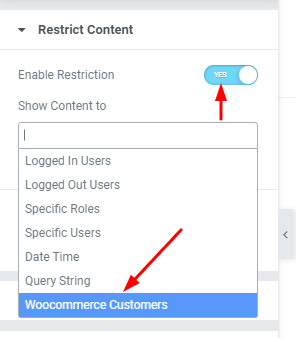
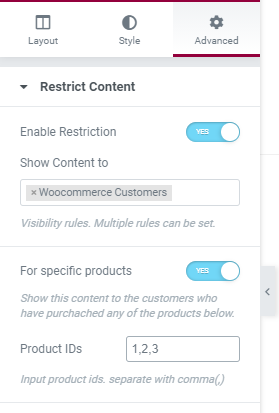
Restrict Elementor Widgets for WooCommerce Customers:
Custom-only content can be handled with this plugin as well.
You even can set it for specific product ID or order statuses.
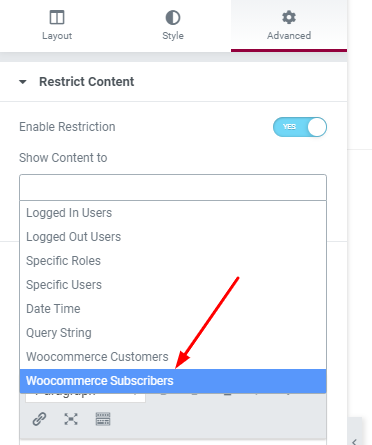
To Woocommerce Subscriptions Subscribers:
It made it possible to show a widget or section to the users who have subscribed to your products or services. Can be used based on subscription product ID or subscription status.
Moreover, You can Enable the option named For specific subscription products. Then a new text field will appear named
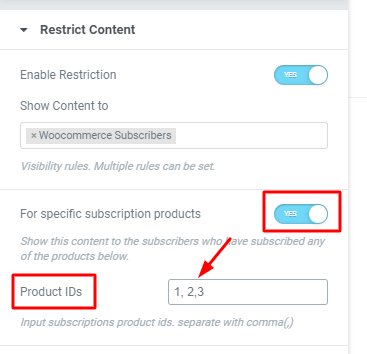
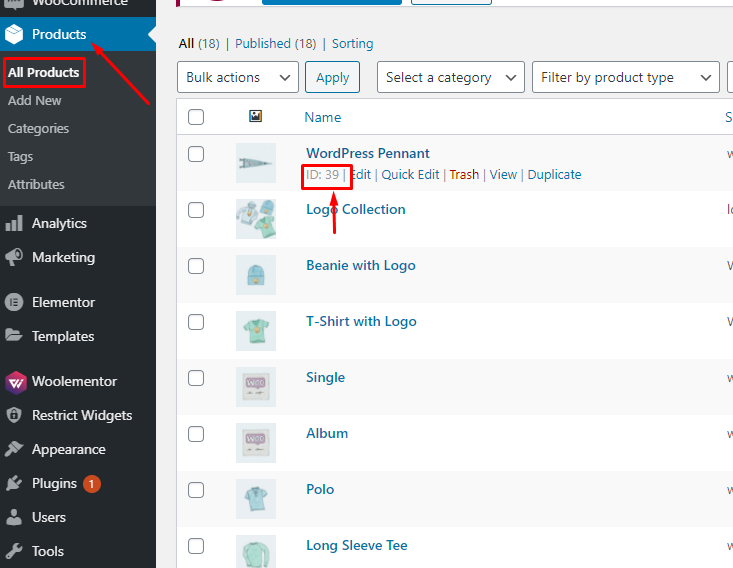
For getting the Product ID, you need to go to the product page in your WordPress admin. If you hover the mouse of the name of a product in this list, you will get a WooCommerce product ID.
Display Alternate Content:
When a widget or section is not shown, by default the plugin will not output any restriction content message. But if we set Plain Text or Template then a restriction message will be displayed instead.
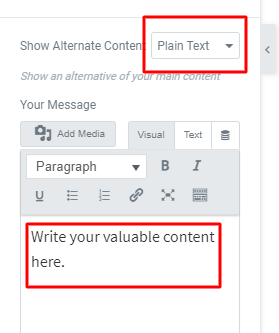
Show A Text Message:
We can set a custom text to be displayed when content is restricted and the visitor is not allowed to access it. With the native text editor, we can decide how we want the text to look.
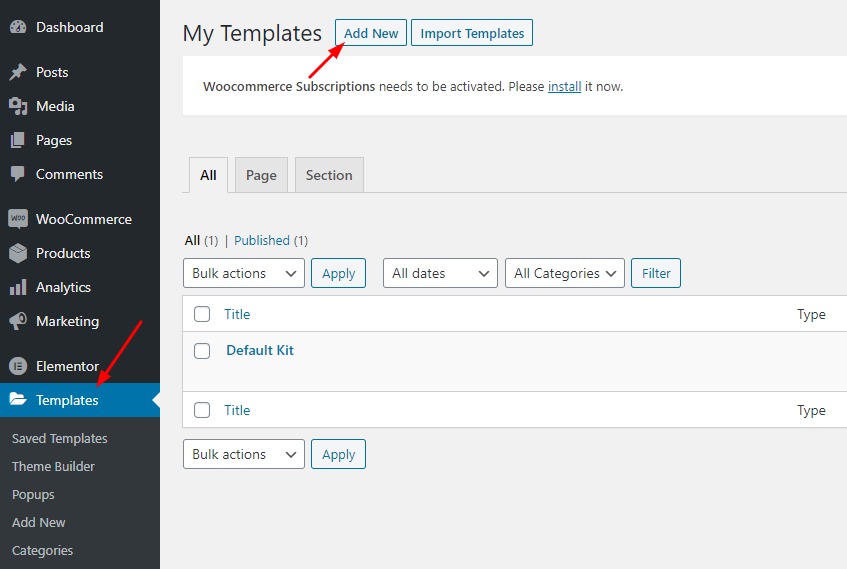
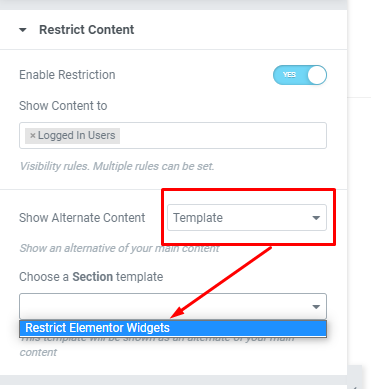
Show A Section Template:
Alternatively, a custom template can be used. You just need to create a Section template from the Elementor -> Templates section.
Then connect this template to The Choose a Section Template. Your Custom Template will be shown.
Show Nothing:
It allows us to completely hide our content and not show an alternate text or template.
It’s easy to Restrict content to our Elementor website once we have the right tools for our job. With the Restrict Elementor Widgets plugin, we can easily restrict specific elements directly.
Subscribe to Our Newsletter
Get the latest WordPress tutorials, trends, and resources right in your inbox. No Spamming, Unsubscribe Anytime.

Thank you for subscribing to our newsletter!

1 thought on “How To Restrict Elementor Widgets, Columns & Sections Based on Unlimited Conditions”
Leave a Comment
Table of Content
- Show Or Hide Widgets Based On Different Conditions
- Restrict Elementor Widgets for Logged-in Users
- Restrict Elementor Widgets for Logged-out Users
- Restrict Elementor Widgets for Specific Roles
- Restrict Elementor Widgets for Users With Specific IDs
- Restrict Elementor Widgets for a Given Date and Time Period
- Restrict Elementor Widgets Based on the Query Strings Added to the URL
- Restrict Elementor Widgets for WooCommerce Customers:
- To Woocommerce Subscriptions Subscribers:
- Display Alternate Content:
- Show A Text Message:
- Show A Section Template:
- Show Nothing:


WOW! Very nice. Exactly what I needed. Can we do this for MemberPress content as well?