Customize WooCommerce Cart Page with Elementor – A Complete Guide


Are you struggling to customize your cart page in WooCommerce with Elementor?
The default WooCommerce cart page falls short in both aesthetics and conversion optimization. This is why it’s important to personalize your cart page, if you’re looking to make your shop stand out. Before diving into customization, take some time to understand the essential plugins, widgets, and overall structure of the WooCommerce cart page. This includes sections, templates, and the elements you’ll be working with.
This blog explores everything you need to know to get a clear idea about the importance of this page and how you can edit your WooCommerce cart page to make it look eye-catching to your customers.
Why You Should Customize WooCommerce Cart Page?
Did you know, according to research $4.6 trillion in lost eCommerce revenue each year?
You might be wondering why I showed you such alarming statistics. It’s to show you why you need to be more careful with the structure of your online store and its sales.
And if you’re constantly finding abandoned carts on your online store – it’s most probably because your cart page is not user-friendly or engaging enough to retain the customer’s interest.
Confusing layouts, outdated structures, or a lack of user-friendly features like adding or updating items could also be driving customers away. If your default WooCommerce cart page falls into this category, it might be time for a revamp. Creating a user-friendly and visually engaging cart experience ensures that your customers navigate the checkout process easily and follow through with their purchases.
Below, I will show you how to create a stunning WooCommerce cart page and customize it using Elementor and CoDesigner.
Create & Customize Cart Page in WooCommerce With Elementor: A Step-by-Step Guide
Now that you’re up-to-date about the pitfalls of the default WooCommerce cart page. Here’s a step-by-step guide to effortlessly customize your WooCommerce cart page with Elementor. We’ll familiarize you with all the free options that are not available in the WooCommerce and Elementor.
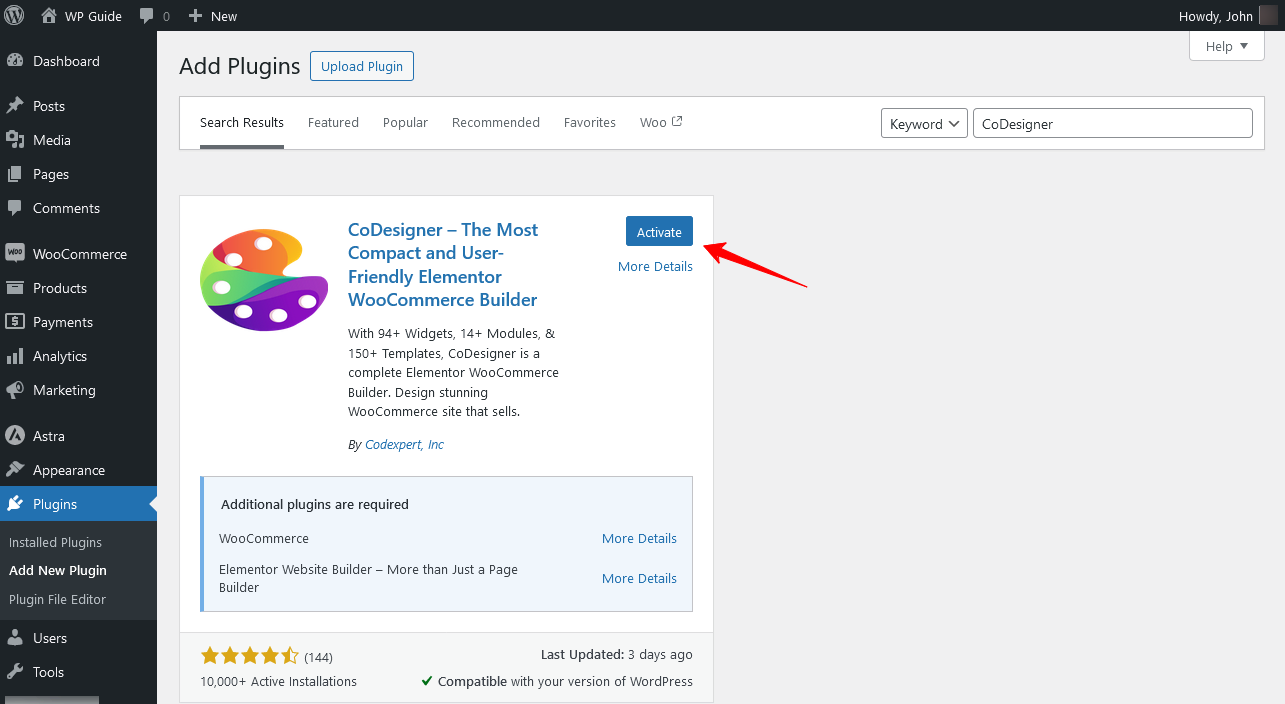
Step 1: Install Necessary Plugins
Start by making sure that you have installed WooCommerce and Elementor within your WordPress site. Next, install the CoDesigner, the WooCommerce Elementor addon from Plugins > Add New.
Click on the Install button, and hit Activate.
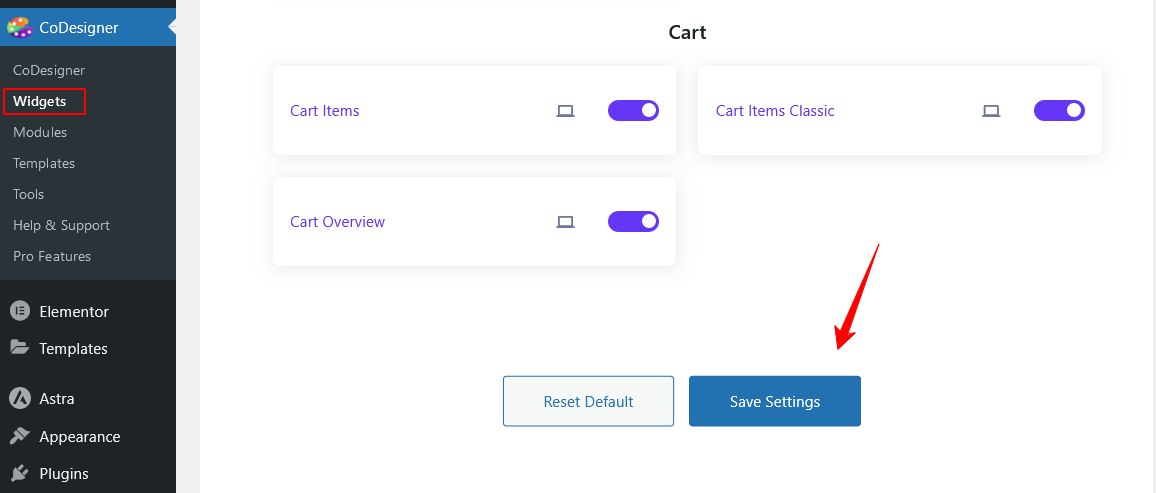
Step 2: Enable Cart Page Widgets
When you’re done installing the necessary plugins, you have to enable the right widgets to get started. To do this, navigate to the CoDesigner > Widgets page within your WordPress site dashboard.
Look for the widgets Cart Items, Cart Items Classic, and Cart Overview. Finally, enable those widgets and click on the Save Settings button.
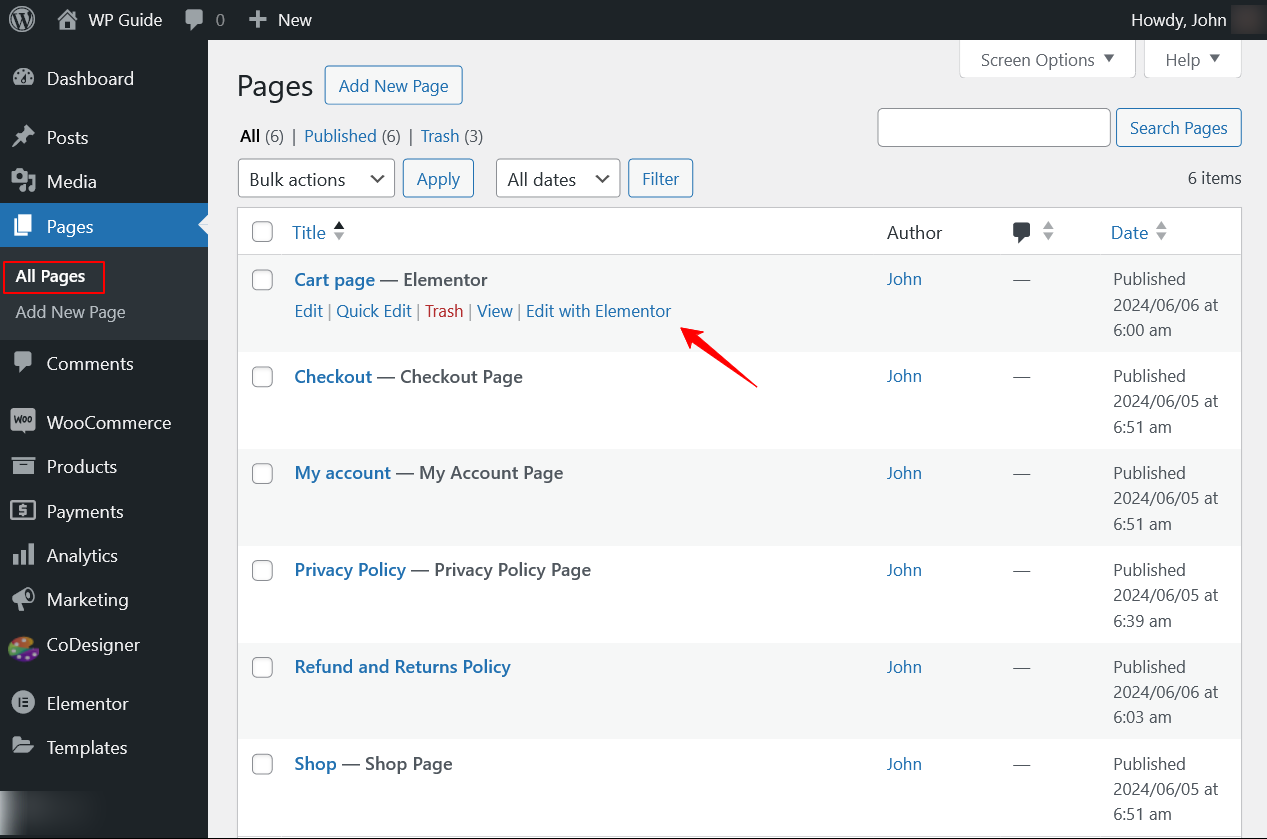
Step 3: Navigate WooCommerce Cart Page in WordPress
To customize the cart page in WooCommerce, go to the Pages section within your WordPress dashboard. And look for the Cart page, which was automatically created when you set up WooCommerce.
Now, click Edit with Elementor to customize the cart page.
Step 4: Add the Cart Widgets
Search for the Cart Items/ Cart Items Classic widget. Drag and drop the cart items widget to the desired section.
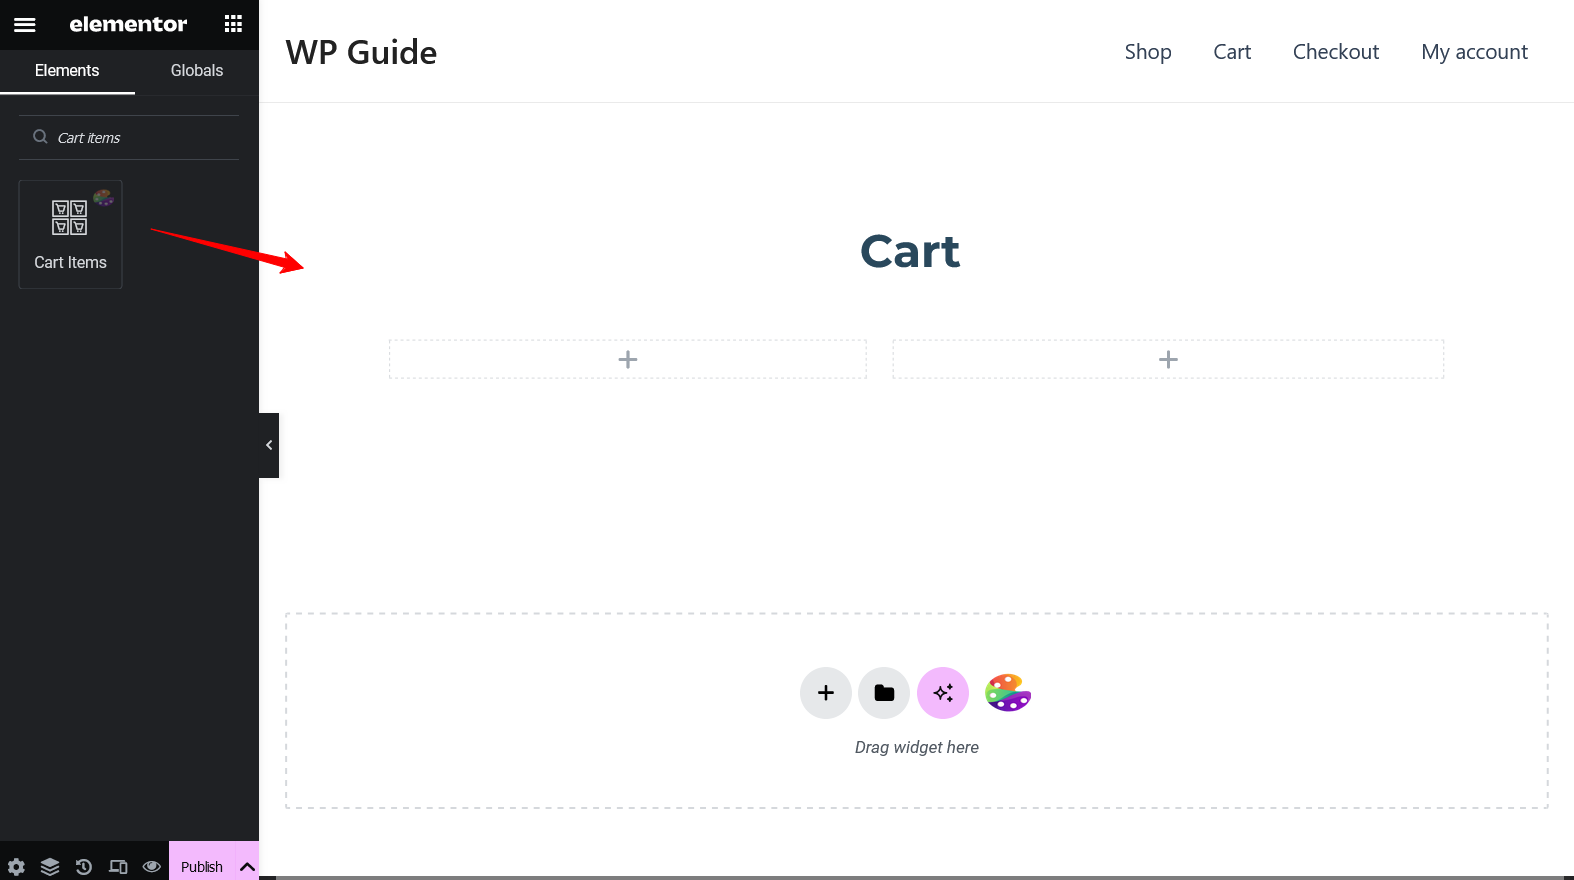
Following the same method, drag and drop the other cart widgets in the remaining section.
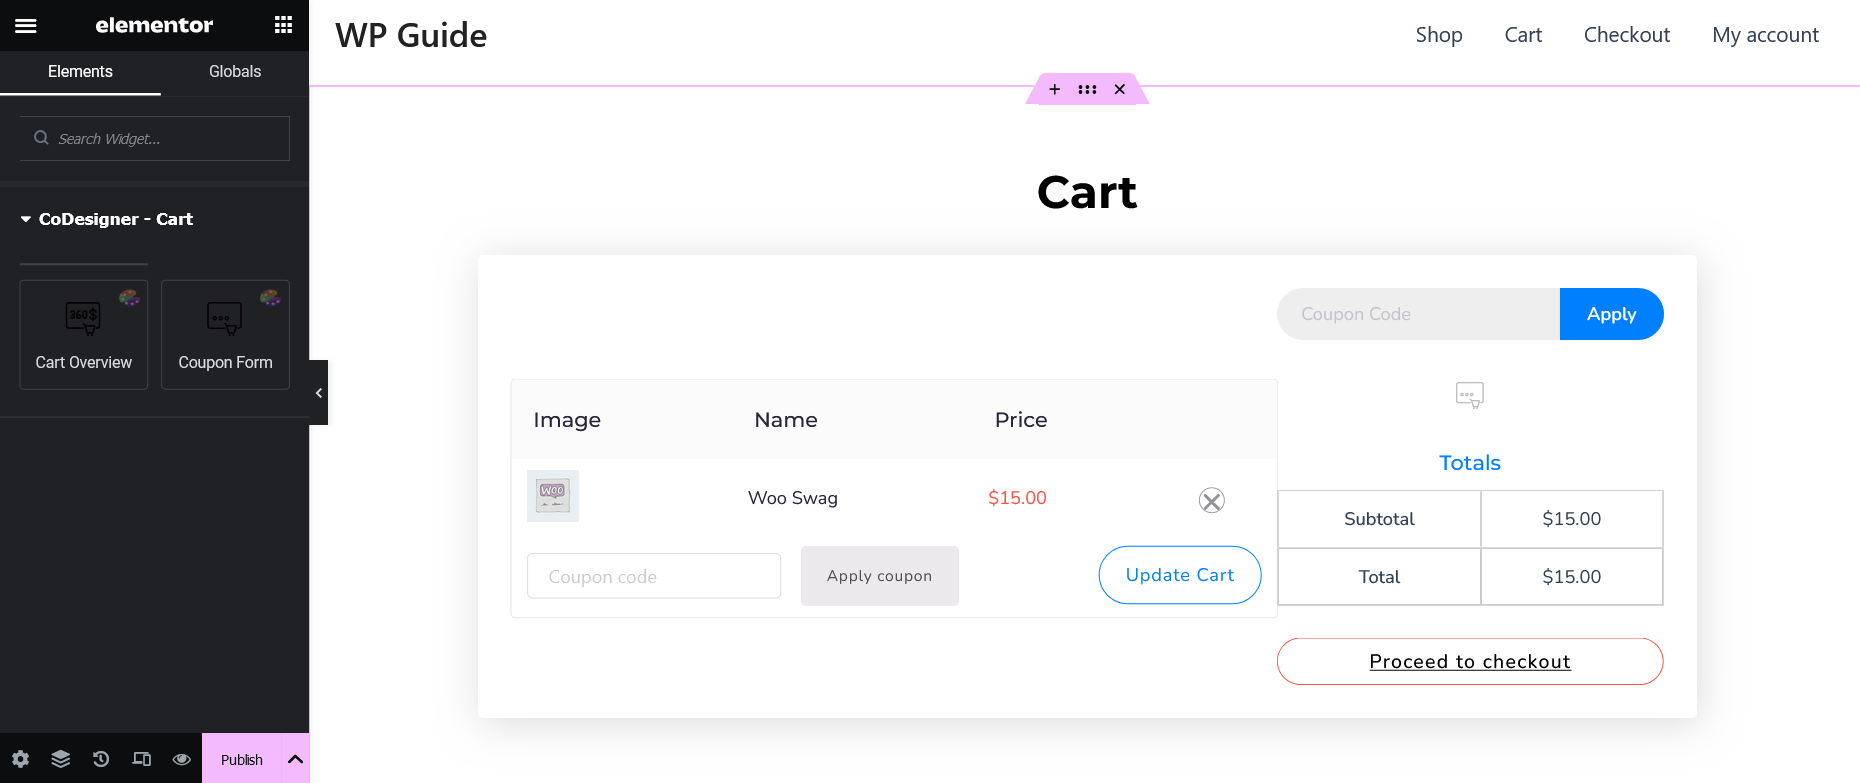
You’ve successfully added the cart widgets to Elementor sections. For a better visual appeal, you have to apply styles to your WooCommerce cart page.
Step 5: Apply Style to Your Cart Page
To add style and customize the cart page in WooCommerce using Elementor, you have to select the element first and you have to select them individually. Select the Cart Items/Classic widget section.
Find the customization options for Cart Items elements including Content, Style, and Advanced. You can add your desired style to every element.
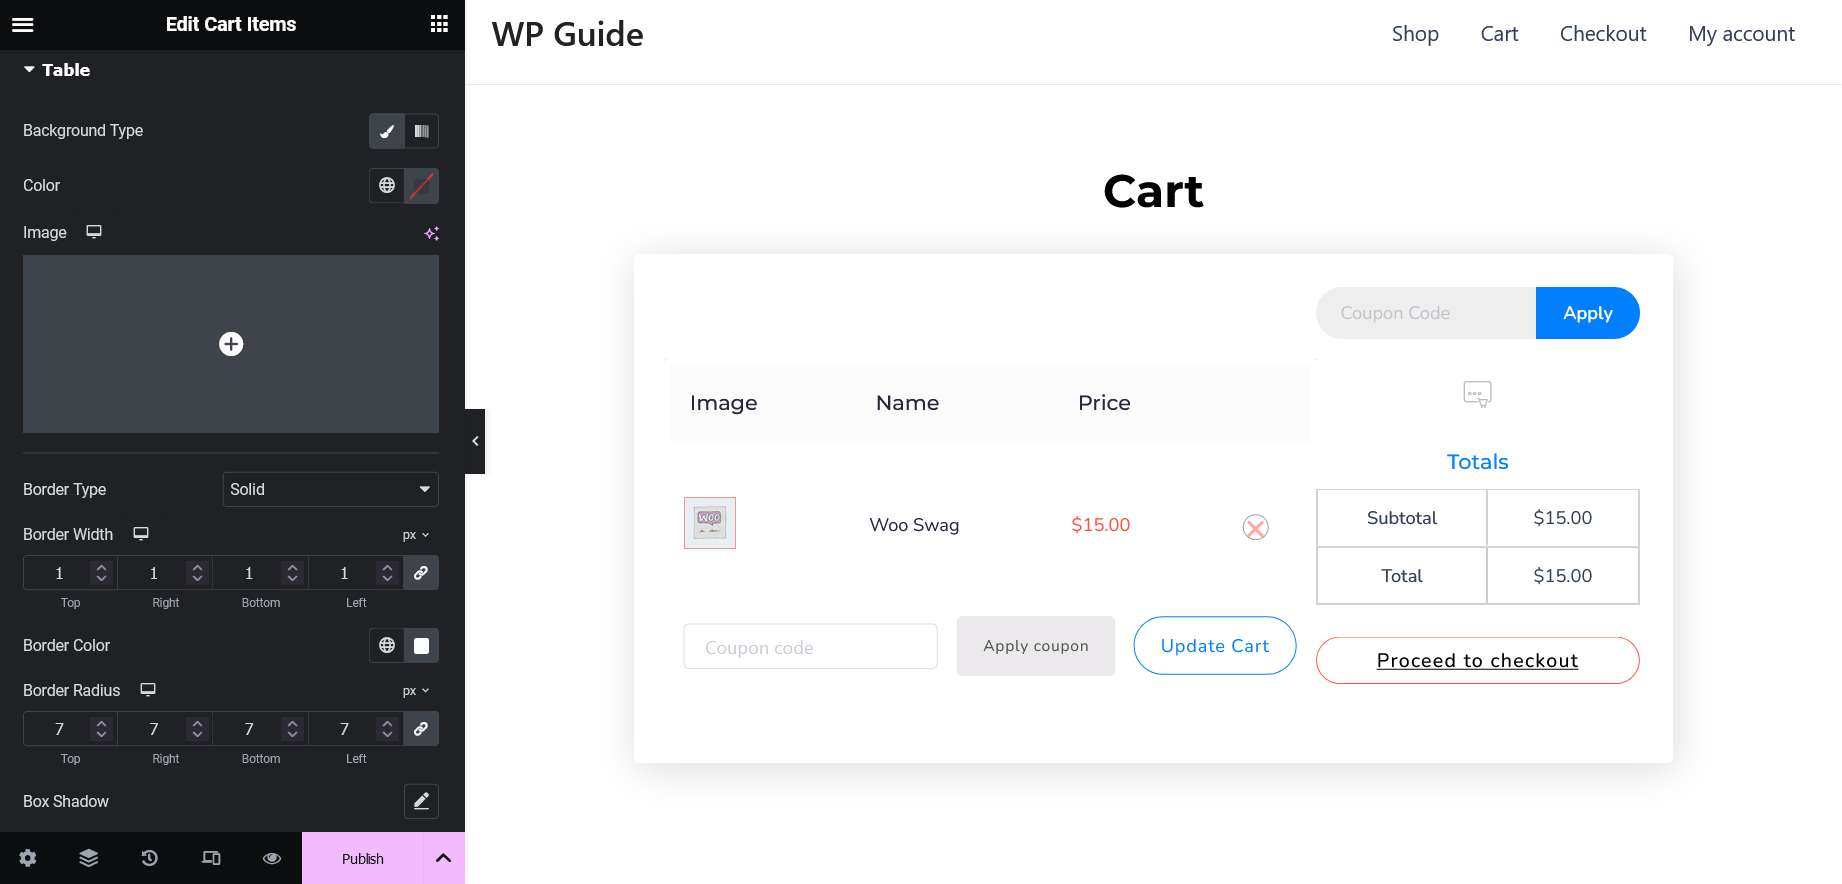
For each of the options, you can edit the Text Colors, Typography, Background, Box Shadow, and everything related to the widgets.
Step 6: Adjust Your Cart Page Structure and Section
You need to adjust the structure and section of your online store’s cart page.
Click on each of the sections to bring up the individual settings. You can modify the margin and padding to ensure that you have a balanced cart page.
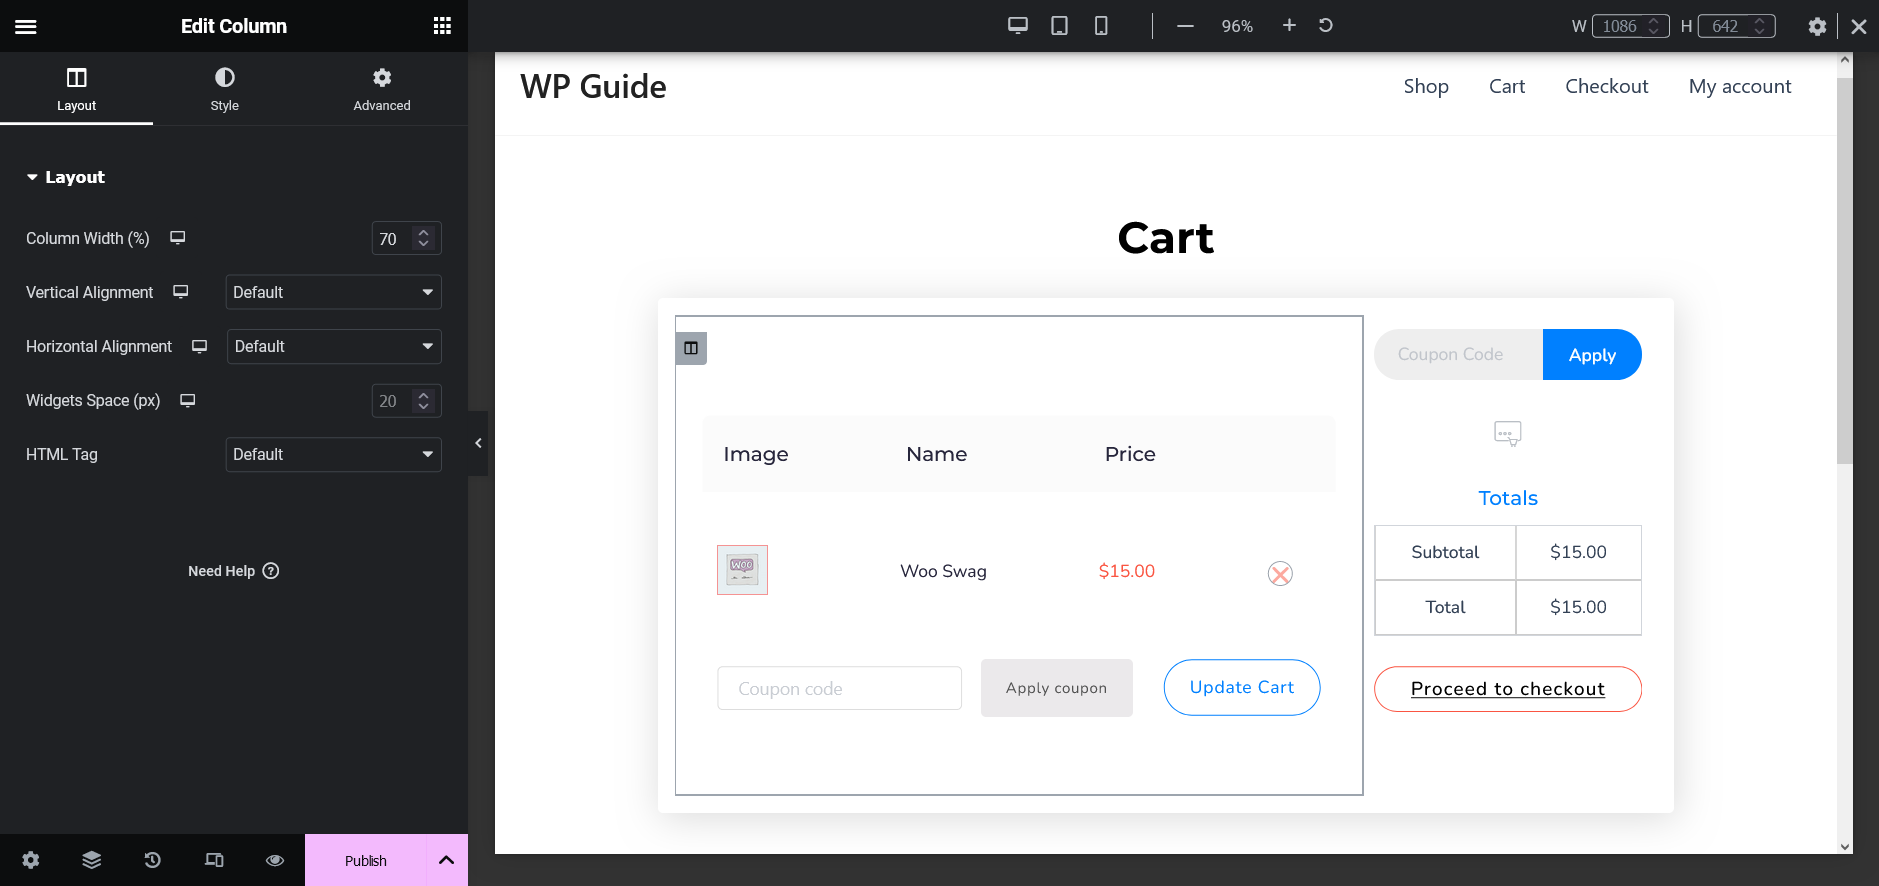
This is an important part when customizing a cart page in WooCommerce. Because you have to identify different sections to adjust with Elementor and CoDesigner cart widgets.
Customize WooCommerce Cart Page with Templates
Use the CoDesigner Cart Page Templates to instantly get stunning visuals and save valuable time on customizations. This method is easier for beginners who have less experience with designing a user-friendly cart page. To import the template to your WooCommerce cart page, open your existing cart page with Elementor.
Click on the CoDesigner Icons on that page.
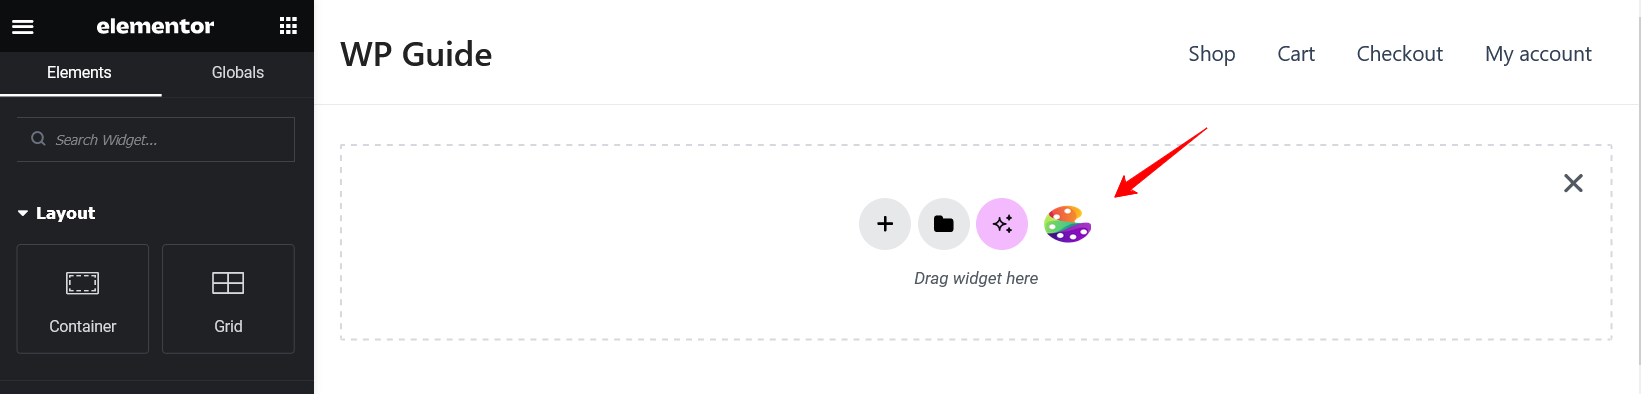
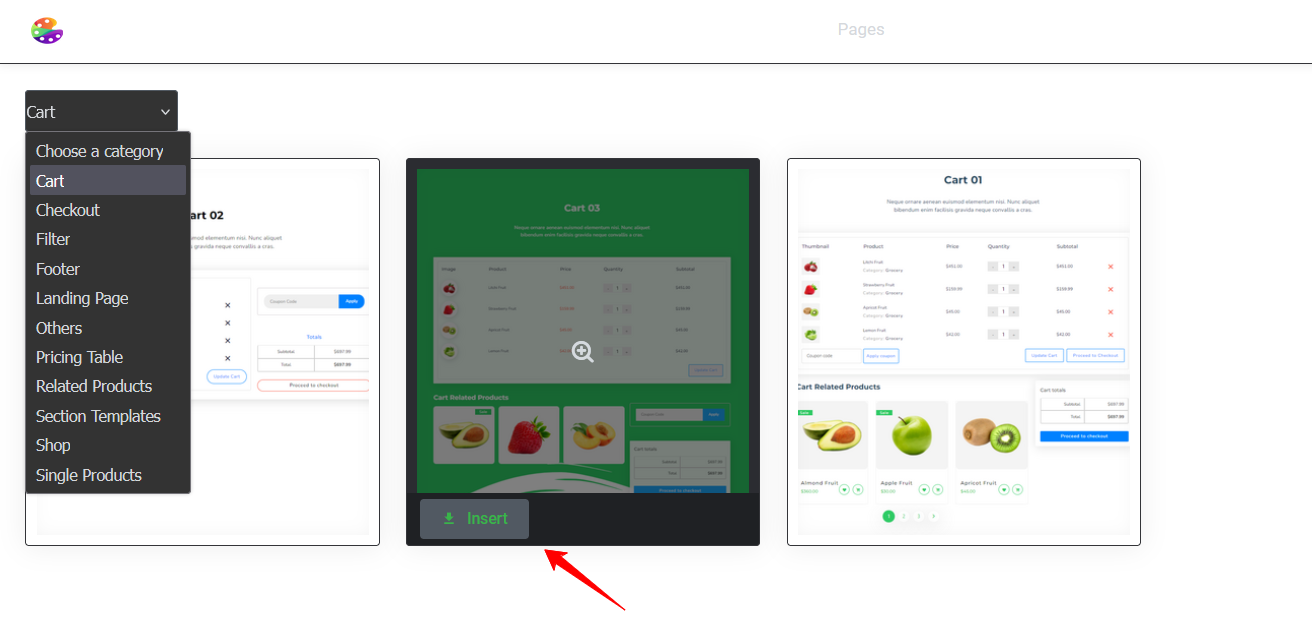
Select the blocks on the popup. In the blocks section, select the Cart category to find the designs that are available in CoDesigner. Hover to any of the templates and click on the Inserts.
When your customization is complete, click on the Update button on Elementor.
Incorporate Custom CSS and Javascript
To edit a WooCommerce cart page with an advanced technique, open your cart page with Elementor Builder.
All the techniques we learned so far are only applicable to the free version of CoDesigner and Elementor. For this, You require the premium version of Elementor with CoDesigner.
If you are thinking of minimizing cost, you can skip this part.
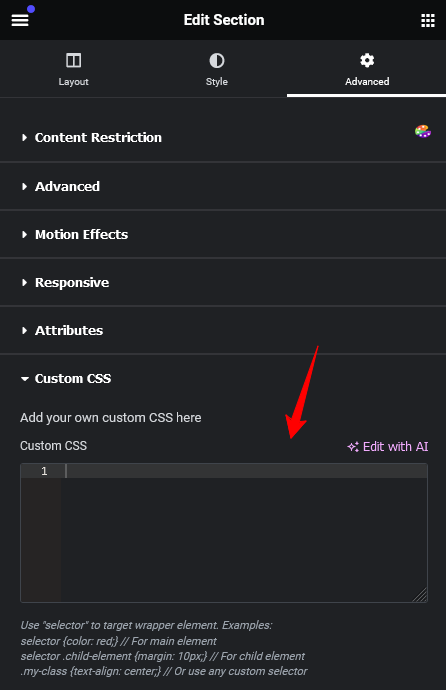
Add custom CSS –
To add finer details to the cart page, you have to navigate to your Elementor Advanced tab, where you will find an option for Custom CSS. Click on Custom CSS and provide the CSS Code.
Add Javascript –
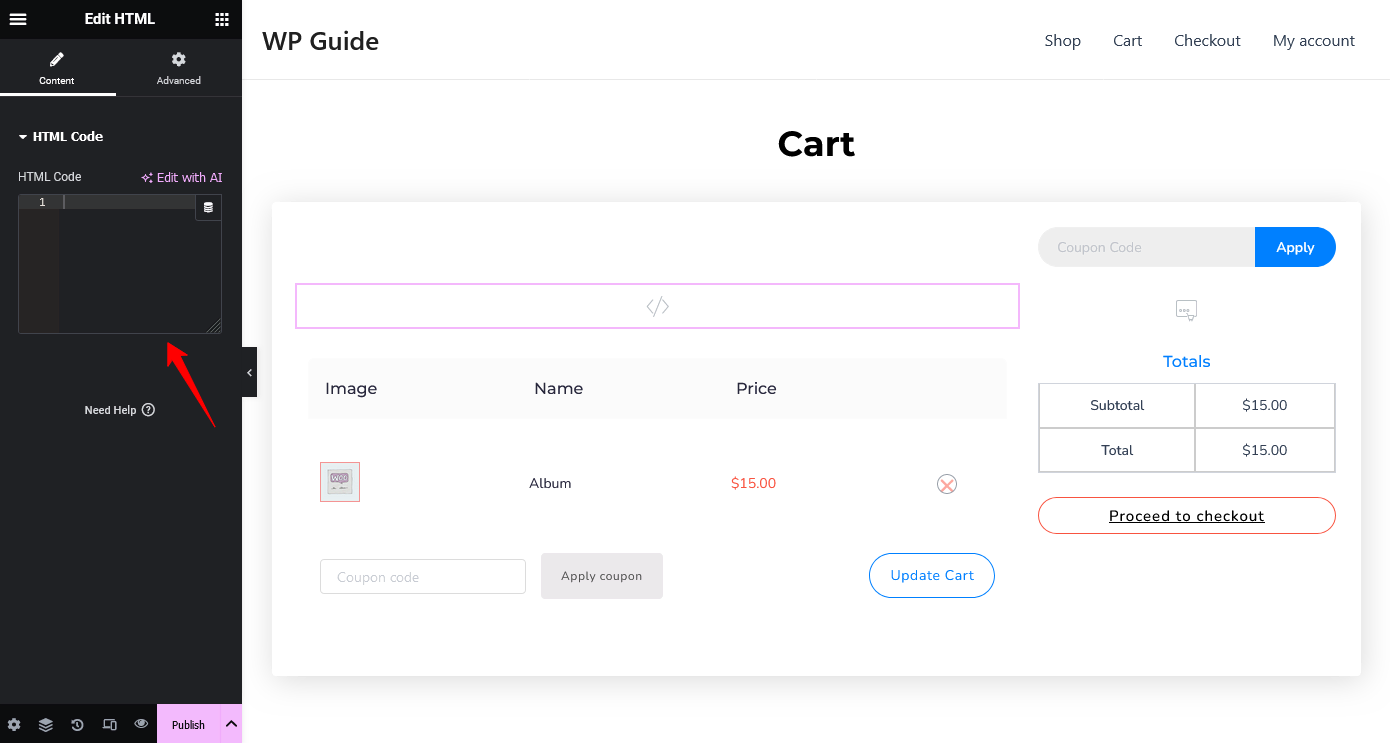
Search for the HTML widget from the Elementor search bar and drag it to your cart page. Insert your code within the box. For proper execution, don’t forget to enclose tags when you’re using your code.
Related Reads
Best Tips to Customize Your WooCommerce Cart Page with Elementor
Outshine your competitors by following these tips and customize your WooCommerce cart page with Elementor.
- Ensure that your cart is simple and every step is clear. This will ensure the customer can easily review their product and quickly proceed to checkout.
- Highlight important parts of your WooCommerce cart page such as product names, quantities, and total costs. Adding attractive colors and bold text can make your cart information stand out.
- You also need to provide clear call-to-action buttons on your cart page. Highlight proceed to checkout buttons. So this action button can easily draw attention to customers.
- Make sure your cart page is responsive. This is the most important part. When you’re done with your design make sure to test all the screen sizes to ensure a smooth user experience for all your customers.
- Take feedback from your customers or analyze your customer’s journey through your site. Make those adjustments to give your customers an optimal shopping experience.
Bonus Tips
If you want to add extra spark to your customers, you can use CoDesigner Free Modules. CoDesigner has two useful and interactive modules. They are:
- Single Product Ajax Add To Cart
This CoDesigner’s “Single Product Ajax Add To Cart” module creates a frictionless shopping experience. You can let your customers instantly add their products to the cart without any page reloading. This helps to guide customers smoothly towards checkout and drive sales.
- Add To Cart Text
You can personalize the add-to-cart button for your WooCommerce shop and single product page with custom text. This CoDesigner module lets you add your desired text to your product.
Final Thoughts
Now you have successfully customized the cart page in WooCommerce using Elementor. This is not just another technical task—it’s a strategic move to enhance your user experience and convert customers. Throughout this guide, we’ve explored the steps and tools needed to transform a default WooCommerce cart page into a user-friendly, visually appealing part of your online store.
To reflect your brand’s commitment to quality and customer satisfaction you must customize the cart page in WooCommerce. Take enough time to customize and perfect it, and you’ll likely see positive results in your store’s performance.
Thank you for following me along with this step-by-step guide. Now, it’s time to put these insights into action and create a cart page that truly enhances your WooCommerce store!
Subscribe to Our Newsletter
Get the latest WordPress tutorials, trends, and resources right in your inbox. No Spamming, Unsubscribe Anytime.

Thank you for subscribing to our newsletter!

A seasoned Business Developer & Support Engineer who is deeply passionate about resolving WordPress-related issues and contributing to WordPress. His expertise lies in enhancing user experiences and driving success within the WordPress ecosystem.
Table of Content
- Why You Should Customize WooCommerce Cart Page?
- Create & Customize Cart Page in WooCommerce With Elementor: A Step-by-Step Guide
- Step 1: Install Necessary Plugins
- Step 2: Enable Cart Page Widgets
- Step 3: Navigate WooCommerce Cart Page in WordPress
- Step 4: Add the Cart Widgets
- Step 5: Apply Style to Your Cart Page
- Step 6: Adjust Your Cart Page Structure and Section
- Customize WooCommerce Cart Page with Templates
- Incorporate Custom CSS and Javascript
- Best Tips to Customize Your WooCommerce Cart Page with Elementor
- Bonus Tips
- Final Thoughts
Get CoDesigner
Build awesome WooCommerce websites with CoDesigner’s 14+ Modules, 94+ Widgets and 150+ Templates.
Get Now